Shared Voicemail has been available in Teams Phone for quite some time now. I still thought that it would be helpful to do a proper write up.
The Basics
A shared voicemail always has to be a Microsoft 365 Group. This group doesn’t need to be Teams enabled but it can be. As of the time of writing, I do not know of a way to forward a call straight to shared voicemail without configuring an auto attendant or a call queue in front of it.
Update 27.01.2023
As it turns out, it’s now possible to also set Distribution Lists or Mail Enabled Security Groups as shared voicemail targets. I’ve put together a new article about that here.
/Update
Skimping on Licenses
If Teams Phone Standard — Virtual User Licenses are scarce in your tenant, this trick might help you out. Teams Unassigned Number treatments are usually used to handle incoming calls to numbers which are not assigned to any user or resource account. Since you specify the matching rule with a regular expression, it’s also possible to match whole numbers explicitly.
An Unassigned Number Treatment can only be configured to forward to a resource account or an announcement. It’s not possible to forward directly to a shared voicemail. If you match the whole number without any wildcards, it’s possible to forward external calls to a shared voicemail without assigning a Teams Phone Standard — Virtual User License. However, an auto attendant or a call queue is still needed to forward the call to voicemail.
Bonus Tip for Unassigned Number Treatments: While it’s possible to play back an announcement without having to setup an auto attendant or a call queue, an announcement will only play back the call and not disconnect the call after the announcement has been played back. If you want to automatically disconnect the call after playing back a message, choose an auto attendant to play back your announcement.
Setup Shared Voicemail
I won’t go into the details on how to setup a complete auto attendant or a call queue in this article. This is only to show you where you would configure a redirection to a shared voicemail. Anywhere where you can choose a redirection target on an auto attendant or a call queue, you can choose to forward to shared voicemail. Remember, this has to be a Microsoft 365 Group.

Now let’s see where shared voicemails land, once a customer has left a message.
Microsoft 365 Groups
Shared voicemails are delivered to M365 Group’s inboxes, not to a channel email address or similar. A customer might tell you which users need to be able to receive and access these voicemails. Naturally, you start adding members to this group in M365 Admin or Azure AD.
Based on my personal experience this usually results in two problems.
1. Group inboxes are often neglected or completely forgotten by users, even though they’re visible and accessible in most Outlook clients. This can lead to potentially unhappy customers because their calls are never returned.

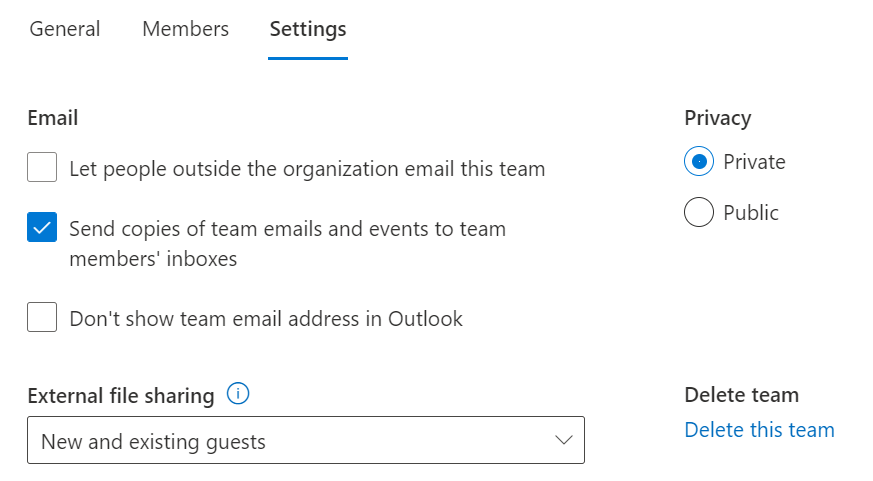
Microsoft 365 Groups offer various settings which can be configured. Some of these settings can only be configured after the group has been created.
By default, the “Send copies of team emails and events to team member’s inboxes” is disabled.

This means that emails to this group will not find it’s way to the member’s inboxes. Members have to open the group mailbox proactively.
From a user’s perspective, their settings look like this. This is the default setting for new groups.

So, let’s head back to M365 Admin and change the setting for “Send copies of team emails and events to team member’s inboxes”.
After a few seconds, this change will be reflected in the user’s mailbox settings as well.

Of course, a user can always override his own settings by going into groups and clicking on settings.

When I last tested this about 1–2 years ago, the setting would only apply to new members for the group. Already existing member’s settings were not changed. It seems like Microsoft has updated this behavior which is a very welcome change. However, disabling it again from M365 Admin doesn’t seem to also disable it for the group’s members again.
The equivalent PowerShell parameter for this setting is still called AutoSubscribeNewMembersand the official documentation says the following.
The AutoSubscribeNewMembers switch specifies whether to automatically subscribe new members that are added to the Microsoft 365 Group to conversations and calendar events. Only users that are added to the group after you enable this setting are automatically subscribed to the group.
Based on my testing, setting it via PowerShell really does not enable “Follow in Inbox” for existing users. The setting is only enabled if it’s configured via the portal. If you disable, save and enable it again from the portal, existing members will be subscribed to all emails again.
While that solves the problem of users missing voicemails because they’re lost in a group inbox, it introduces problem number two.
2. When multiple people get an email with a voicemail message, coordination and clear communication within the team is key to prevent either multiple people calling back a customer or nobody at all calling back a customer.
What about Shared Mailboxes?
Can’t we just use a shared mailbox as a target for shared voicemail where we already have established routines, rules and shifts on who processes which messages on which days etc.?
The answer is both yeas and no. Technically no. At least can’t we choose a shared mailbox as voicemail target in Teams Admin Center. It is however possible to just add a shared mailbox as the only member of a M365 Group and enable “Follow in Inbox” for the group’s members. This way, all voicemails will be delivered to a shared mailbox and the group’s actual inbox can be completely ignored without feeling guilty at all.
Voicemails in Teams Client
Personal Voicemails
Let’s check out all the places a user can see voicemail notifications. Even though this article is focusing on shared voicemail, I’ll start with personal voicemails for a complete overview.
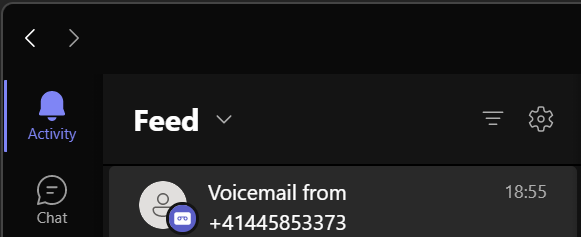
The first thing you will probably notice when you get a new voicemail is the Teams feed notification which looks like this.
Of course, you can also go to the Calls app and filter your history by “Voicemail”.

You can also find your voicemails as an *.mp3 attachment in your personal inbox.

The Teams client actually searches your inbox for emails which meet certain criteria to display them in the Teams Client. Unfortunately, I don’t know the exact criteria Teams is evaluating but I’ve seen some cases where voicemails did not show up in a user’s Teams Client because an external anti-virus solution was scanning emails and manipulated the message headers before they were delivered into the user’s inboxes. That is definitely something to keep in mind if you’re facing similar issues.
Shared Voicemails
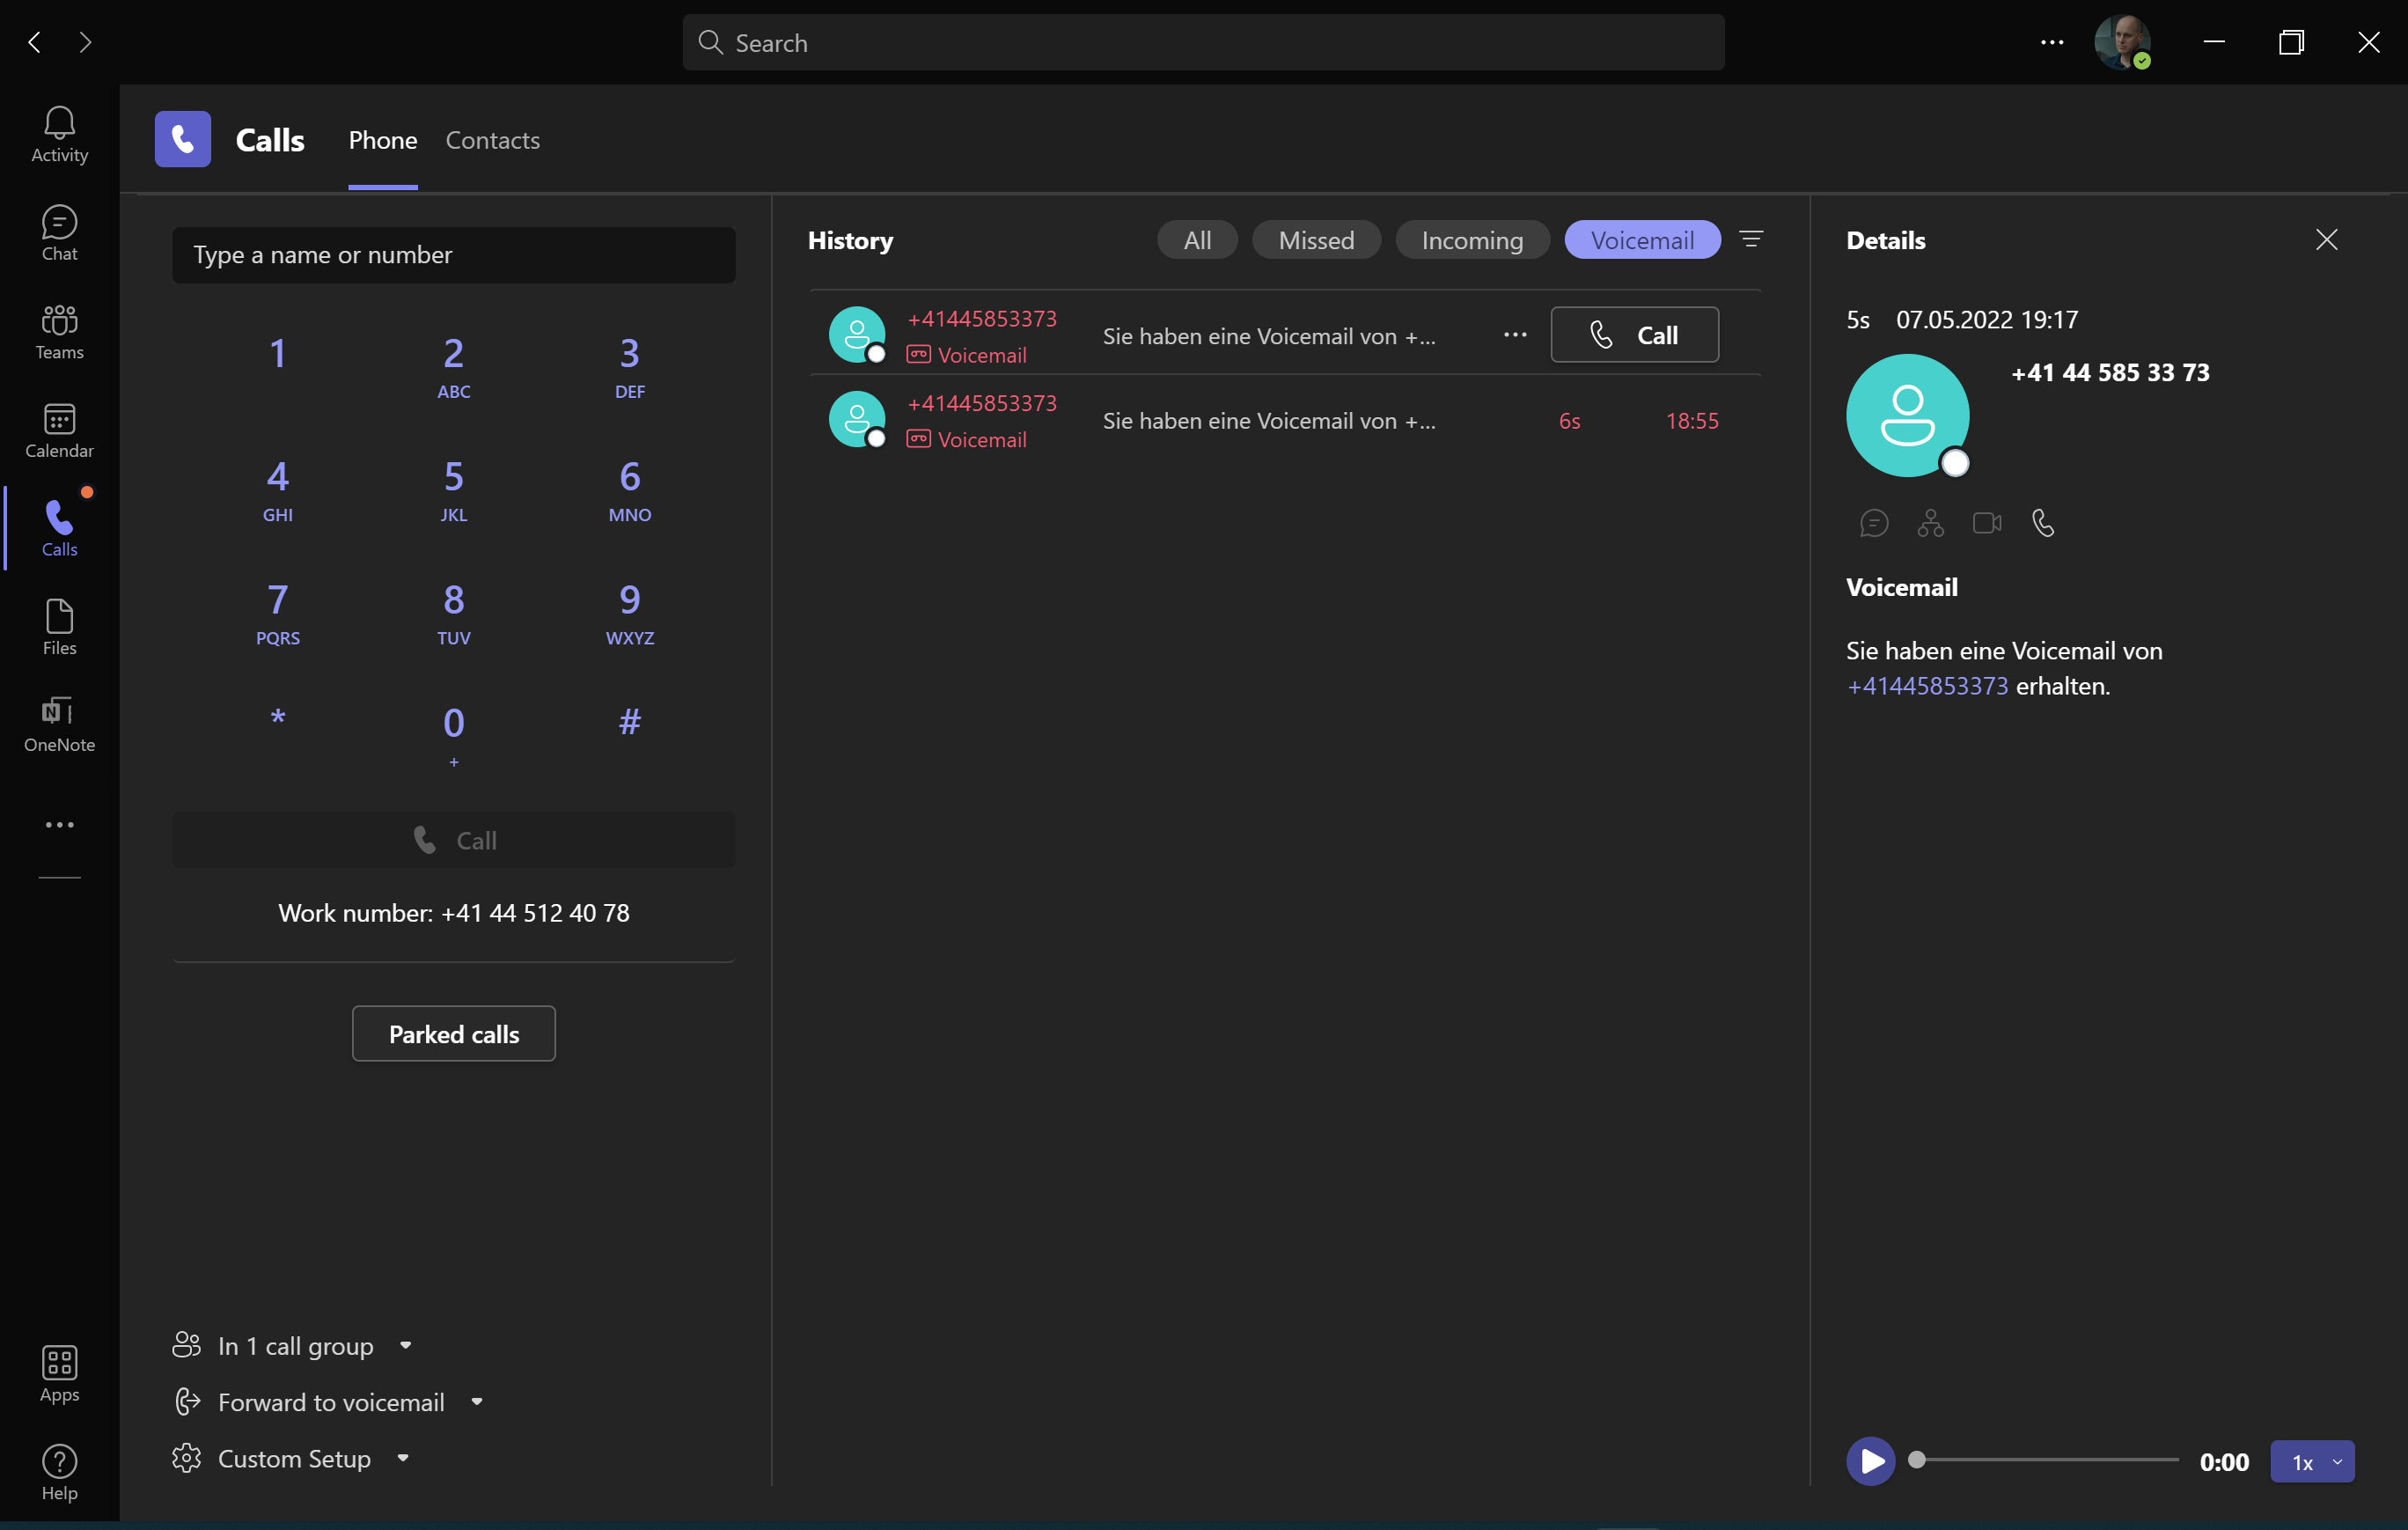
The interesting part is that this also applies to shared voicemails. If a user has subscribed to receive all group emails in their inbox, the shared voicemail will also be delivered into the personal inbox of the user.
As you can see, the email received at 19:17 is a shared voicemail. The subject contains “Geteilte Voicemail” which means “Shared Voicemail” in English and also includes the Name of the Call Queue on which the voicemail was received.
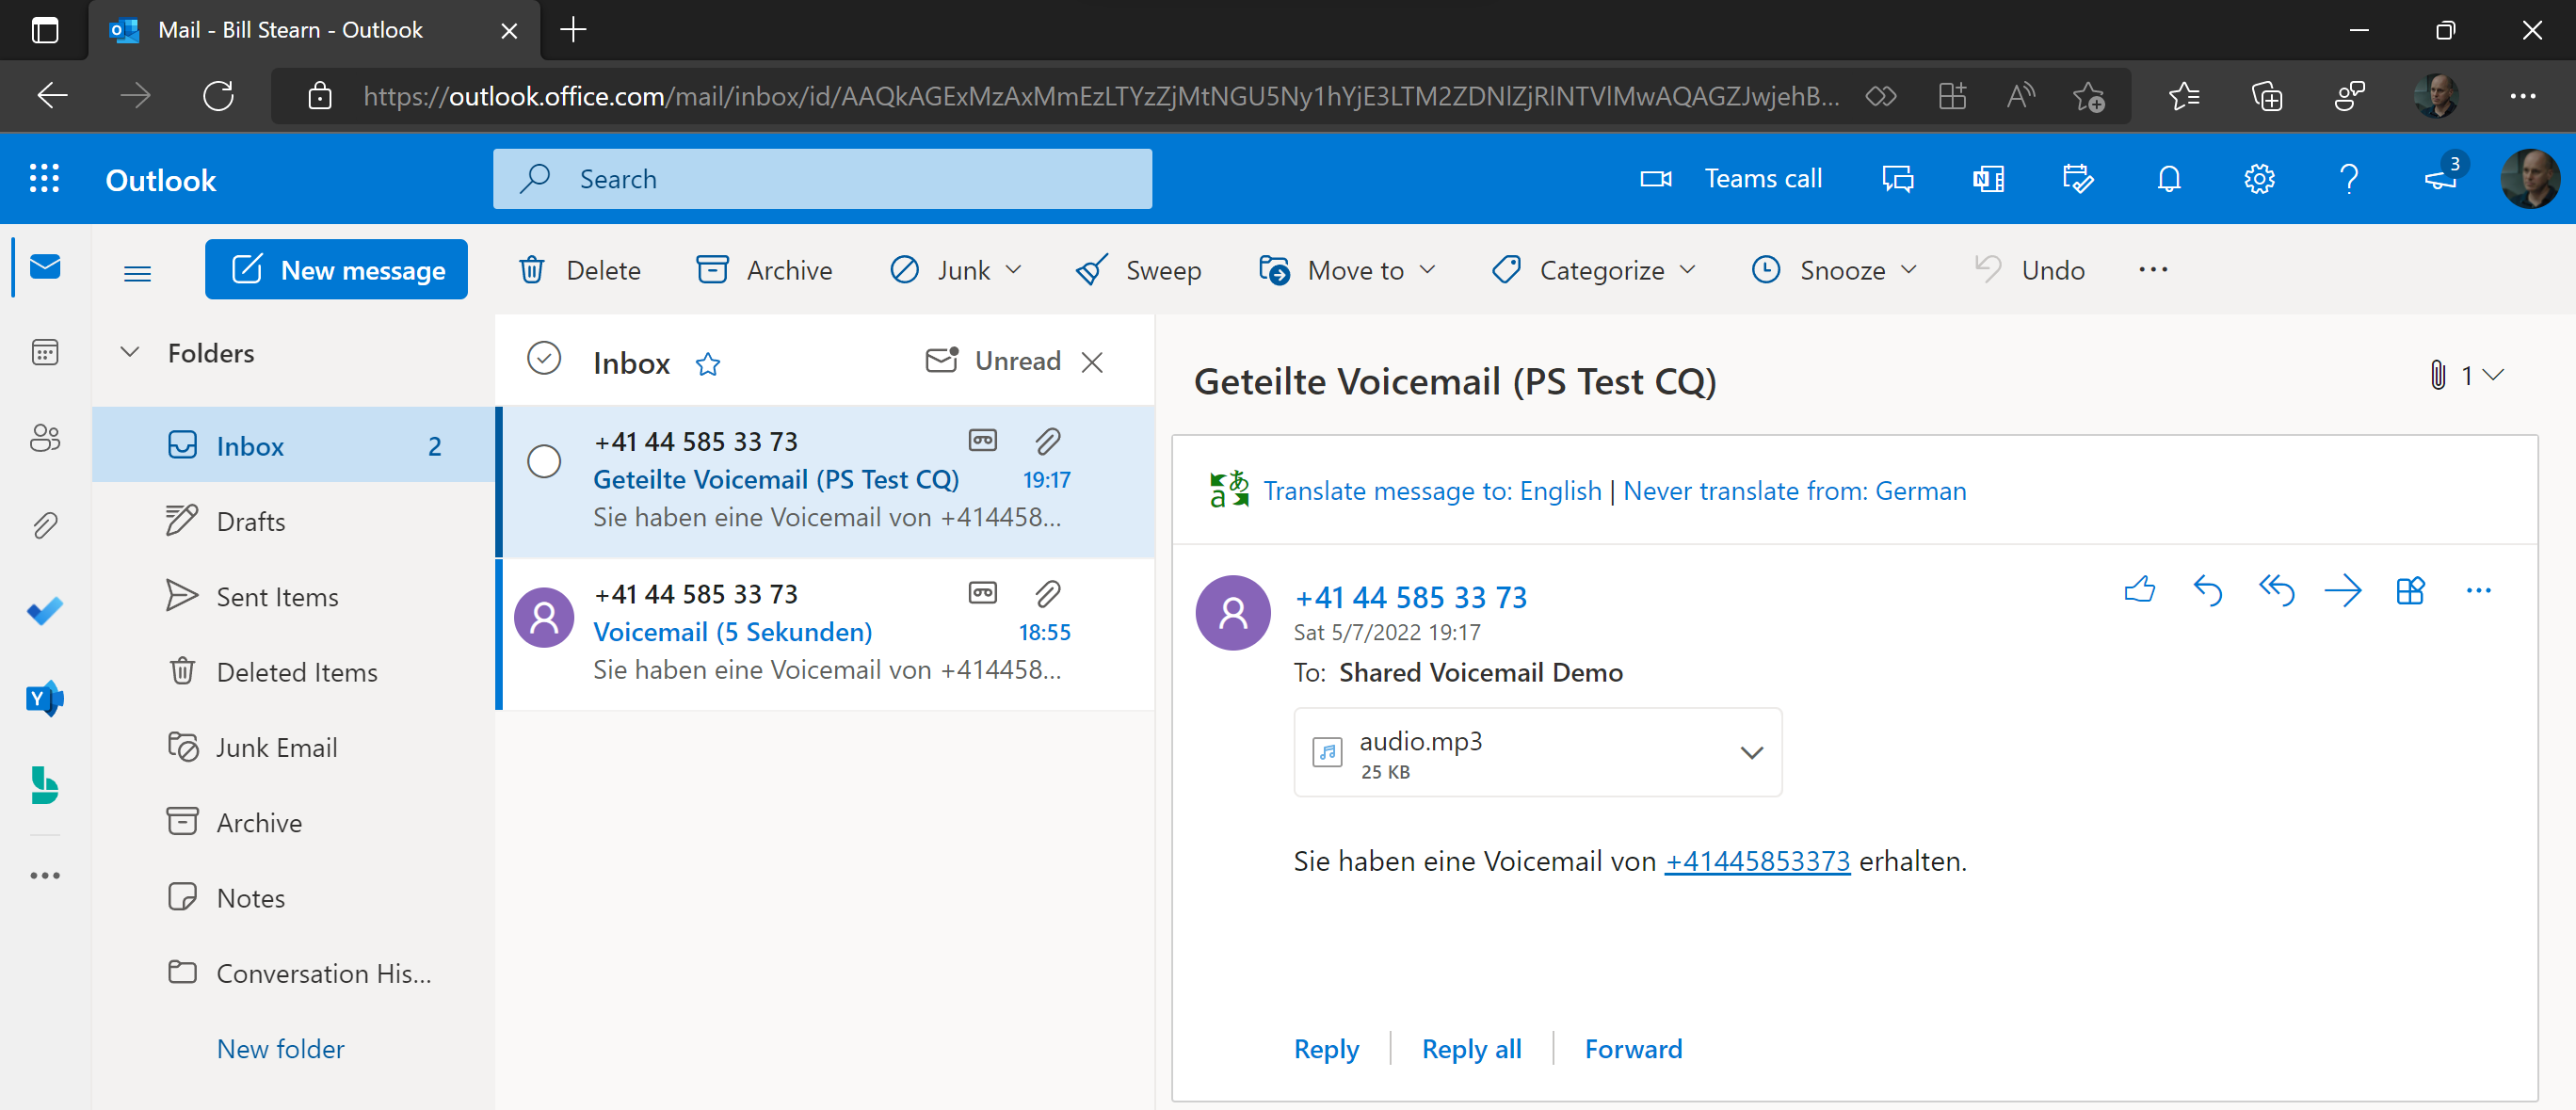
In this case, it’s indeed the name of a call queue or auto attendant and not the display name of the resource account associated with one of the afore mentioned voice apps.
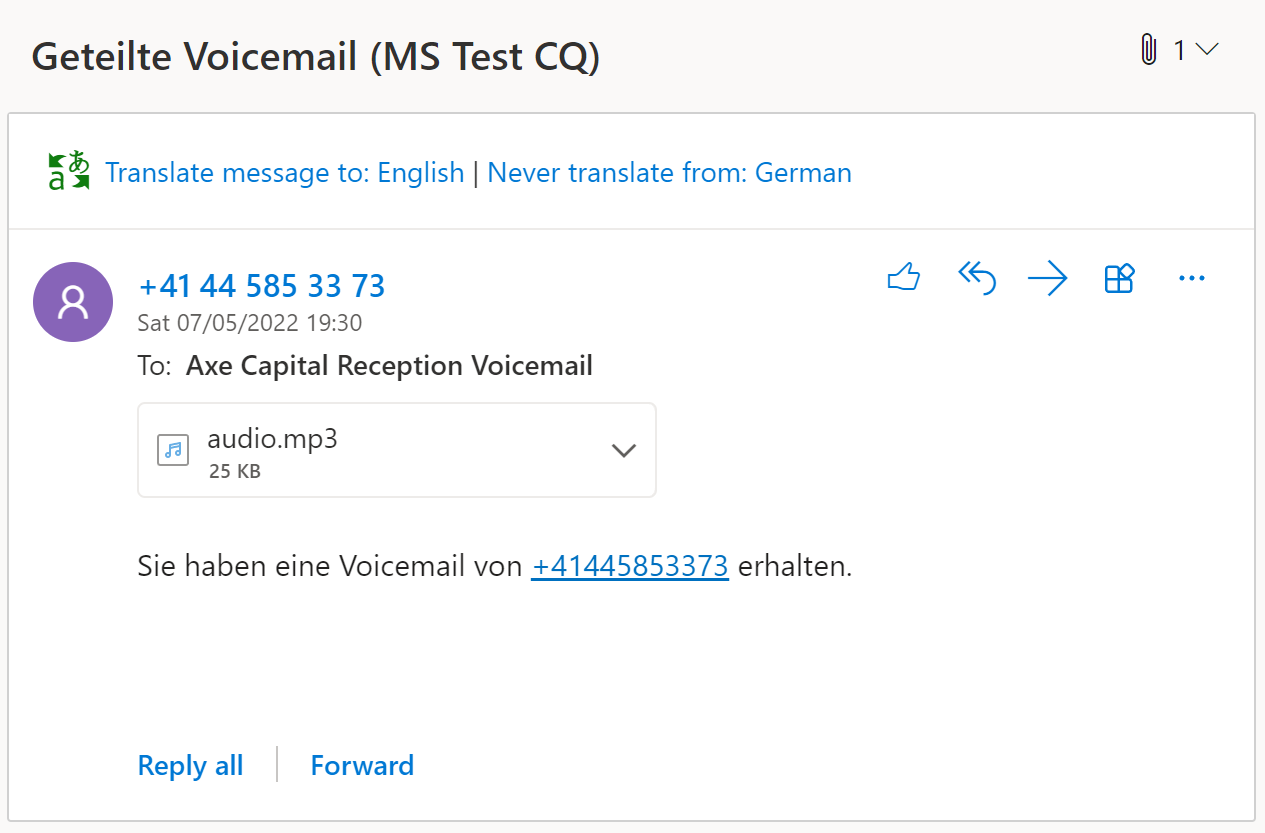
Here you can see that I have a call queue named “MS Test CQ” but the associated resource account is actually called “Team Green CQ”.

And here you can see that the subject shows the call queue’s name.
But let’s get back to Teams. The call history now shows both the personal and the shared voicemail in the user’s personal call history. There’s no indication whatsoever that the voicemail received at 19:17 is a shared one. The user can only get this information in Outlook.
Voice Enabled Channels
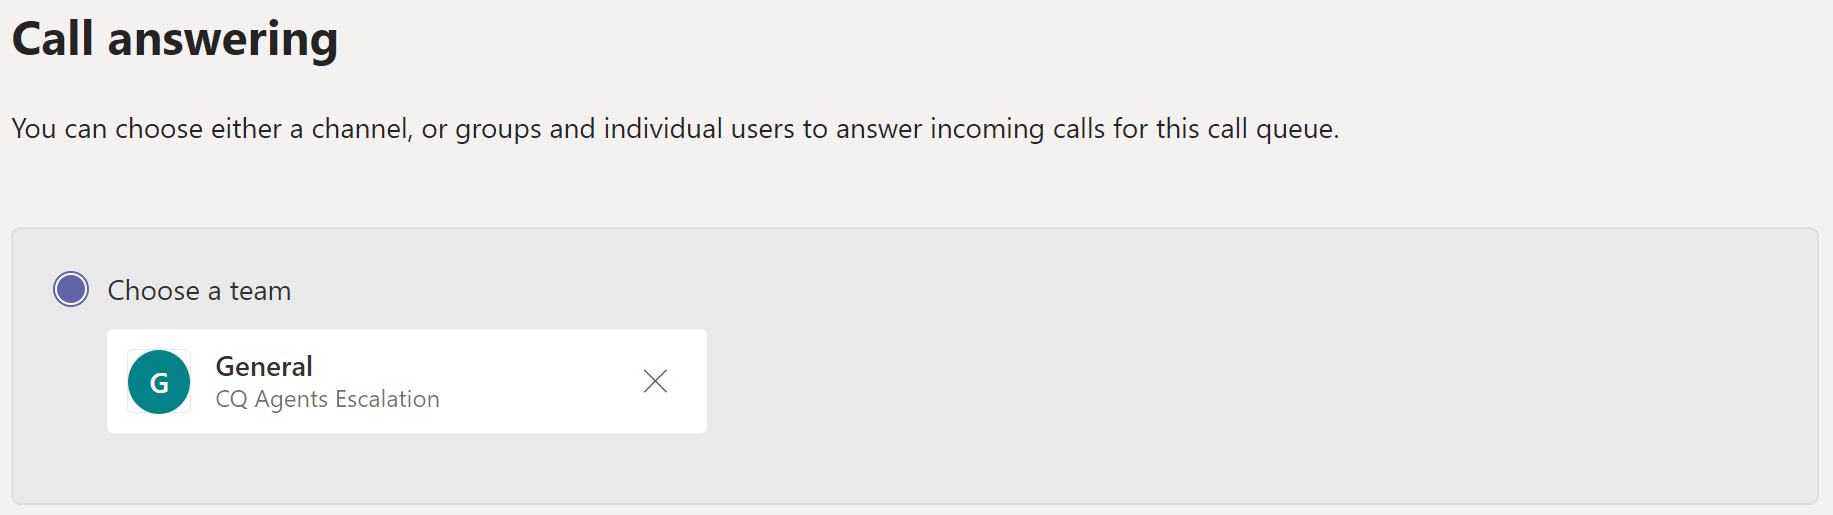
Teams Channels can also be configured as “Voice Enabled Channels”, also known as “Collaborative Calling Channels”. A channel becomes voice enabled if a Team and a Channel are used as a call queue’s agent list.
Here you can see that I’ve selected the “General” channel from the Team “CQ Agents Escalation” as the call queue’s agent list.
Voice enabled channels are only visible/available on Desktop Clients. Web, mobile or desk phones are not supported yet. It’s important to mention that this has absolutely no impact on the delivery of call queue calls. Even if a channel is used for the agent list, mobile, web and desk phone clients can still receive calls from the call queue. They just won’t be able to see the “Calls” tab inside the channel.
On the Desktop Client, the “Calls” tab is added automatically when a channel is configured to receive calls. This tab cannot be added from the Teams Client itself. Assigning it to a call queue in TAC is the only way to do it.
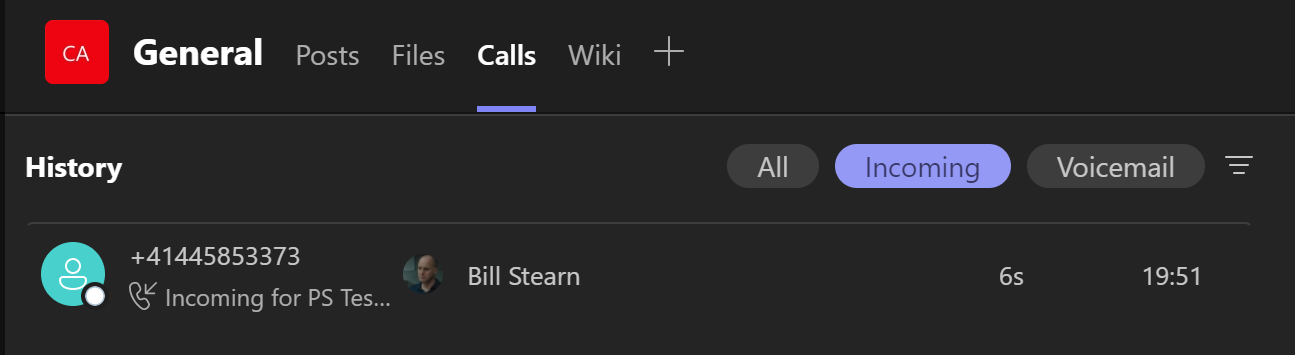
The Calls Tab includes its own call history. Unfortunately, this is a bit misleading. The history will only show incoming calls which were answered by the signed in user. It doesn’t show missed calls on the queue at all.
If notifications about missed calls on call queues are essential to you, I suggest to take a look at the service I developed at my previous employer which does just that.
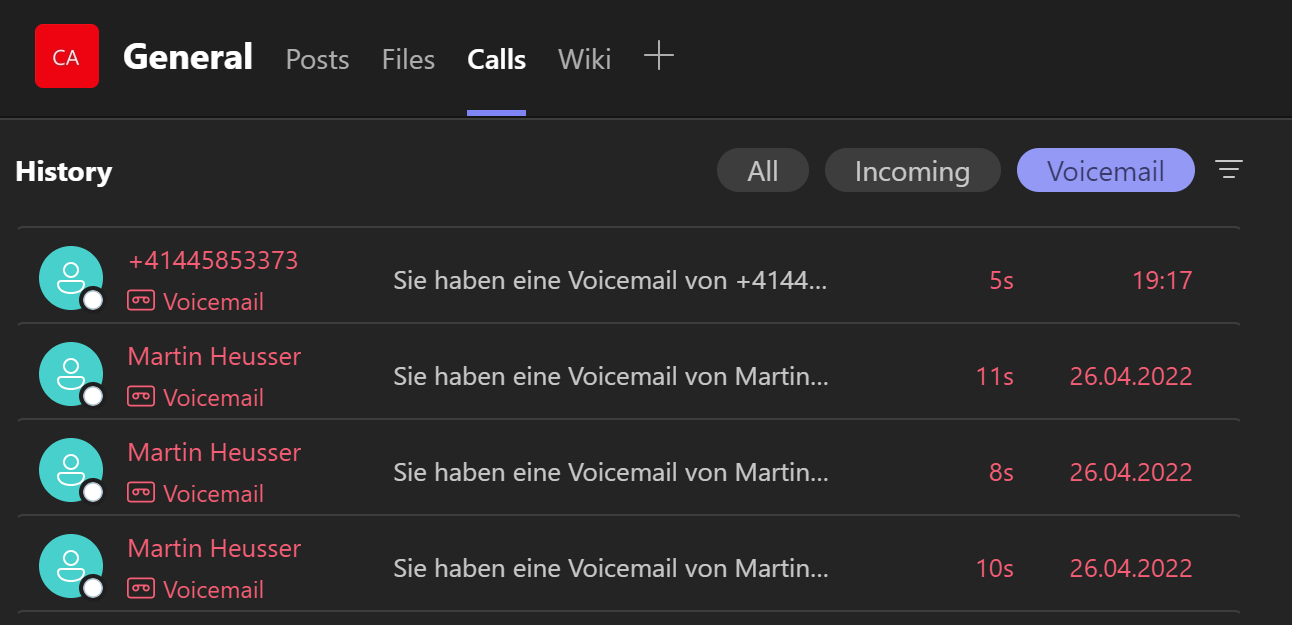
If we switch the filter to Voicemail, it gets even weirder. Here we can see the same shared voicemail from 19:17.
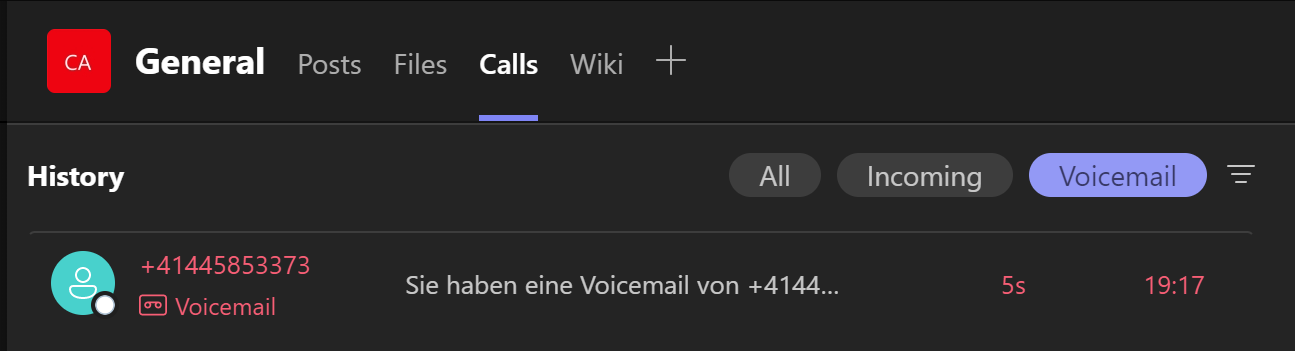
Note that I’ve set a different group as shared voicemail target than the Team which is configured as voice enabled channel. It seems that the Teams Client is evaluating all the M365 Groups which are configured on this particular call queue and whether or not the signed in user is a member of these groups. A call queue can have a maximum of two different voicemail targets. One for the overflow action and one for the timeout action.
Right now, I’ve only configured shared voicemail as the overflow action.
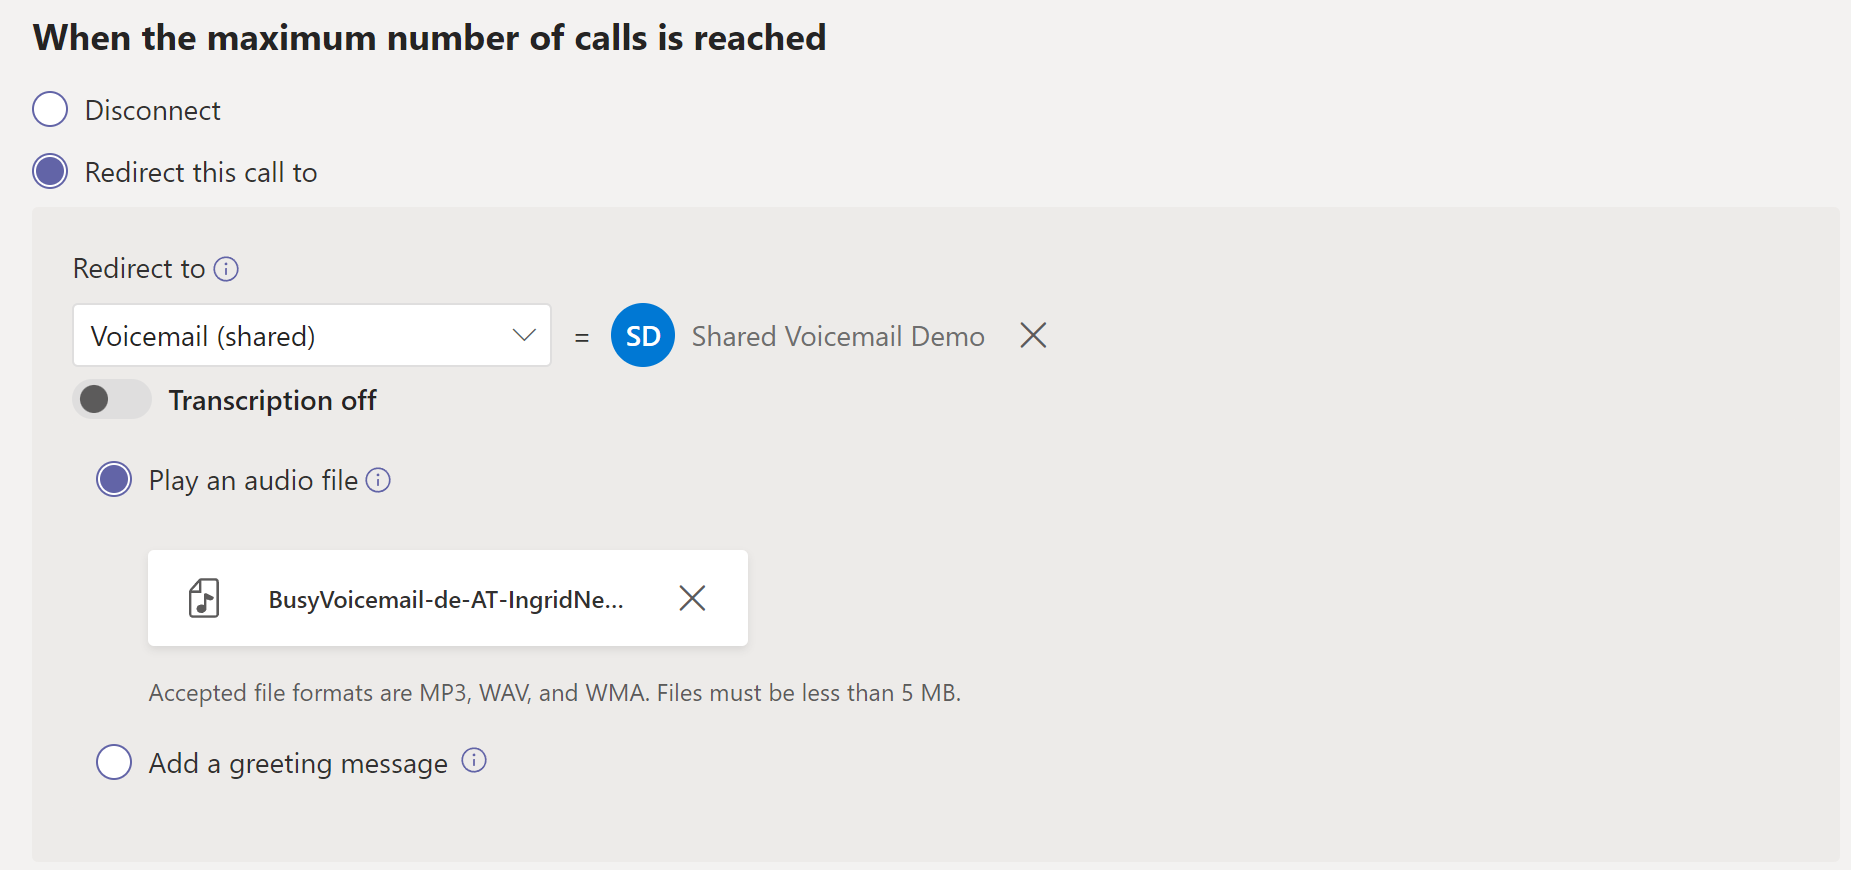
Since the signed in user is a member of that group, the voicemails will show up in the voice enabled channel.
If I remove the shared voicemail target from the queue in TAC and refresh the Teams Client, the entry is gone.

This call queue also has shared voicemail configured for its timeout action. The M365 Group for voicemail on timeout is called “Axe Capital Reception Voicemail”.
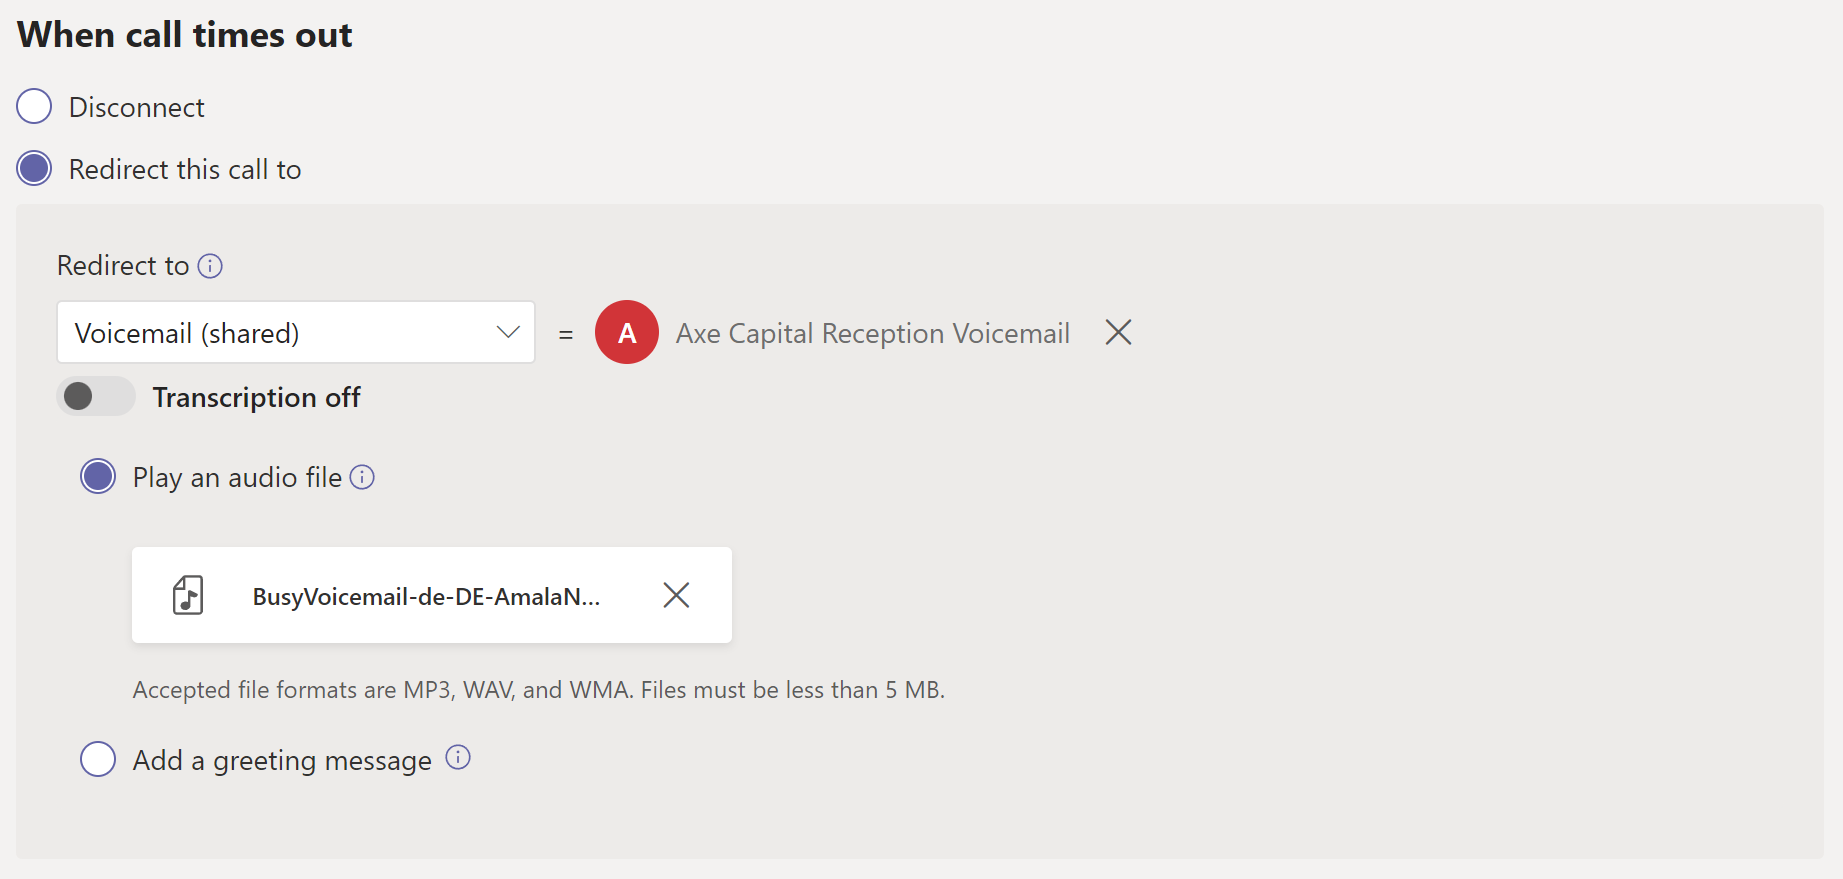
The signed in user is not a member of this group yet, hence the voicemails in the group mailbox do not show up in the calls tab. I’ve now added the user to this group as well and signed out and in again in Teams.
Suddenly, the user sees a lot more shared voicemails in the calls tab because they have been fetched from the M365 Group “Axe Capital Reception Voicemail”. The list is now aggregated across both M365 Groups which are configured in the call queue and the user is a member of. As you can see, the first entry is still the shared voicemail from the “Shared Voicemail Demo” group from 19:17.
Best Practices
These are my recommendations for most shared voicemail scenarios.
- Create a new, dedicated M365 Group without a Team for shared voicemails.
- Make sure “Send copies of team emails and events to team member’s inboxes” is enabled.
- Add an existing or new shared mailbox as the group’s only member.
- Manage responsibilities of calling back or delegating through existing processes and staff for already existing shared mailboxes.
By creating a new, dedicated group instead of using an existing group or Team we can make sure that this group only ever receives voicemail messages and prevent unwanted emails from making its way into the shared mailbox.
If you’re going to use voice enabled channels, also use the same Team as shared voicemail target. Otherwise, you need to make sure that all the Team’s members are also members of the M365 groups used for shared voicemail. Different users seeing different voicemails in their Calls tab will only create confusion among them. Unless of course you deliberately want only select members of the Team to see shared voicemails.
Another way of efficiently handling shared voicemails would be to set up a Power Automate Flow which triggers on new emails in a shared mailbox, saves the audio files to SharePoint and sends an adaptive card with the link to the mp3 file to a channel. I plan to do a separate post about that though.
Bonus Tips
Even though call queues and auto attendants are quite similar, there are some differences which can be quite significant to some customers.
Voicemail on an Auto Attendant
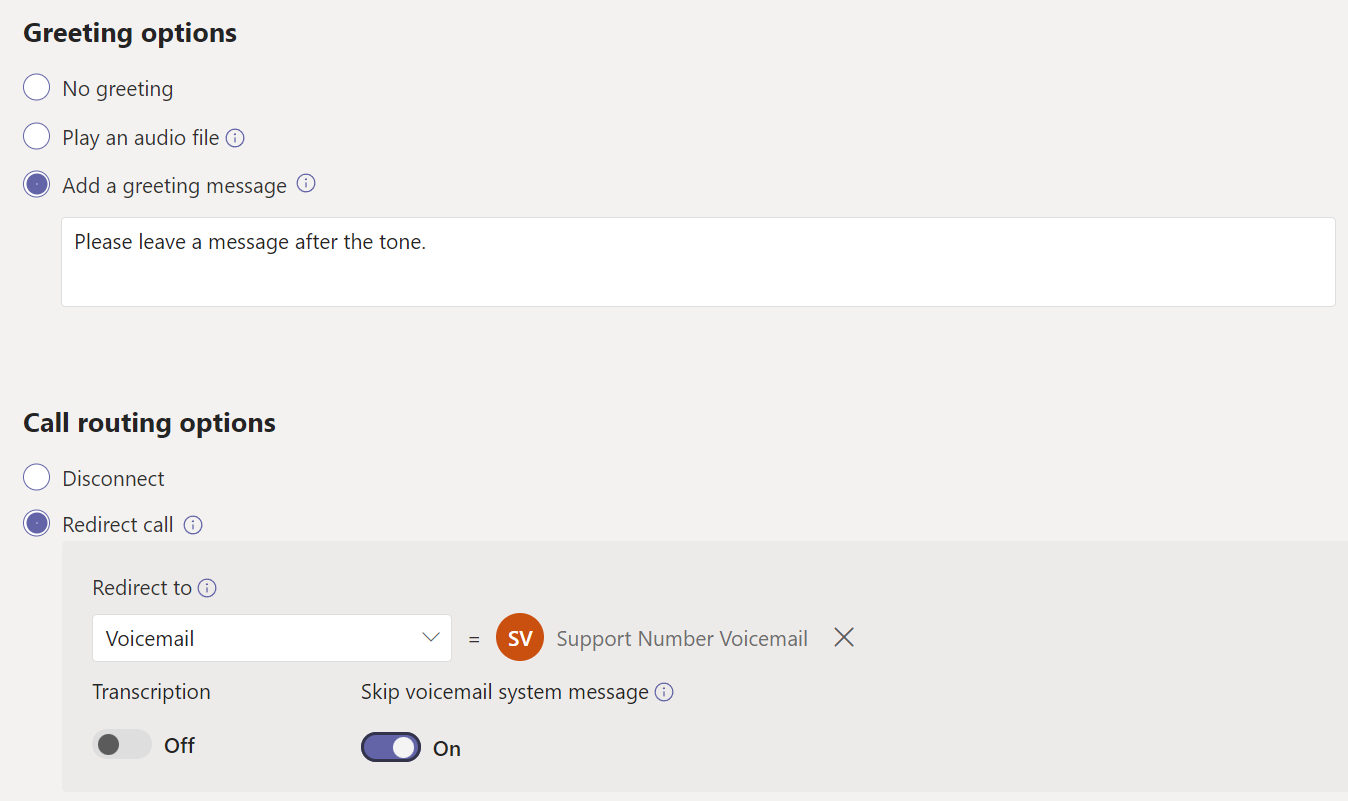
When you configure shared voicemail on an auto attendant, there’s no option to configure the greeting for the voicemail itself. Instead, you configure the greeting one layer above, on the call flow.
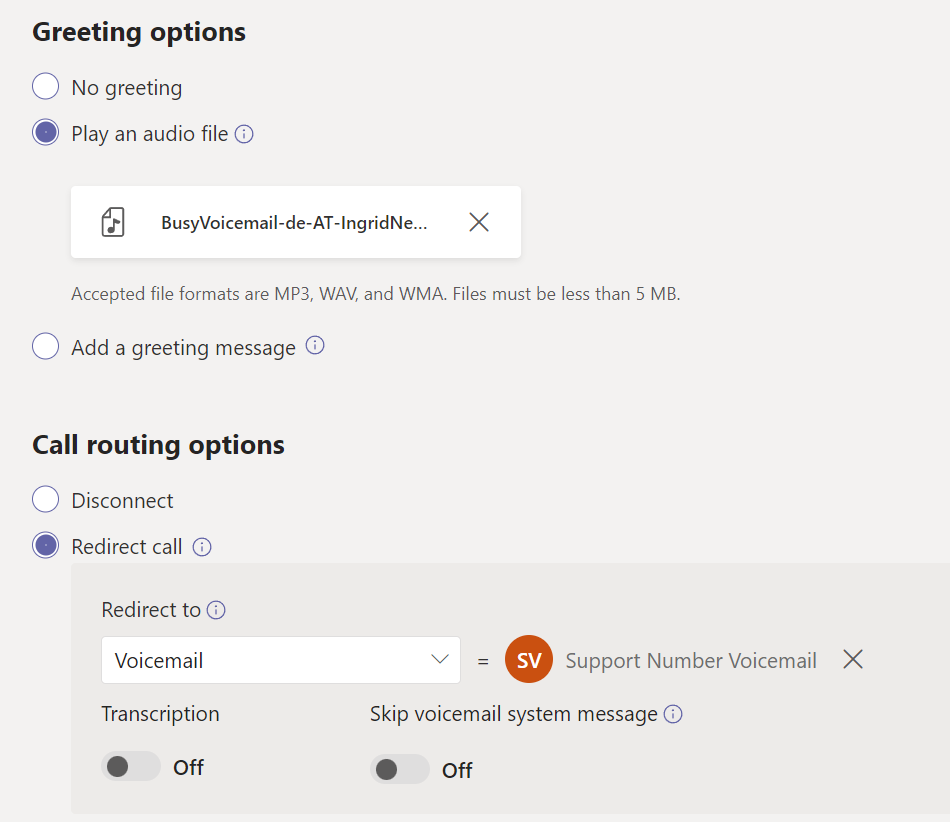
By default, an auto attendant will play a “system greeting” after your custom greeting has been played back or synthesized by the Azure Text-To-Speech service. The system greeting will sound like this:
Please leave a message after the tone. When you have finished, please hang up.
You can suppress the system greeting by enabling the toggle switch for “Skip voicemail system message”. Because the greeting is configured outside of the scope of the call routing options, this can be configured for both TTS and audio file greetings.
Voicemail on a Call Queue
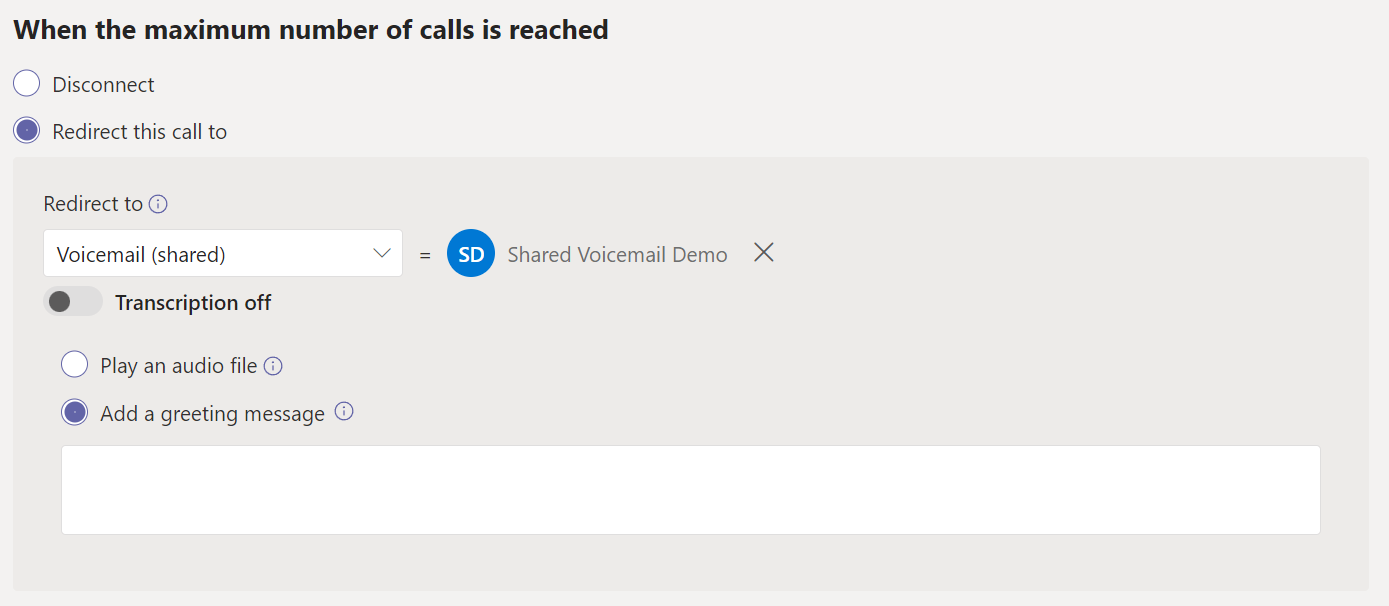
For call queues, this is slightly different. There is no option to suppress the system greeting. A call queue’s primary purpose is to route calls to agents so there are only routing options for overflow or timeout scenarios. This also means that there’s no option to configure a greeting inside the scope of an overflow or a timeout action.
When you upload your own audio file, the system greeting is automatically suppressed by the call queue. There’s no option to enable it. (Why would you anyway?)

If you’re using a TTS greeting, there’s no option to disable it. In this case the system greeting is always played back after your custom TTS greeting.
If you absolutely need to have a TTS greeting but also need to suppress the system greeting your only options are to use Azure Cognitive Services to generate and upload an audio file from your TTS greeting or to create another auto attendant which will have the sole purpose of playing back the TTS greeting and then forward to shared voicemail.
Update 06.04.2023
Skip voicemail system message is now available in TAC. It now supports both audio files and TTS greetings. I don’t remember when exactly it was added but it was a long time ago since I already wrote about it in this article in December 2023.
/Update
One Last Caveat
But there’s another catch I recently discovered with this approach. If an auto attendant forwards to shared voicemail, the caller will hear two different beeps before the message can be recorded.
The auto attendant will play back the greeting and then transfer the call to shared voicemail. The caller will hear one beep for the transfer and most likely starts to record the message while the call is still being transferred to shared voicemail. Once the transfer has been completed, there will be a second beep which sounds slightly different. This is the actual beep which will indicate that the recording has started. This can be quite confusing for both the caller and the callee. It’s possible that the first one or two seconds or so are cut off from the recording or that the caller gets confused and loses focus because his recording is interrupted by the second beep.
To mitigate this issue, the only workaround at the moment is to forward the call to a call queue which goes straight to voicemail by using an overflow threshold of 0. But keep in mind that you can’t use a TTS greeting if you also want to suppress the system greeting when using this method. This will, however, play back one beep for the transfer to the queue, play back your configured greeting on the queue and then play the second beep to indicate that the recording has started.
Even though these seem like minor issues, I hope that Microsoft addresses them in a timely manner. I think that’s all I know about Teams Phone and Voicemail. I hope it helped you demystify some stuff.