Over a year ago I was asked if it’s possible to retrieve a Teams meeting attendance report if the organizer of the meeting isn’t available to get the report themselves. At the time, I created a quick and dirty script to get what was urgently needed but today I put it all in a nice and ready to use example.
Of course an organizer being out of office isn’t the only scenario why you’d need this. Another popular use case I can think of is to create an automation to automatically archive attendance reports for recurrent meetings.
First, let’s look at how an end user would access and view an attendance report.
TL; DR - I know what I’m doing, just give me the script already!
View Meeting Attendance Report as Organizer
Only meeting organizers have access to meeting attendance reports. To view an attendance report, organizers can simply open the meeting chat. Teams will automatically post the attendance report after a meeting has ended.
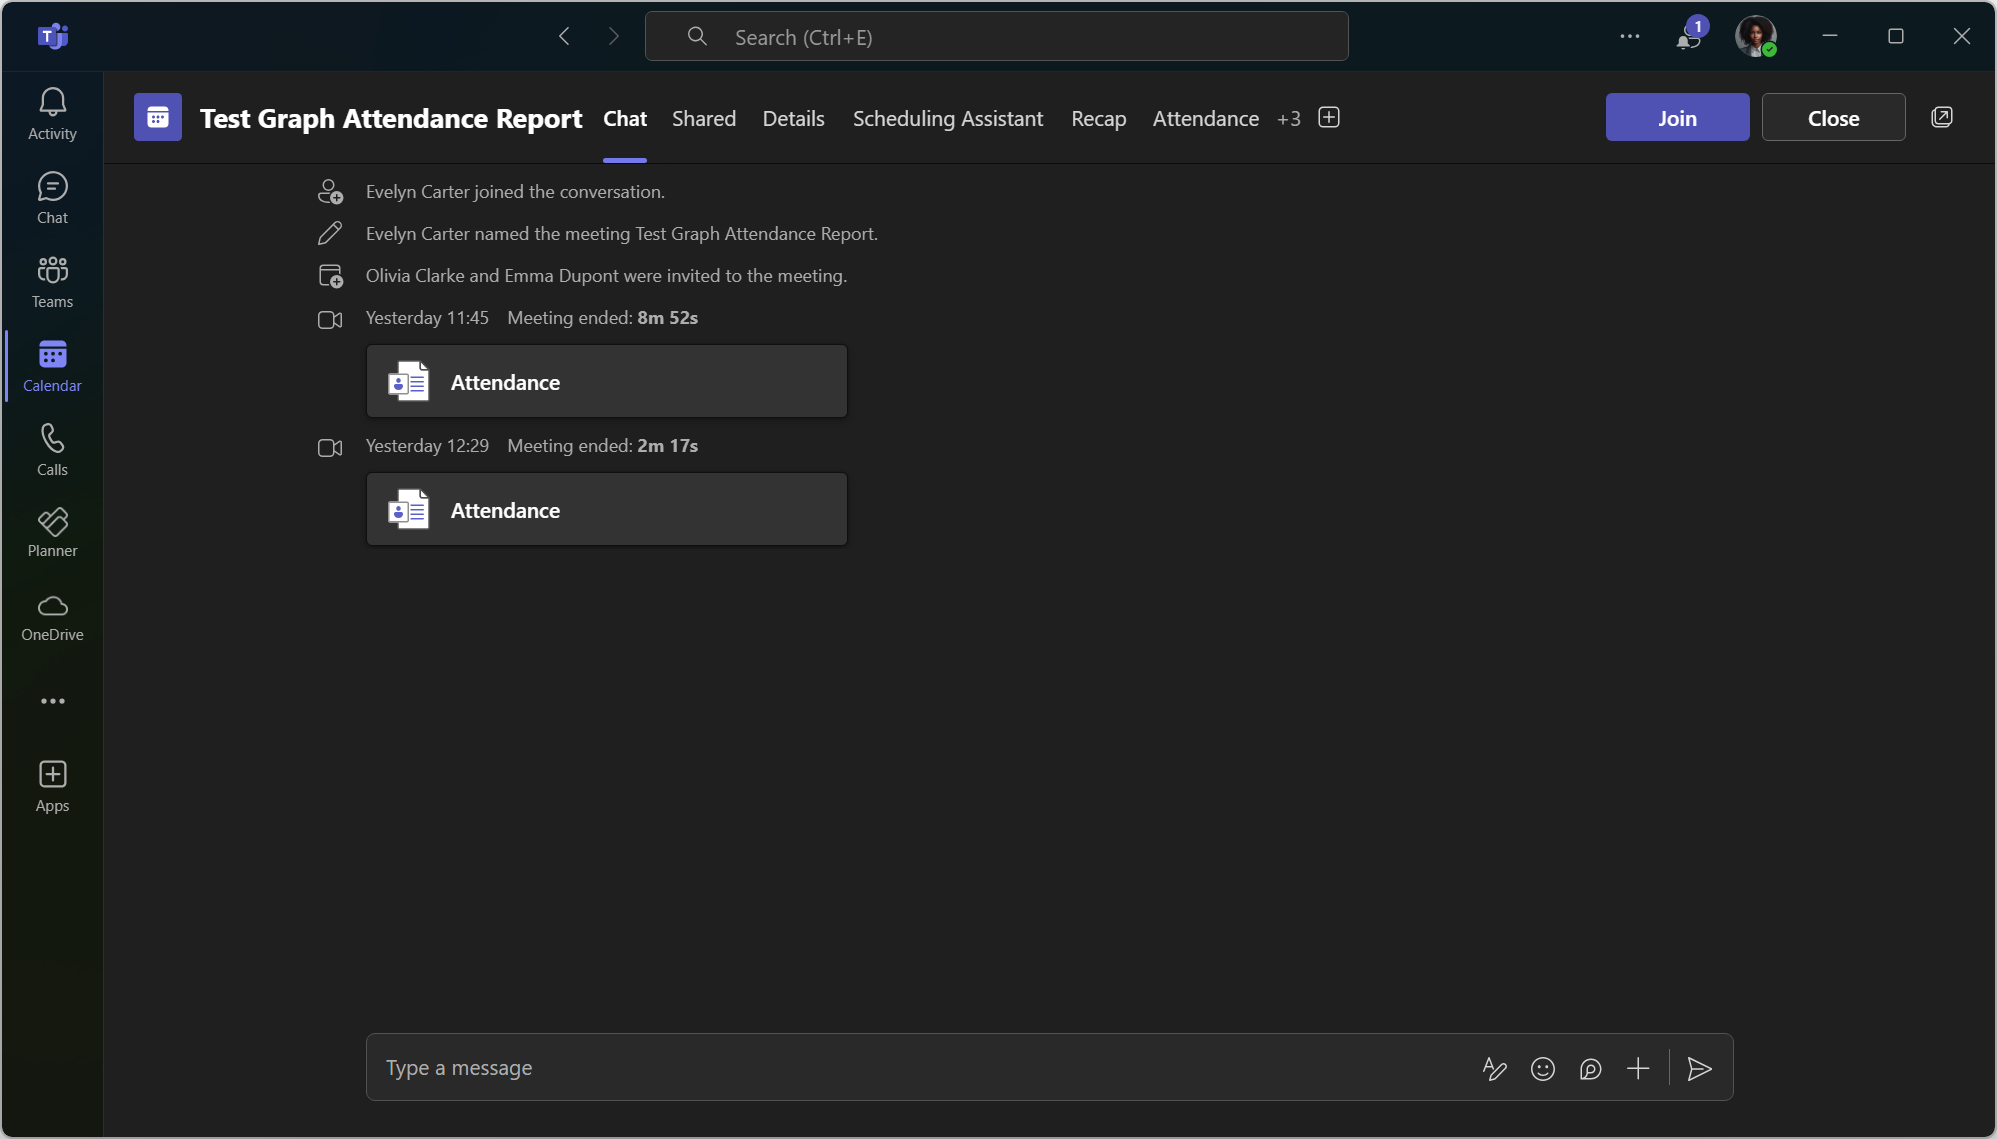
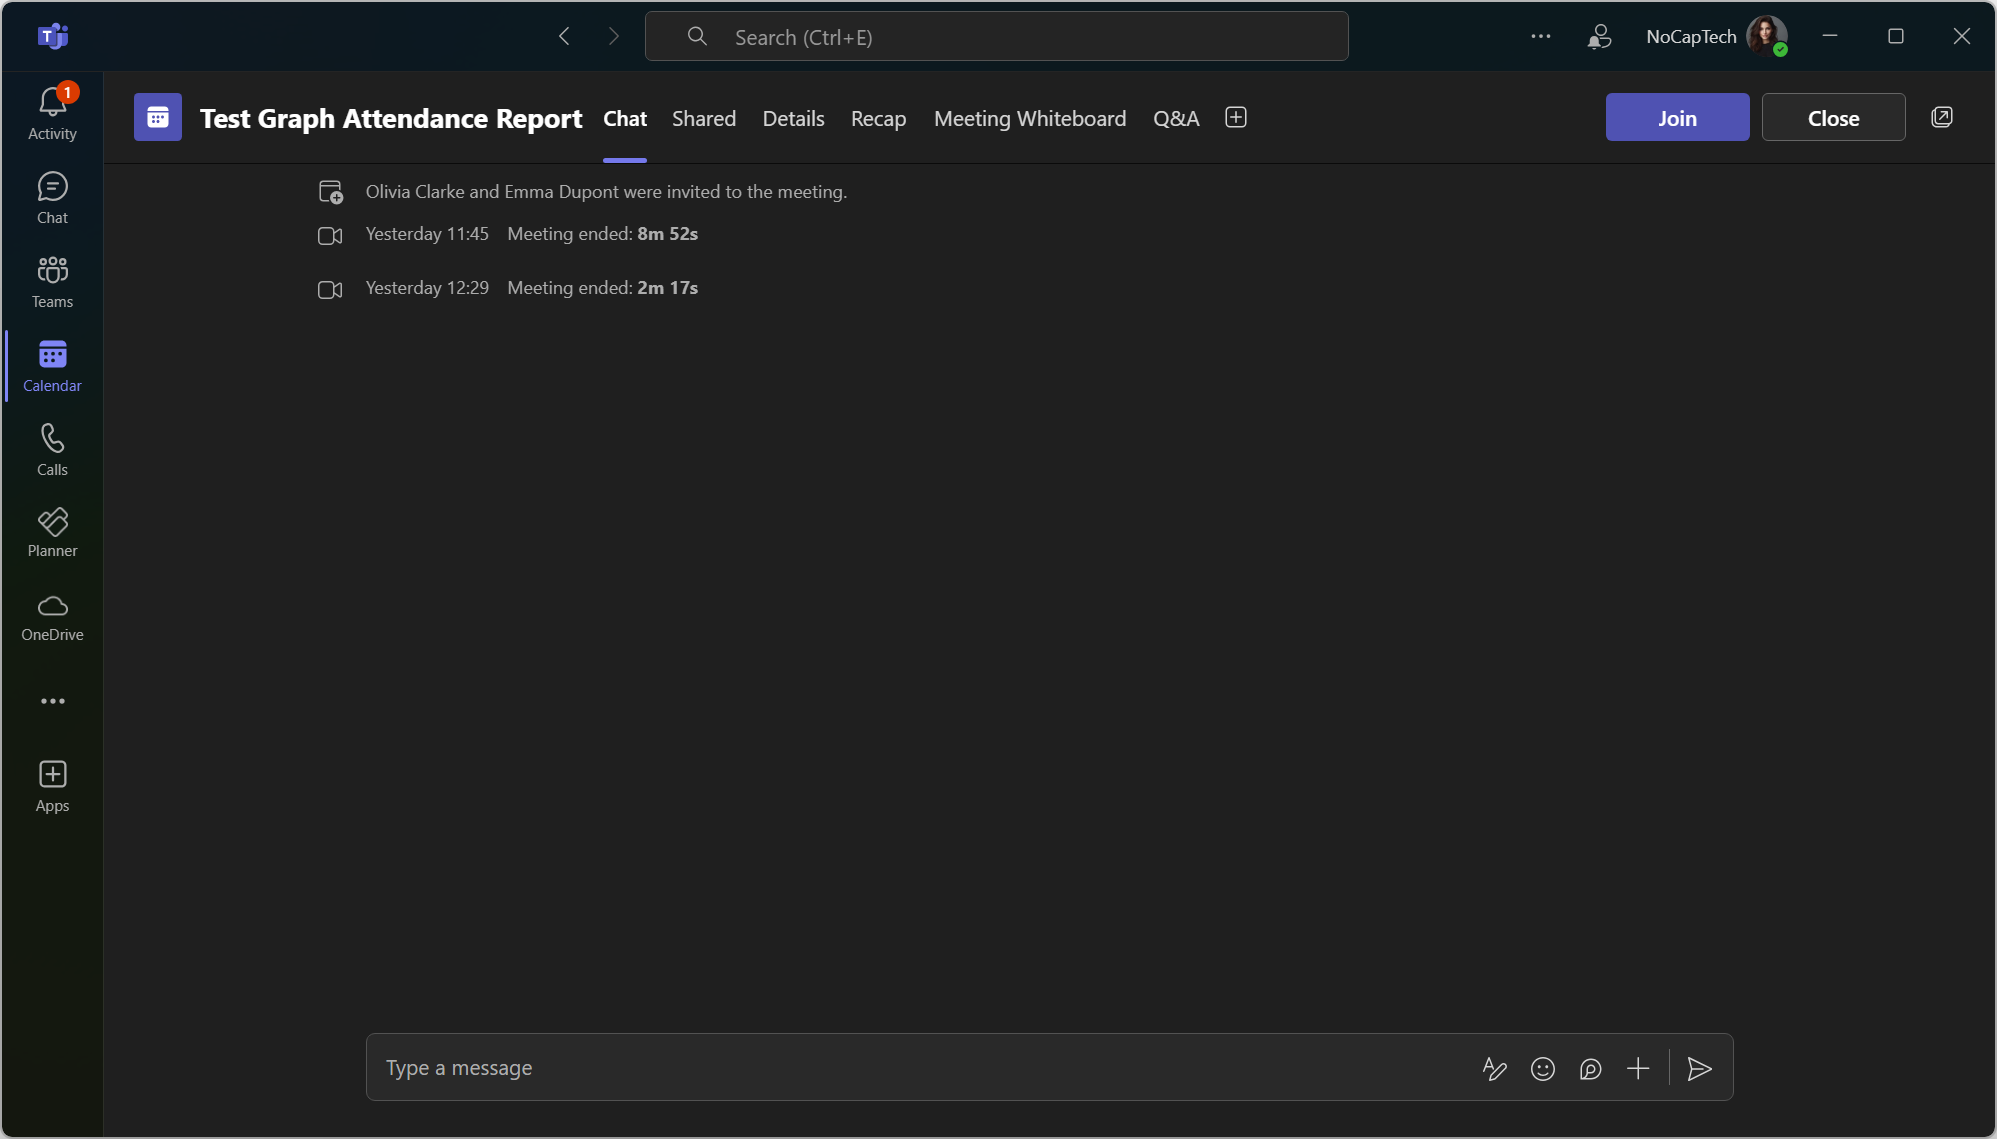
Note that the attendance report is only shown in chat for the meeting organizers. Attendees can’t view see it. That’s also why we’re looking into how to get it through the Graph API today. Organizers also see a tab called Attendance. This is where they can view the report directly in Teams.
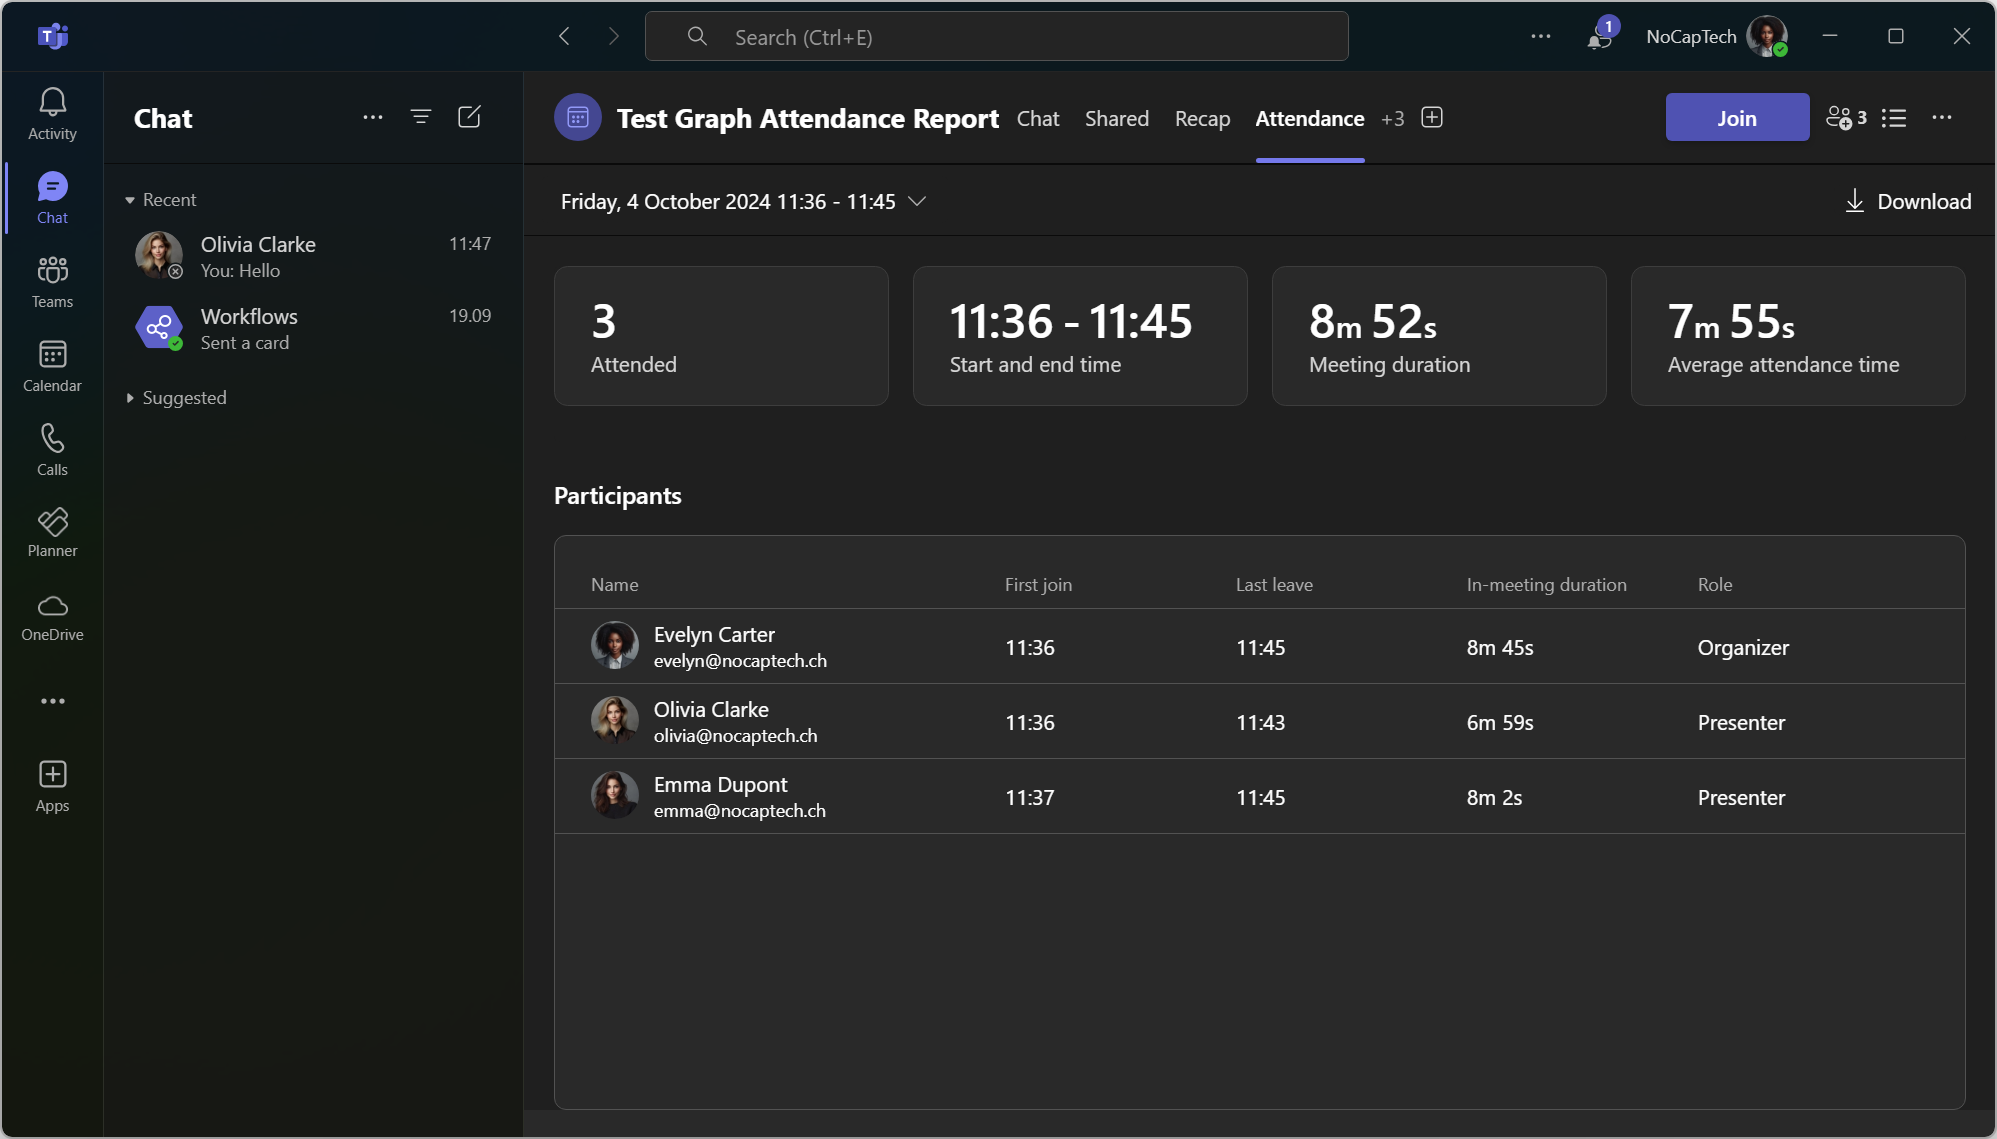
It’s also possible to download a CSV but it’s not very well structured which makes it kind of hard to further process the data.
Let’s switch gears and make some graph requests.
Get Meeting Attendance Report Through Graph PowerShell
Since we’re accessing data without a signed in user, we need an Entra ID application with appropriate application permissions.
Create a new Entra ID App Registration.
Note: You’ll need Global Admin access to grant the consent for your organization.
Go to the Entra ID Portal and click on App registrations under Applications in the left navigation menu.

Then click + New registration.

Give your app registration a name and keep Accounts in this organizational directory only (“Org Name” only - Single tenant). Under Redirect URI (optional) select Public client/native (mobile & desktop) and enter http://localhost as redirect URI.
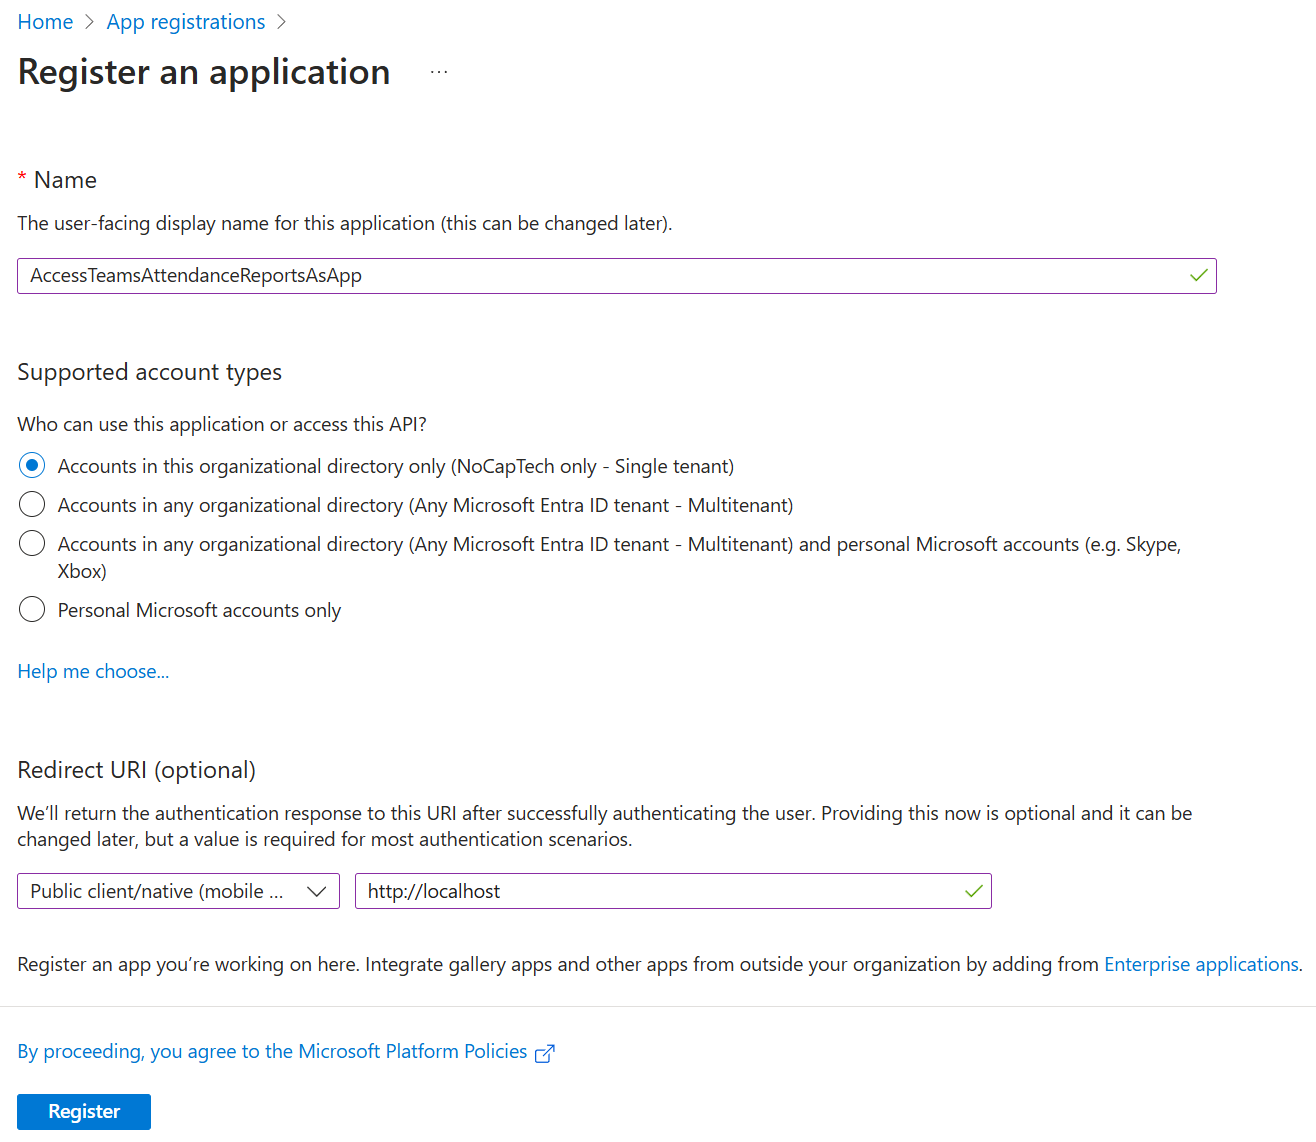
Click Register to create the app registration.
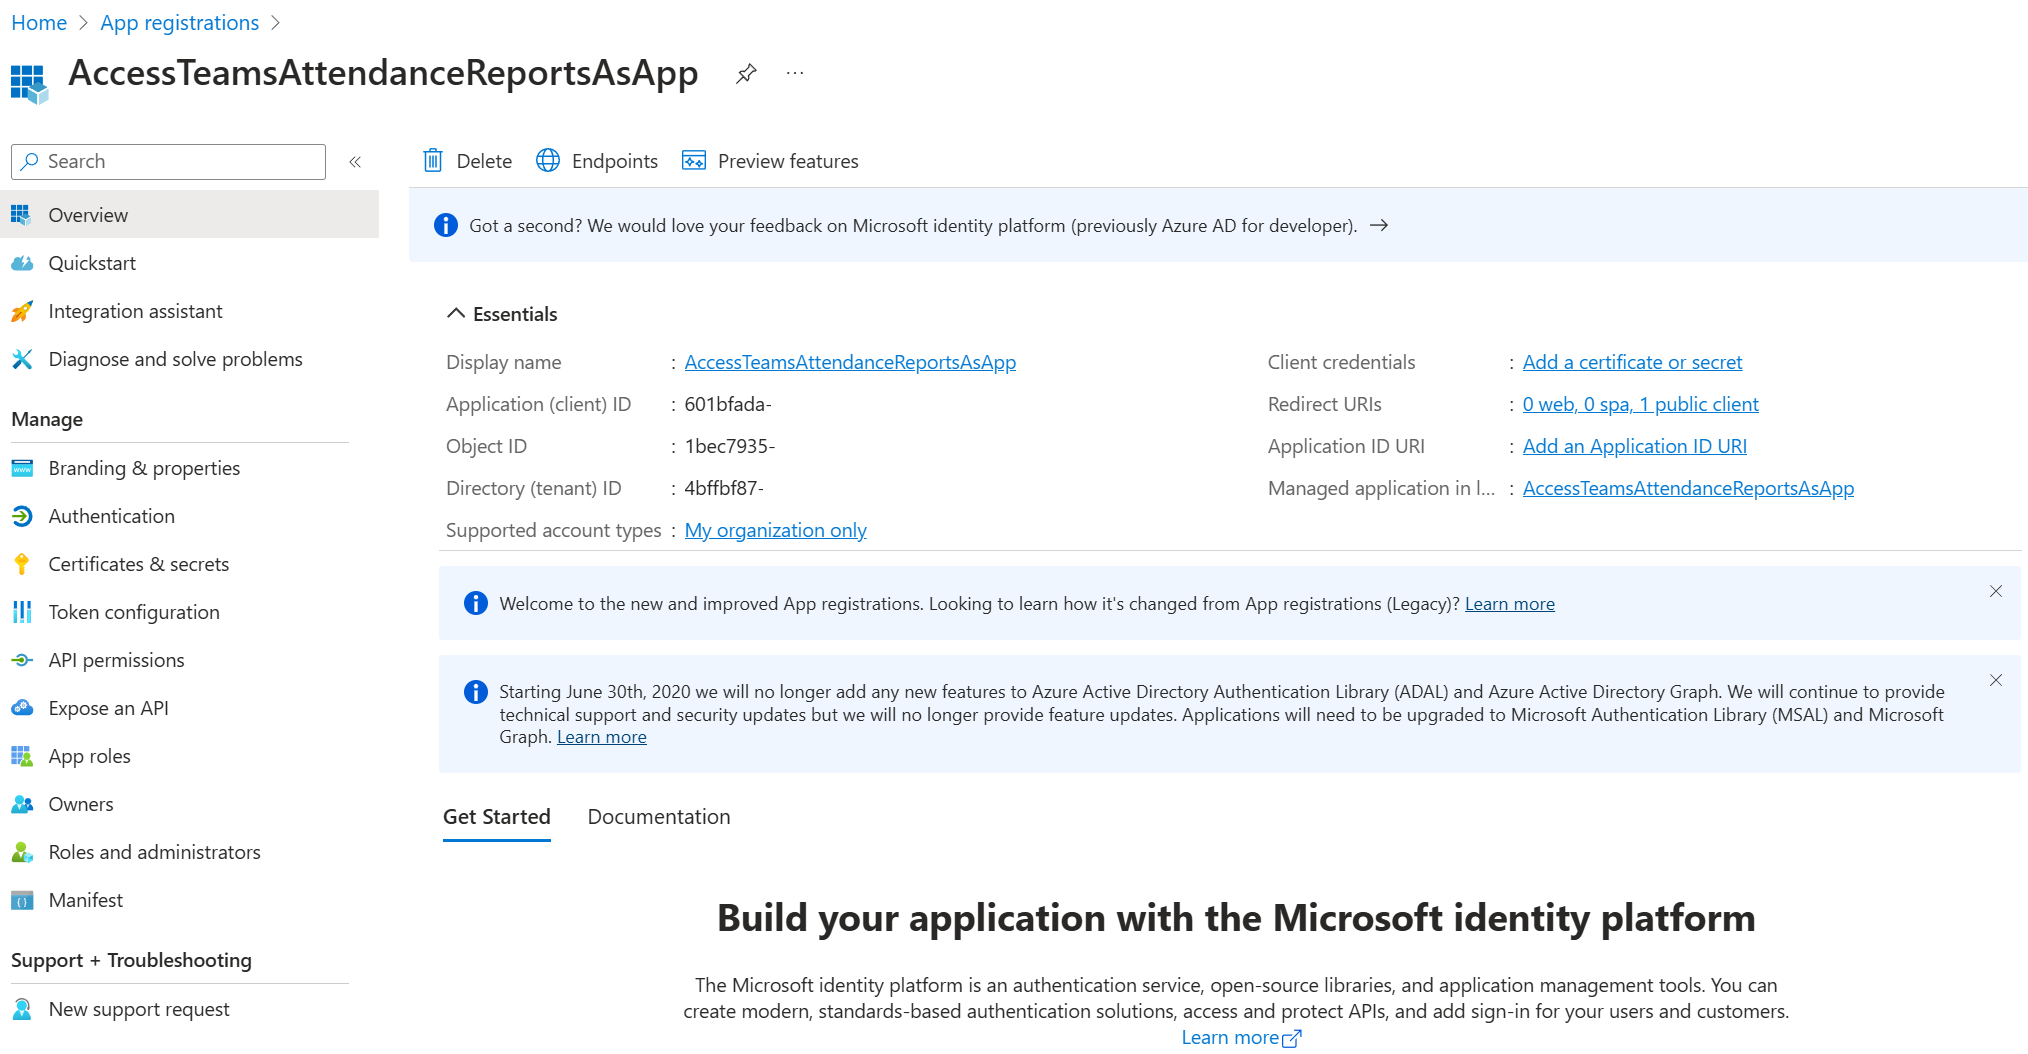
Copy the Application (client) ID and the Directory (tenant ID). You’ll need this later.
Add Permissions
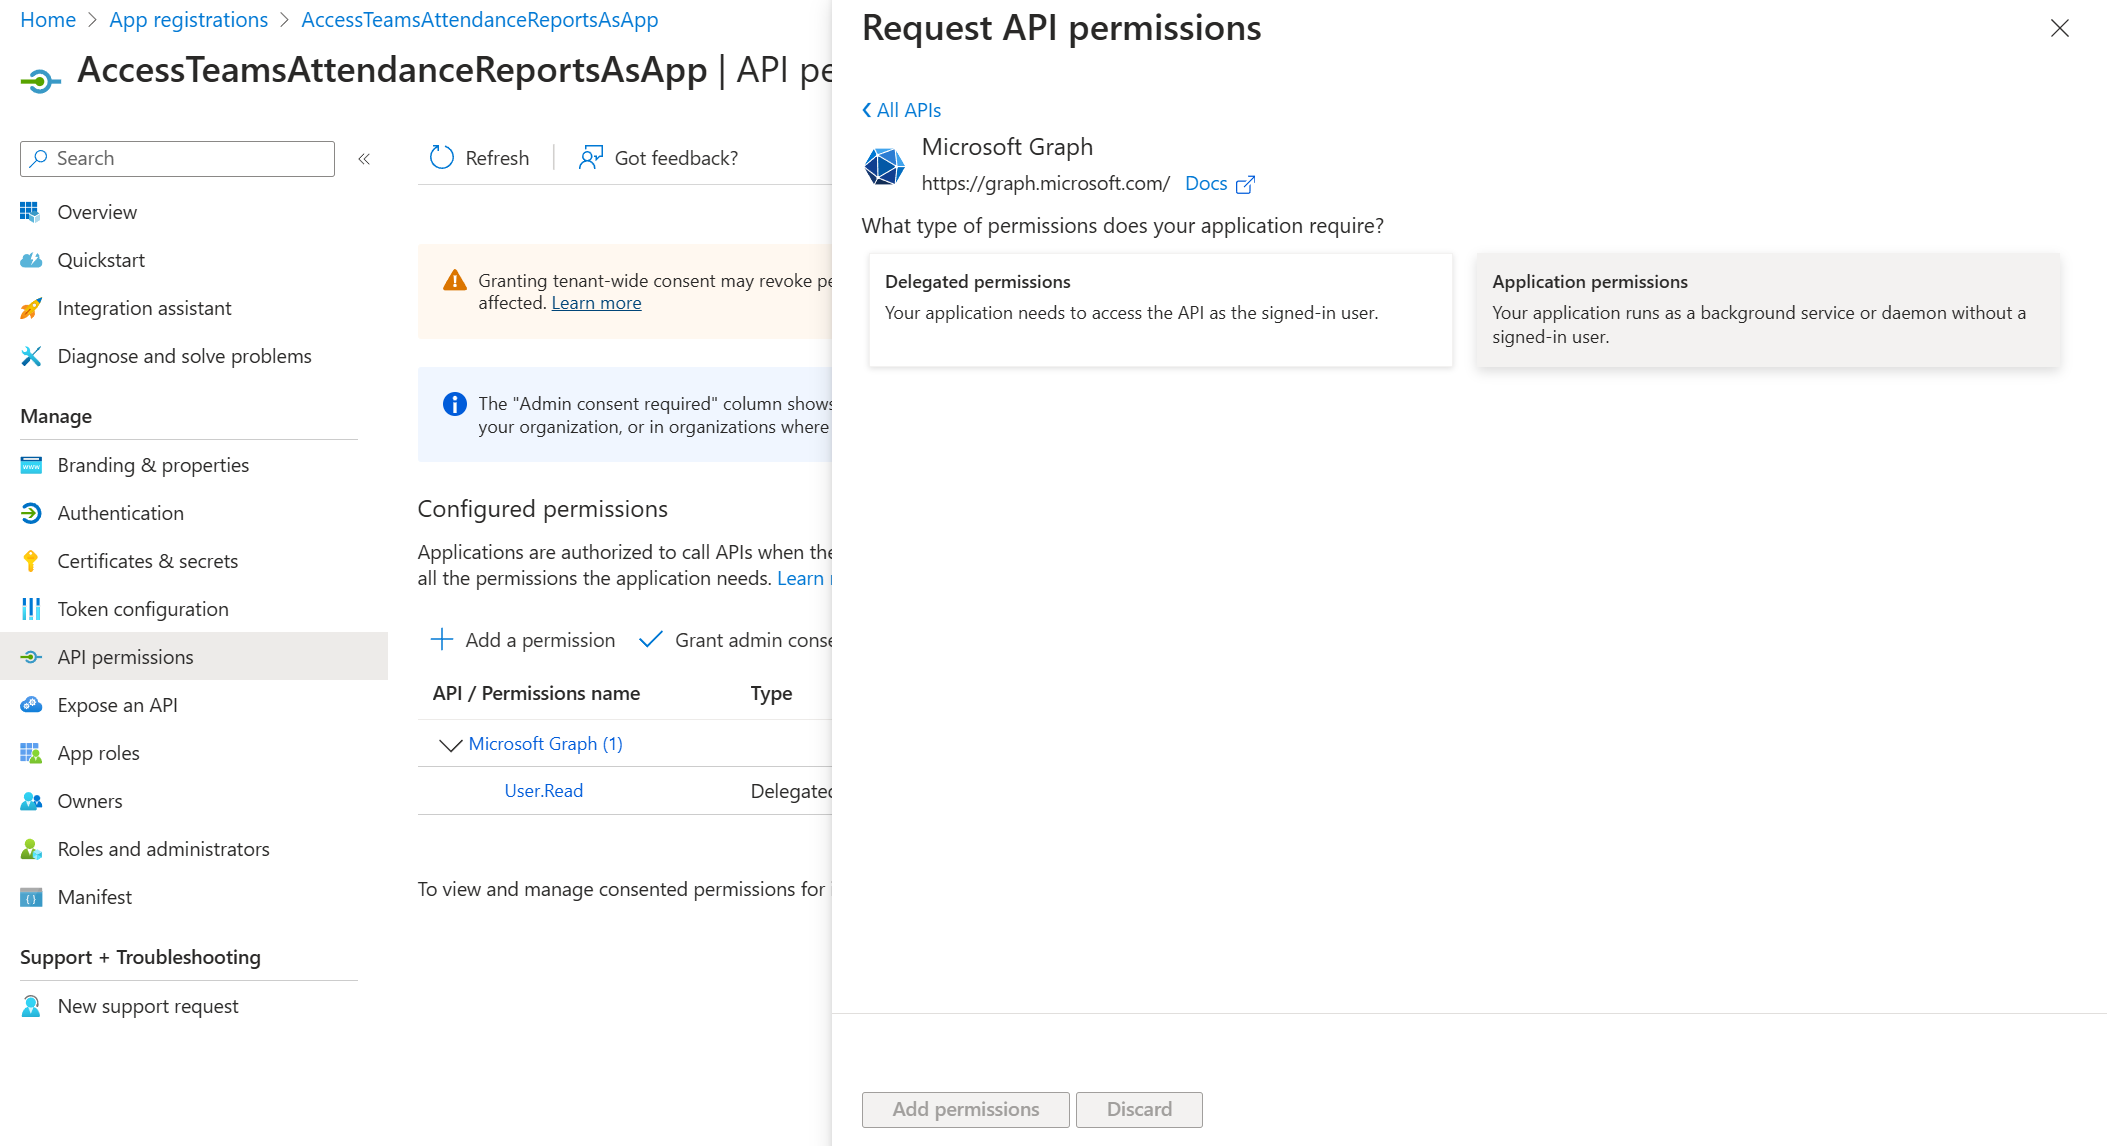
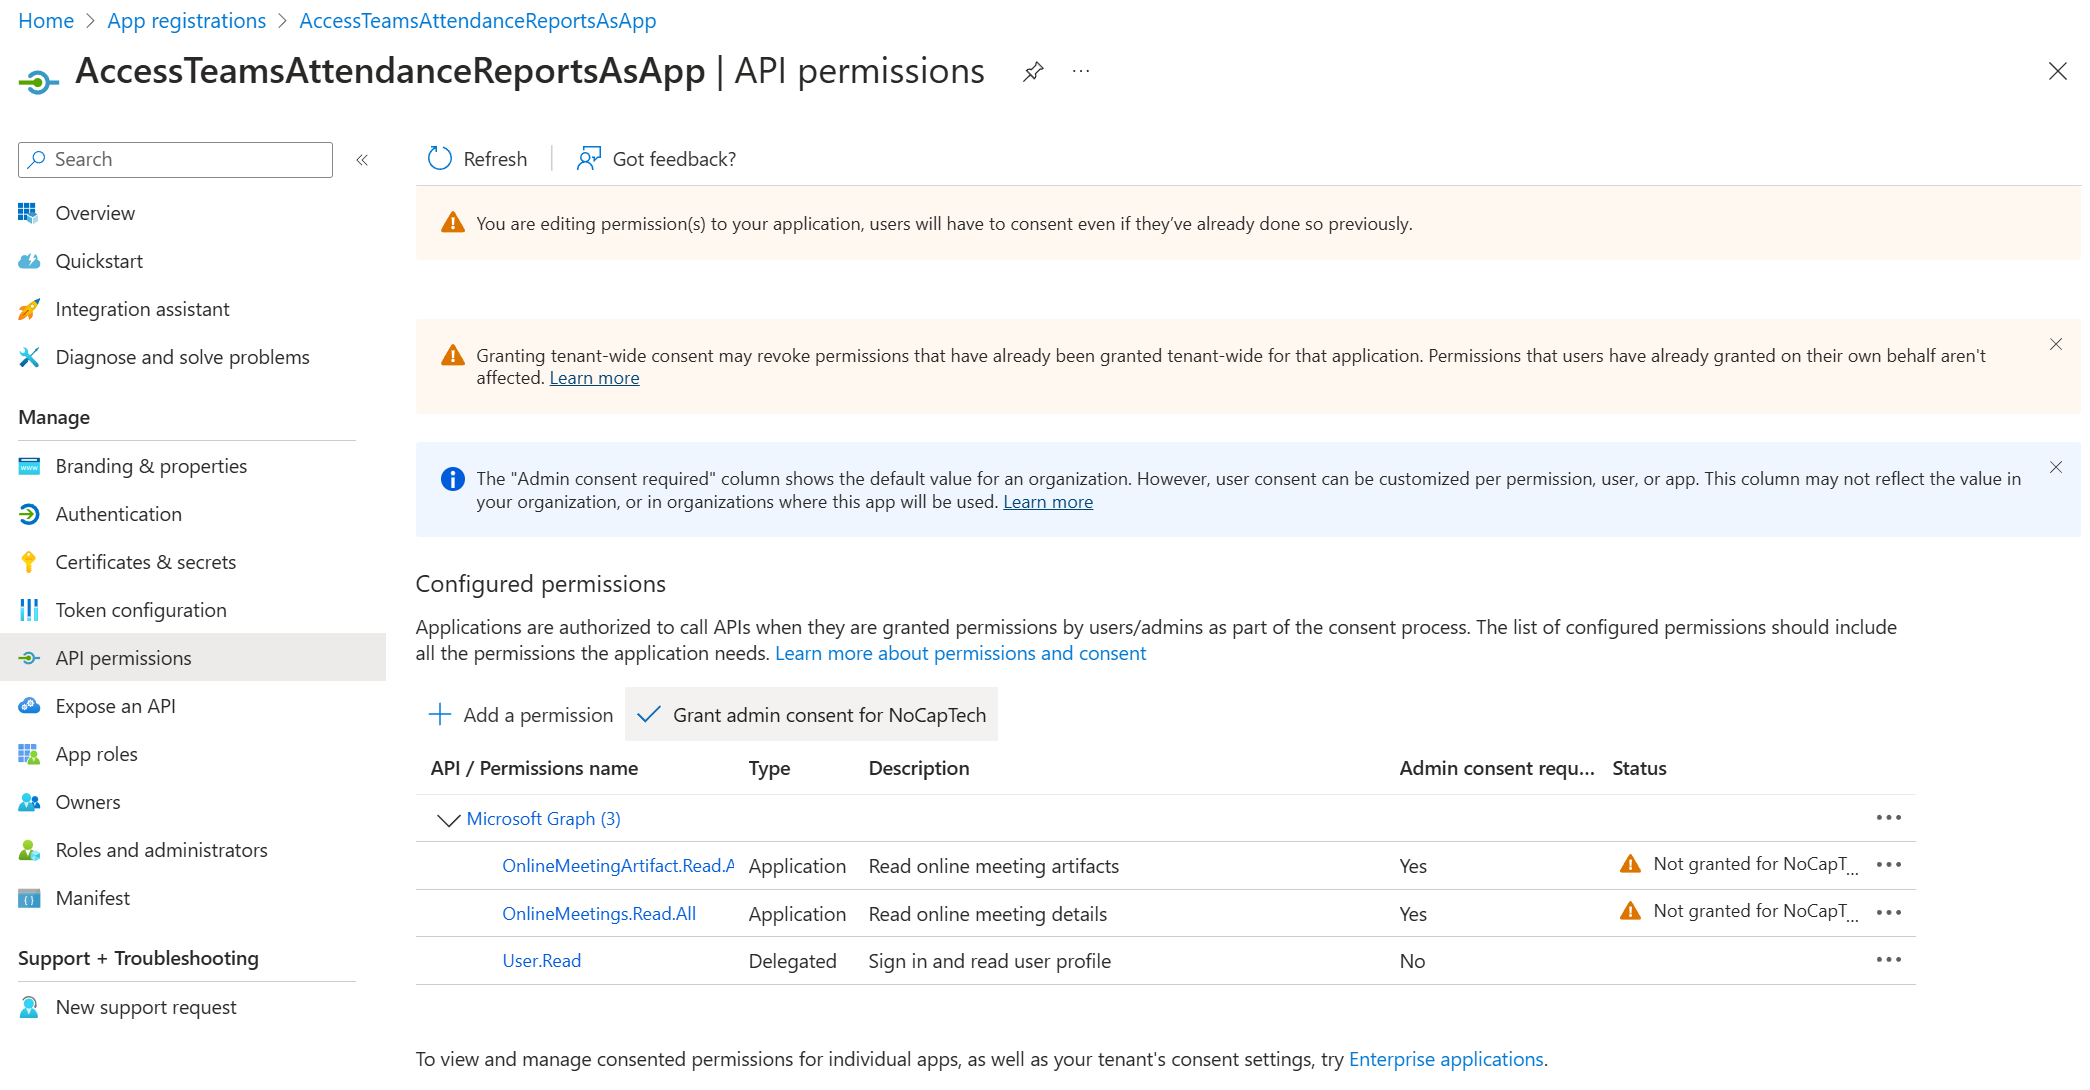
Navigate to API permissions in the left navigation pane and click + Add a permission.
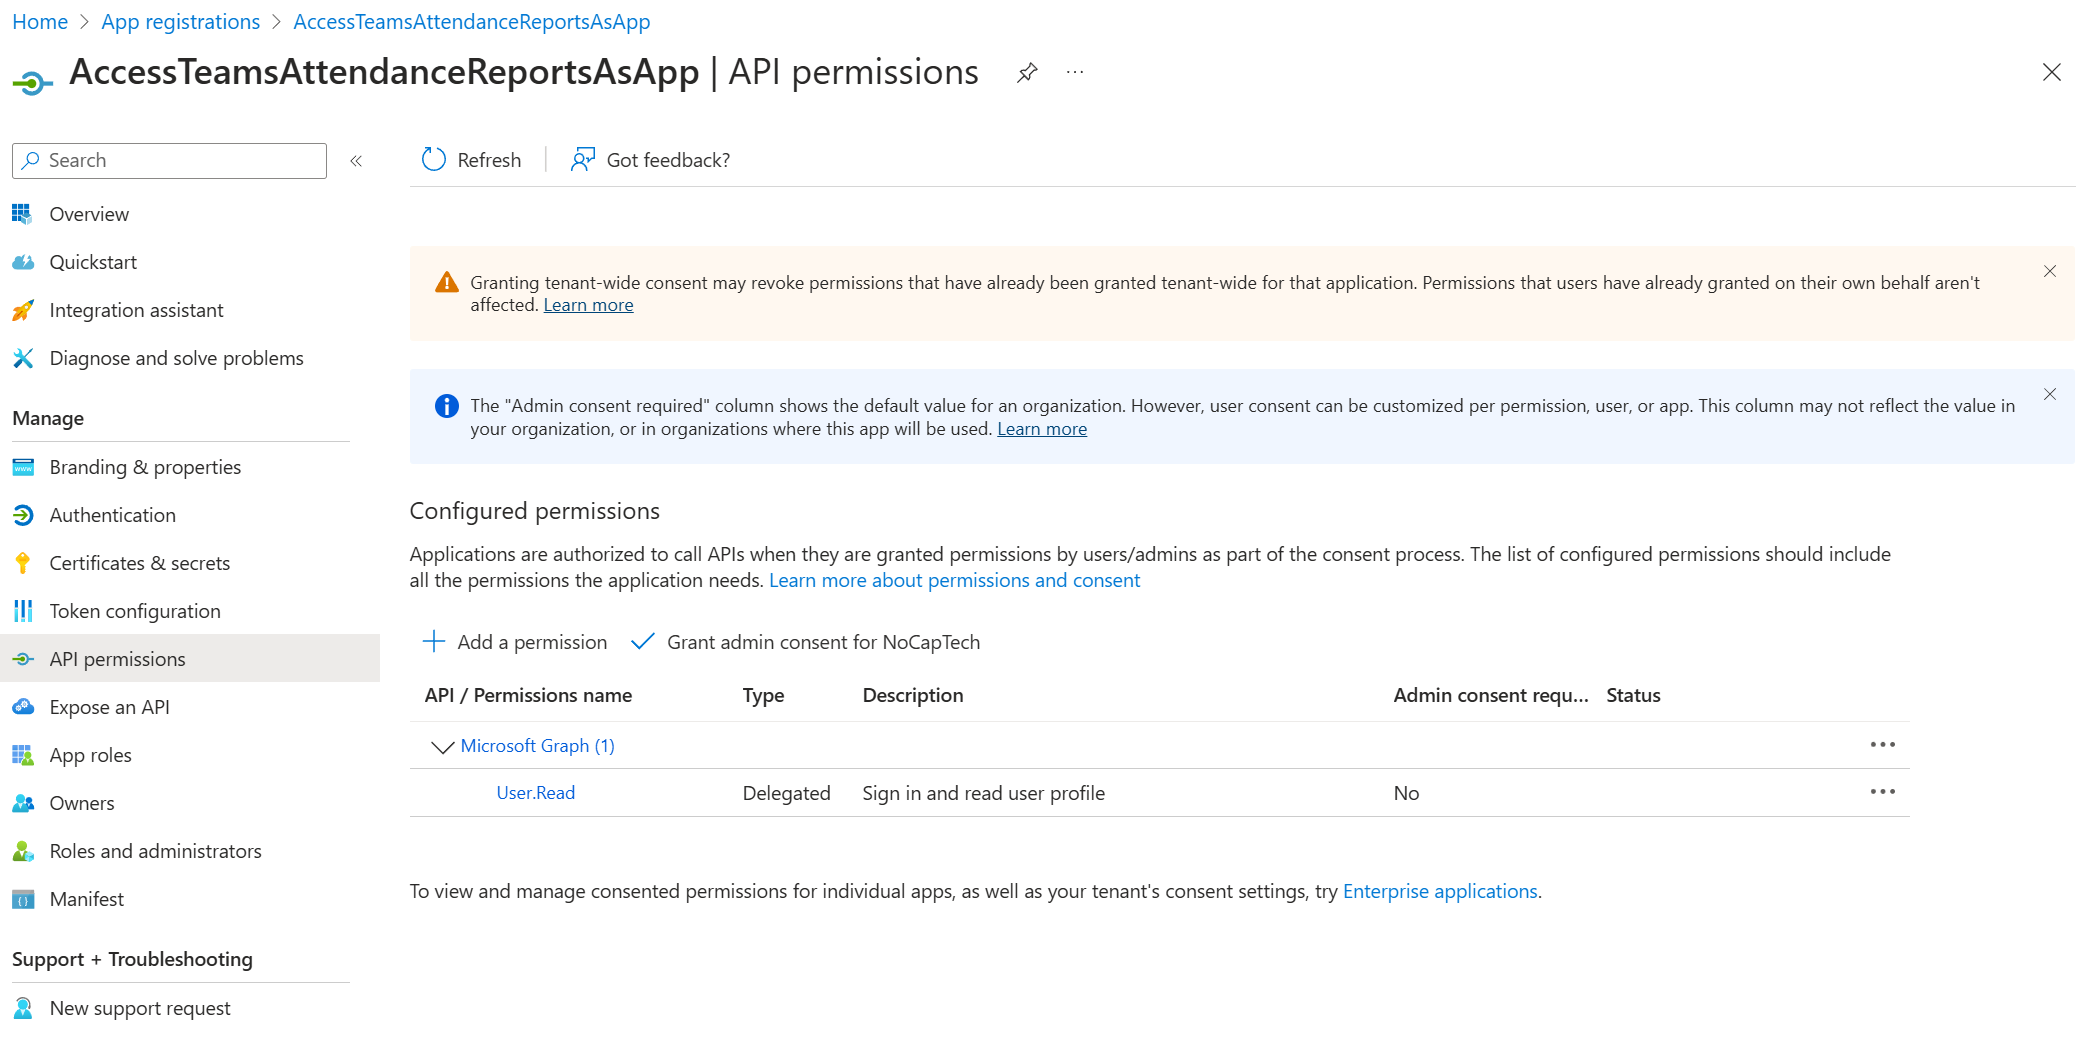
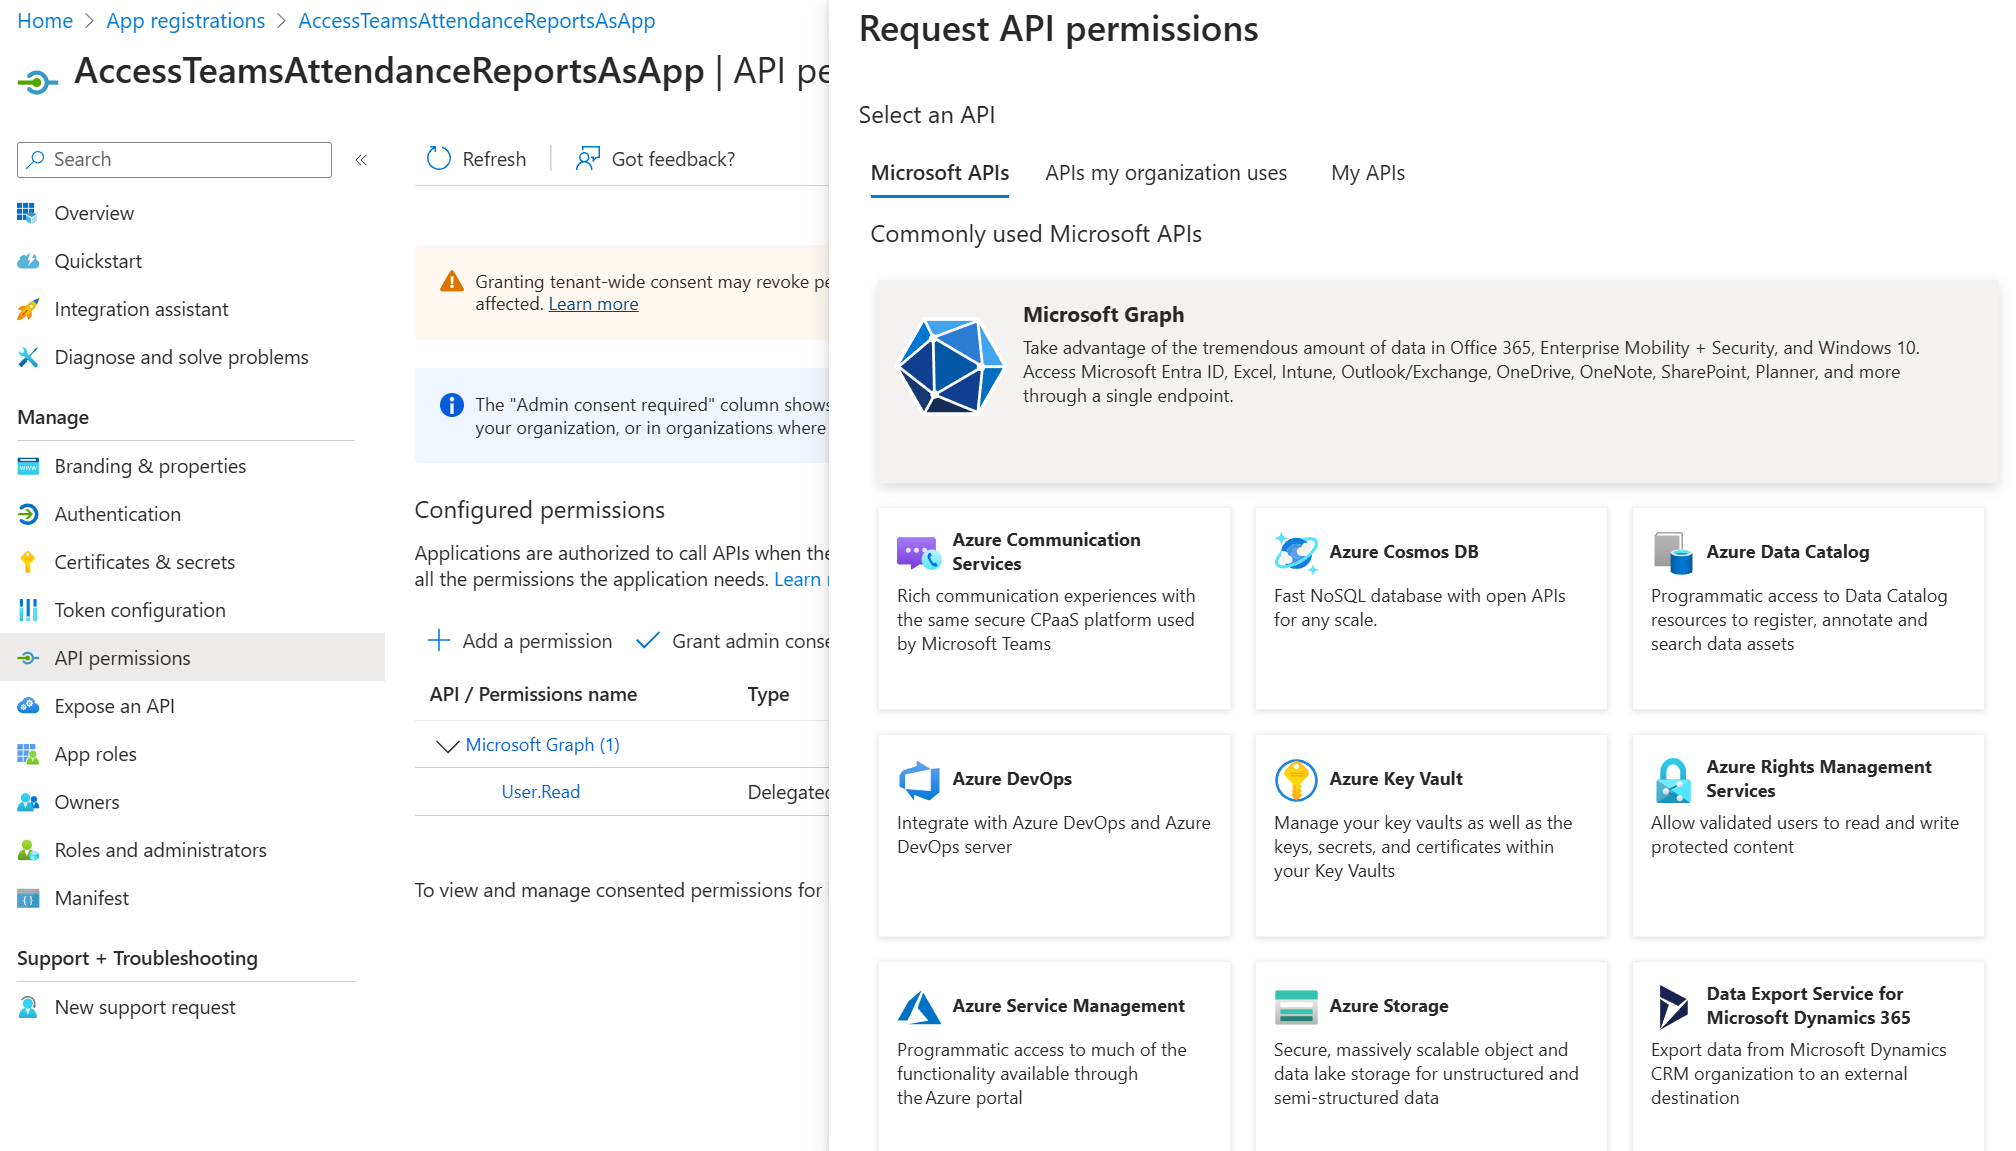
Search for OnlineMeeting and expand the menus to select OnlineMeetingArtifact.Read.All and OnlineMeetings.Read.All.
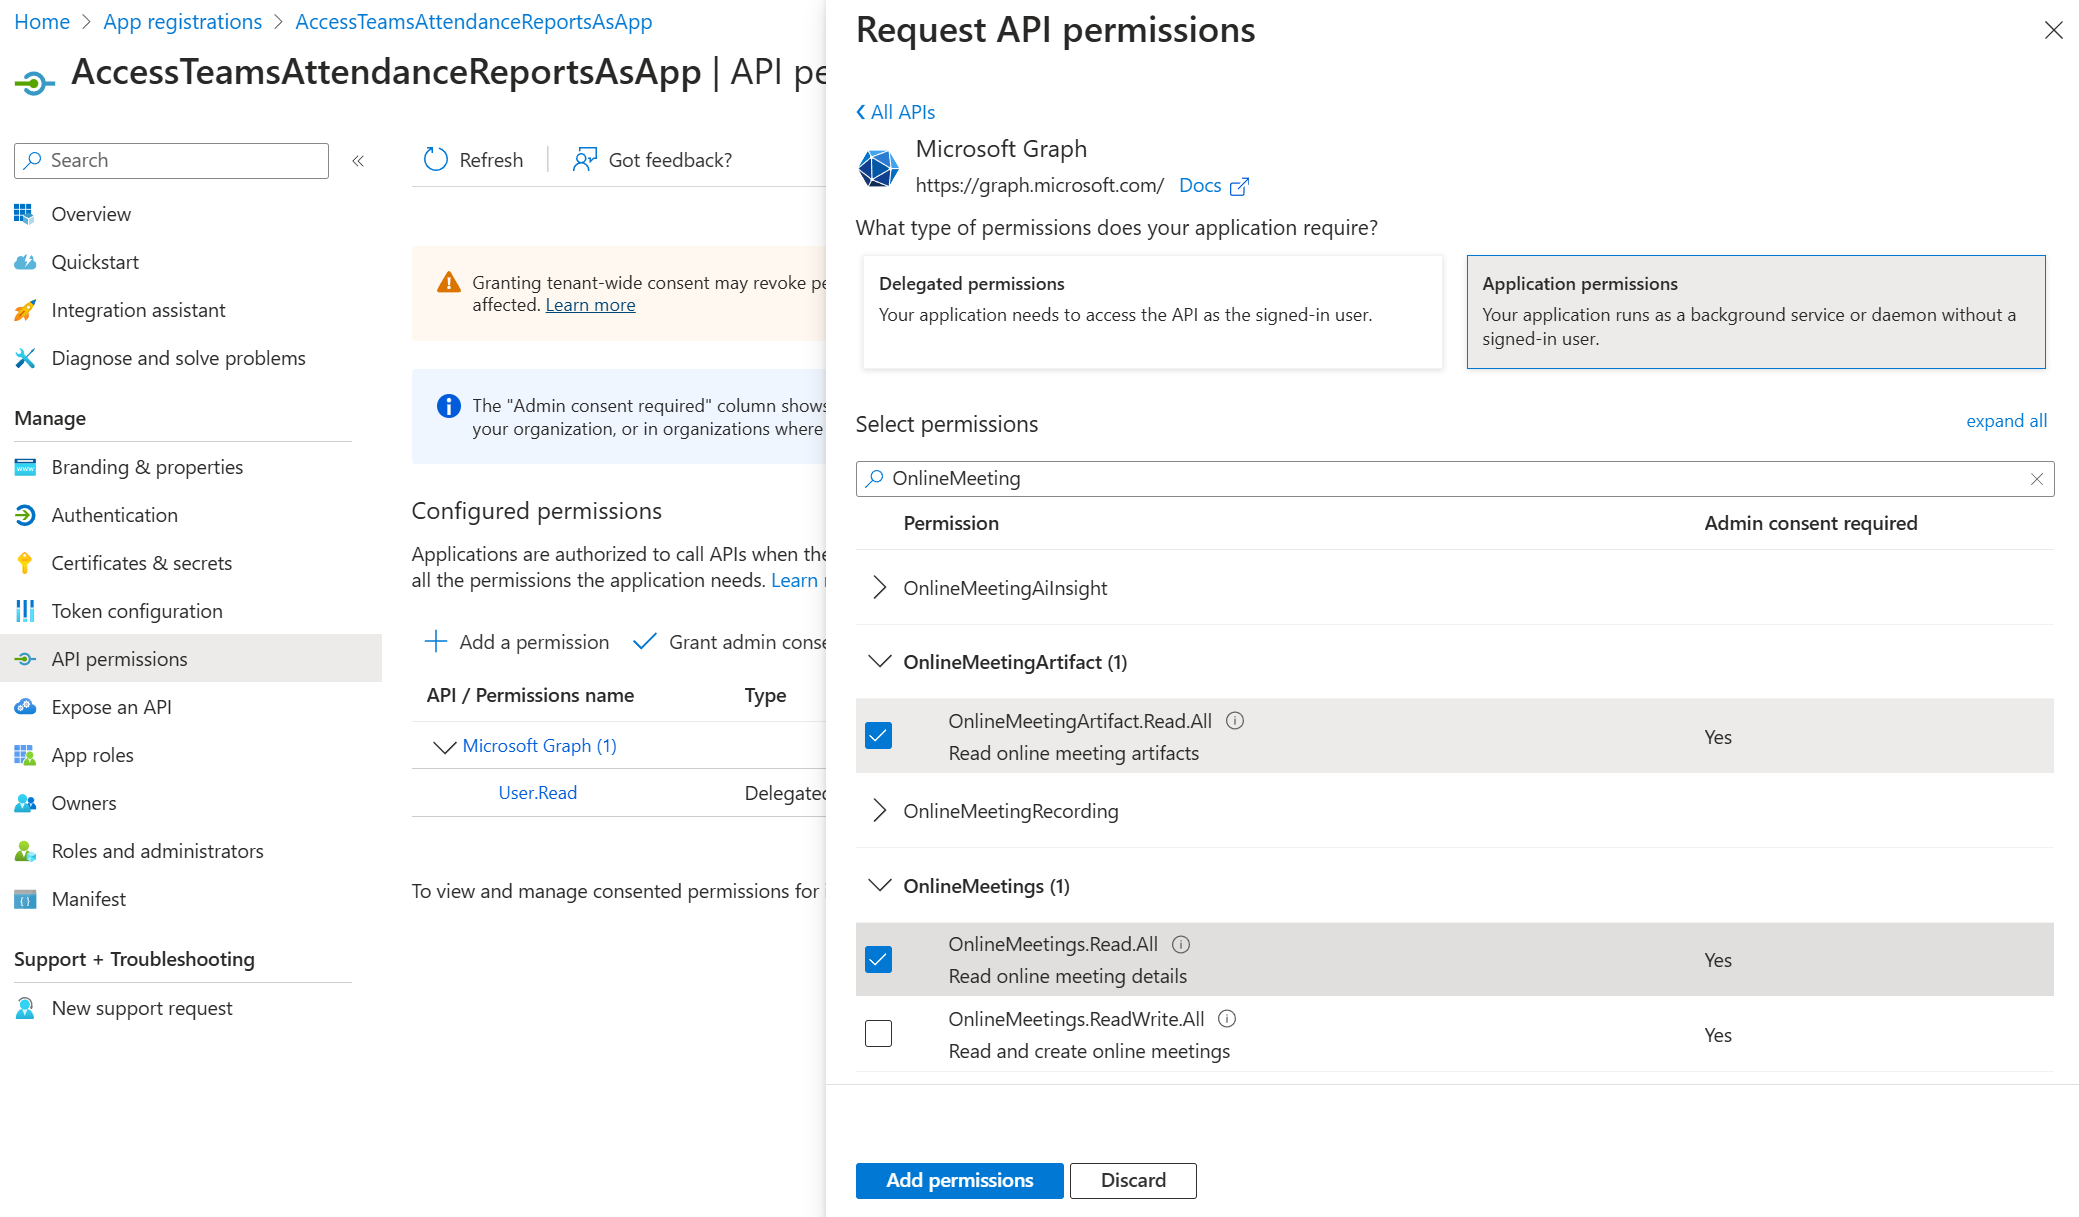
Click Add permissions and then click Grant admin consent for “Org Name”.

Add a Client Secret
Navigate to Certificates & secrets in the left navigation pane. Under Client secrets (0) click + New client secret.
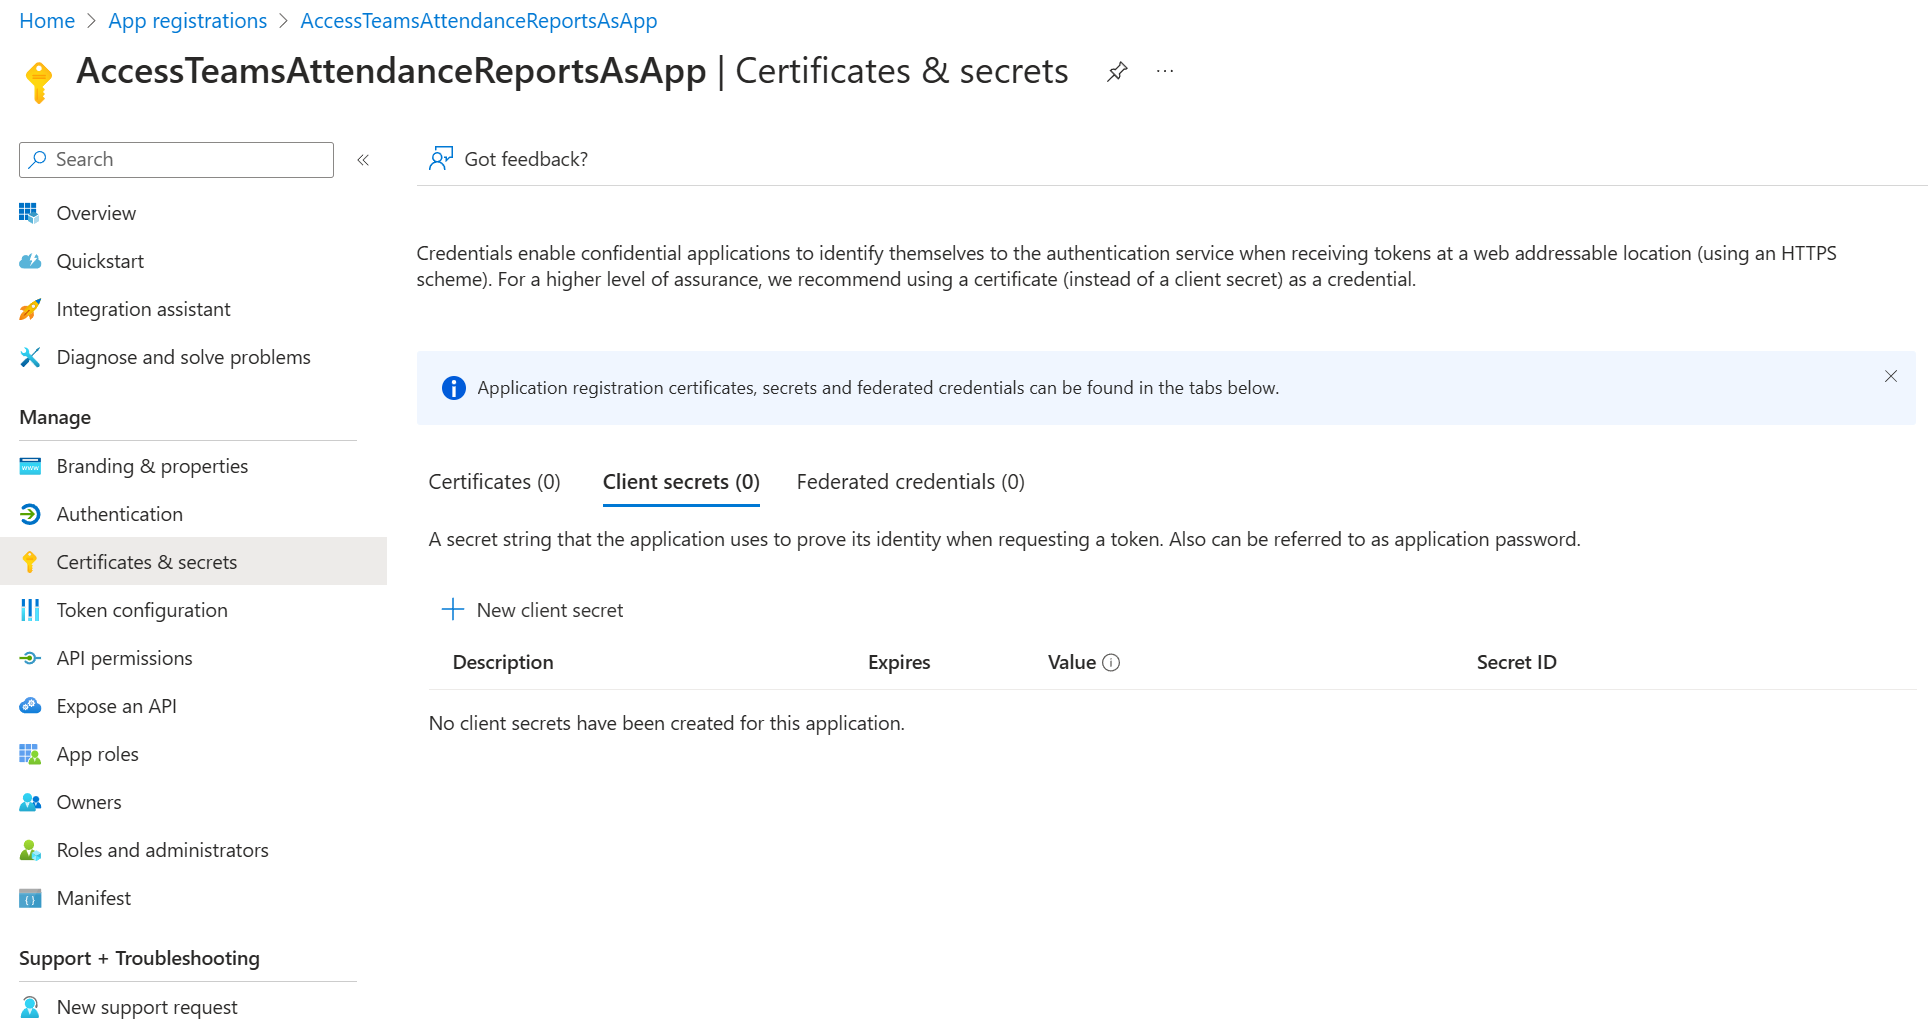
Give your secret a name and select after how many months it will expire.
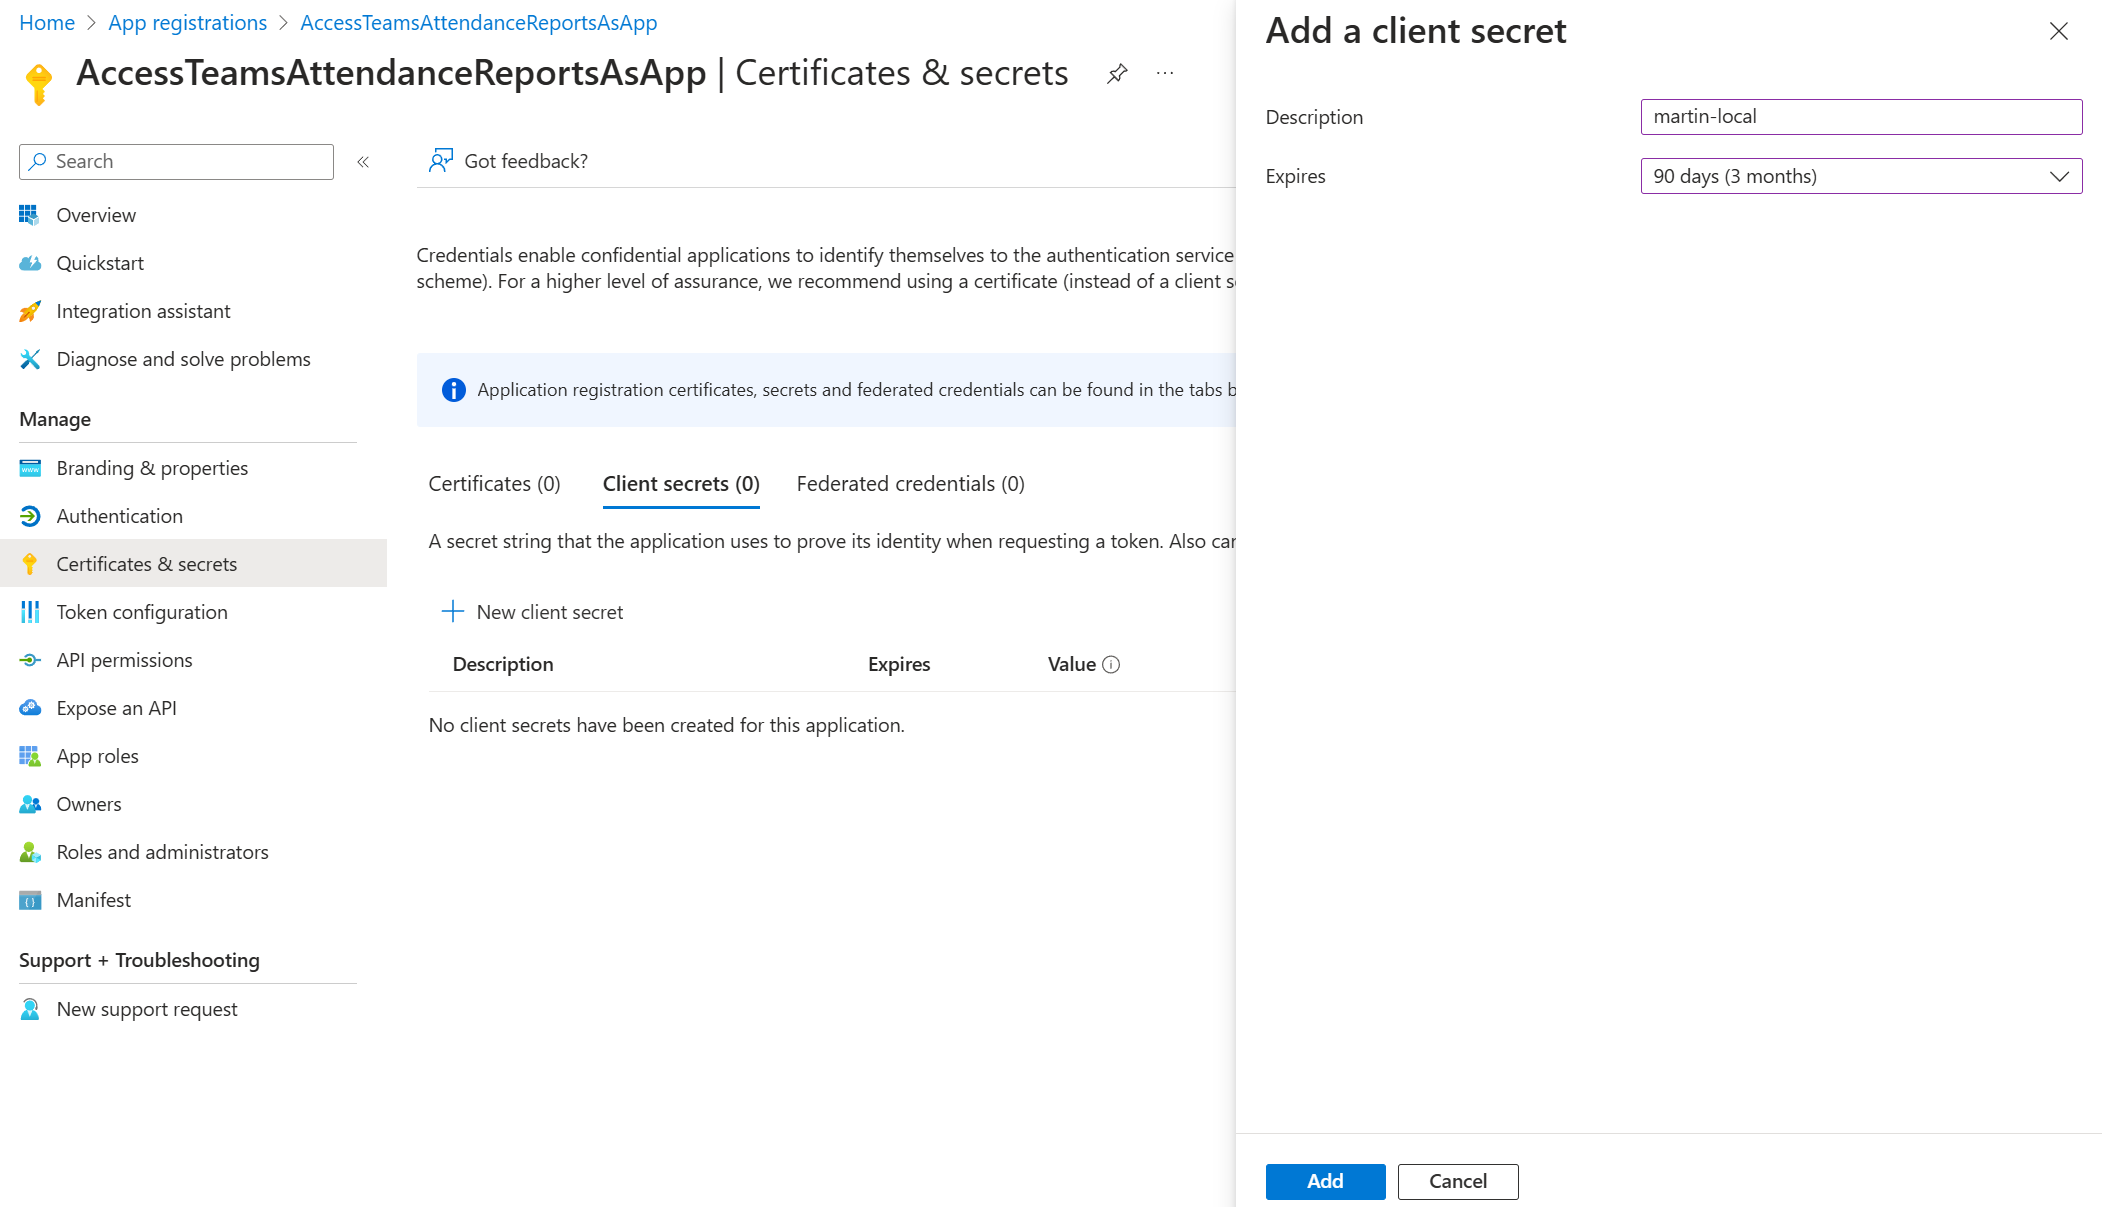
Copy the secret from the portal. It will only be shown once and you’ll need it later.
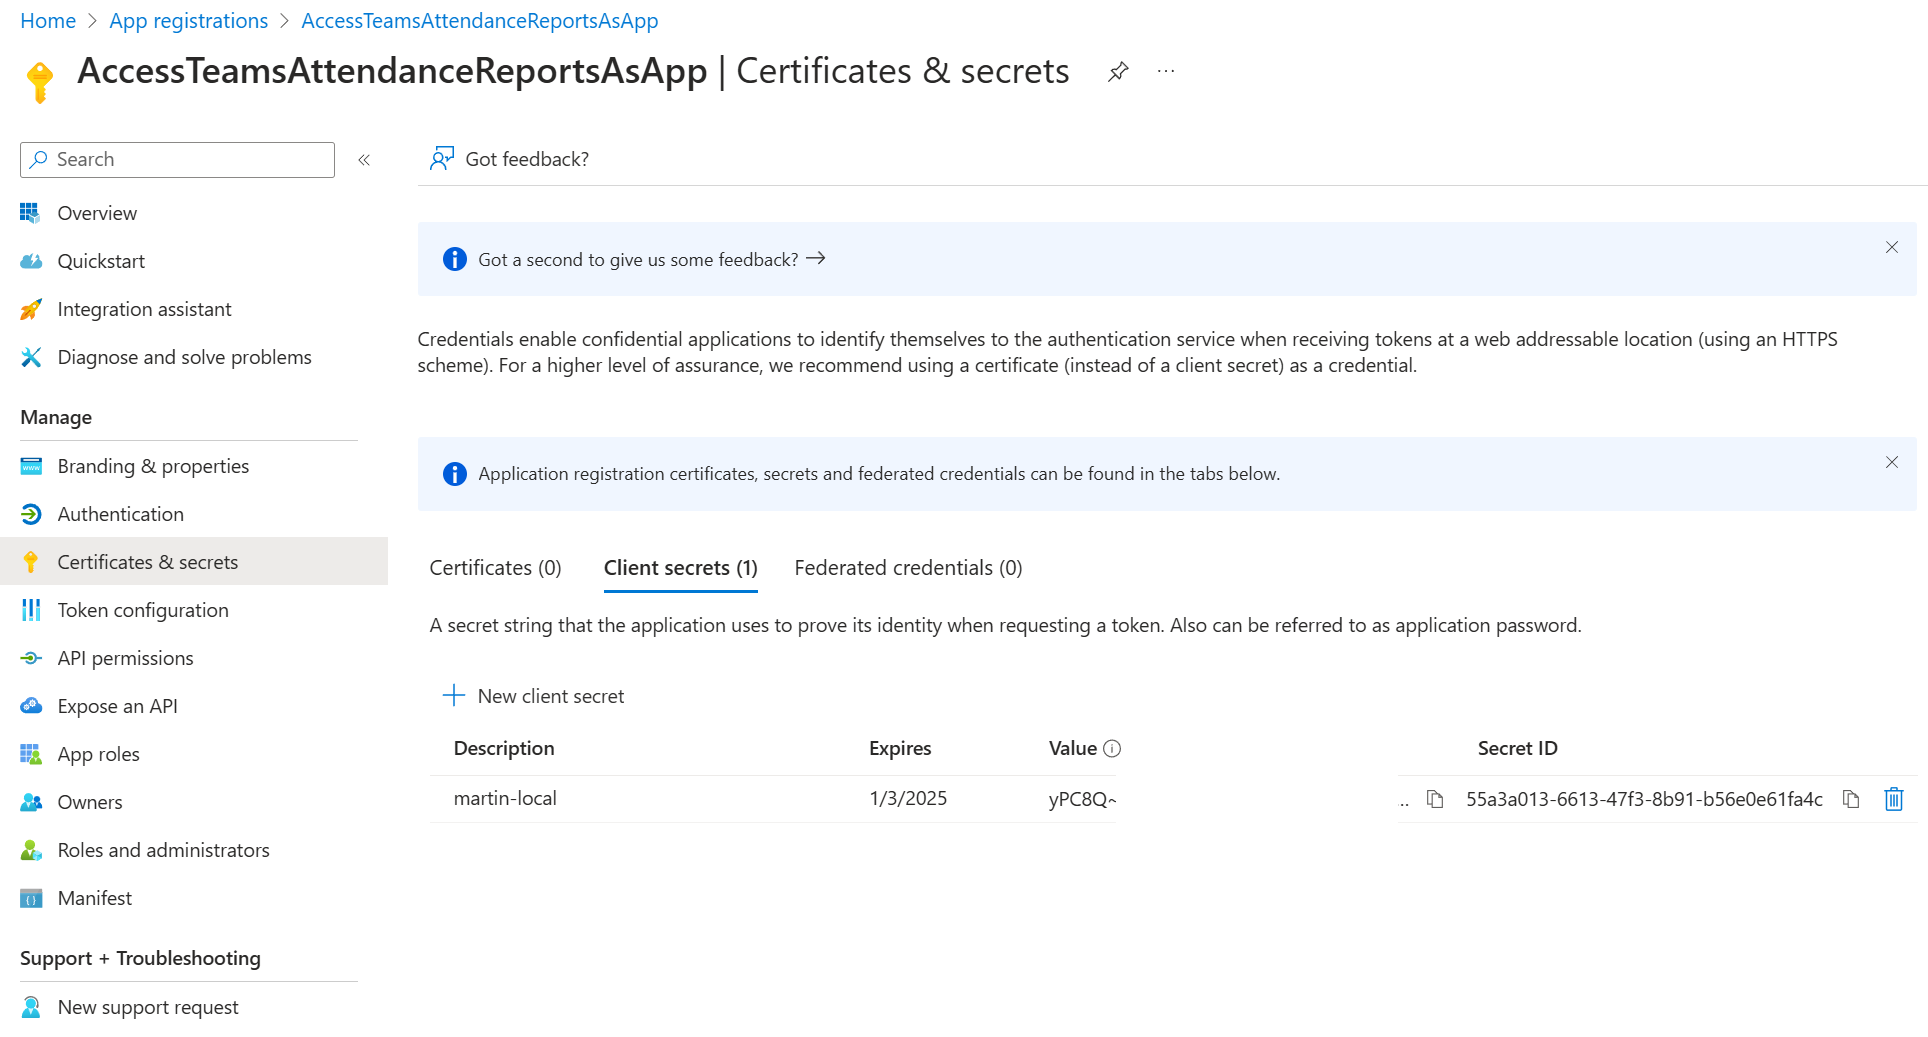
The configuration of the app registration is now complete.
Run the Script to get an Attendance Report
The script can be found in my Teams Phone Automation Repo on GitHub. If you want to make use of the secret encryption feature, you’ll need to clone the entire repo because of the dependencies of other files in the repo.
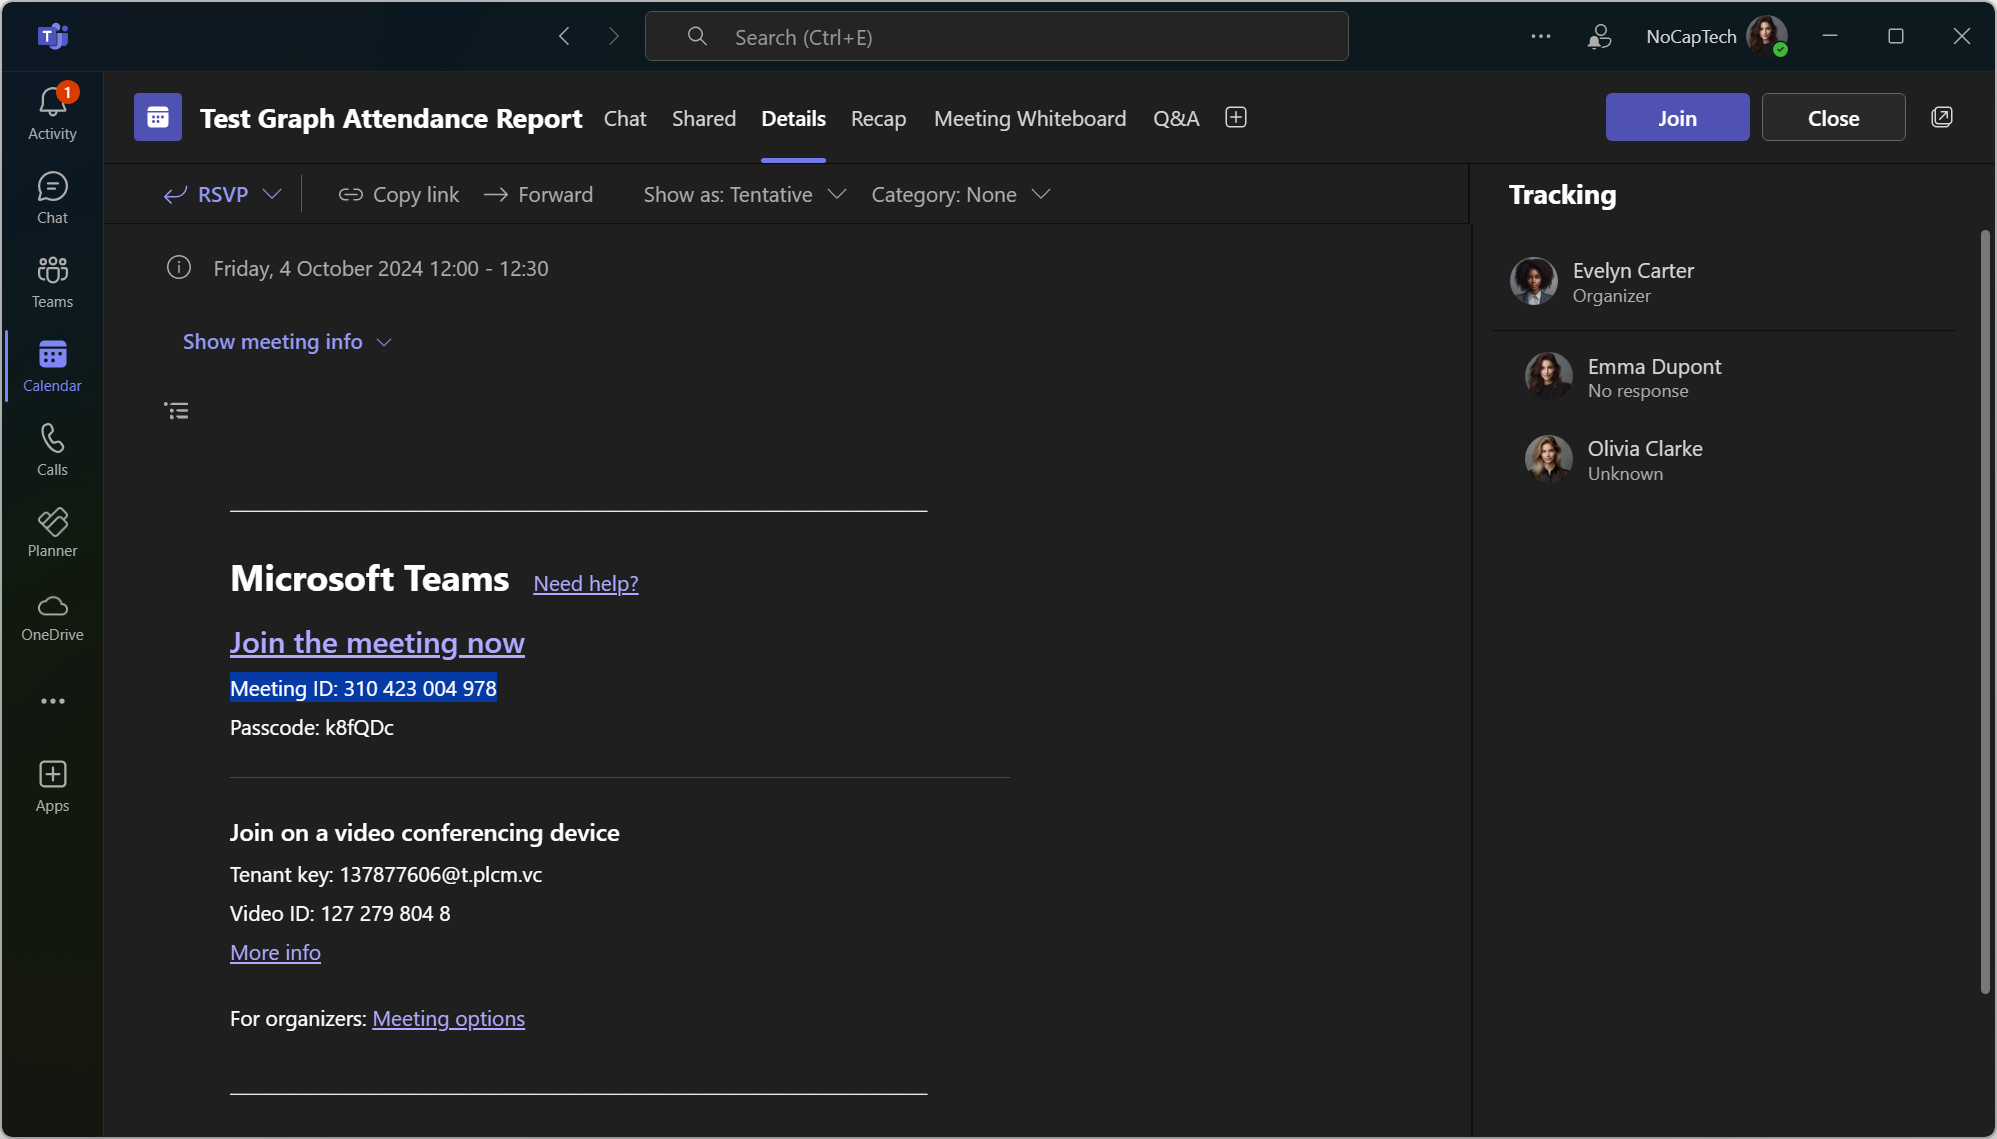
To be able to retrieve an attendance report from Microsoft Graph, we need a meeting id. Unfortunately, this is not your typical GUID you could easily find in TAC. But we can, however find it easy enough by passing a Join meeting ID.
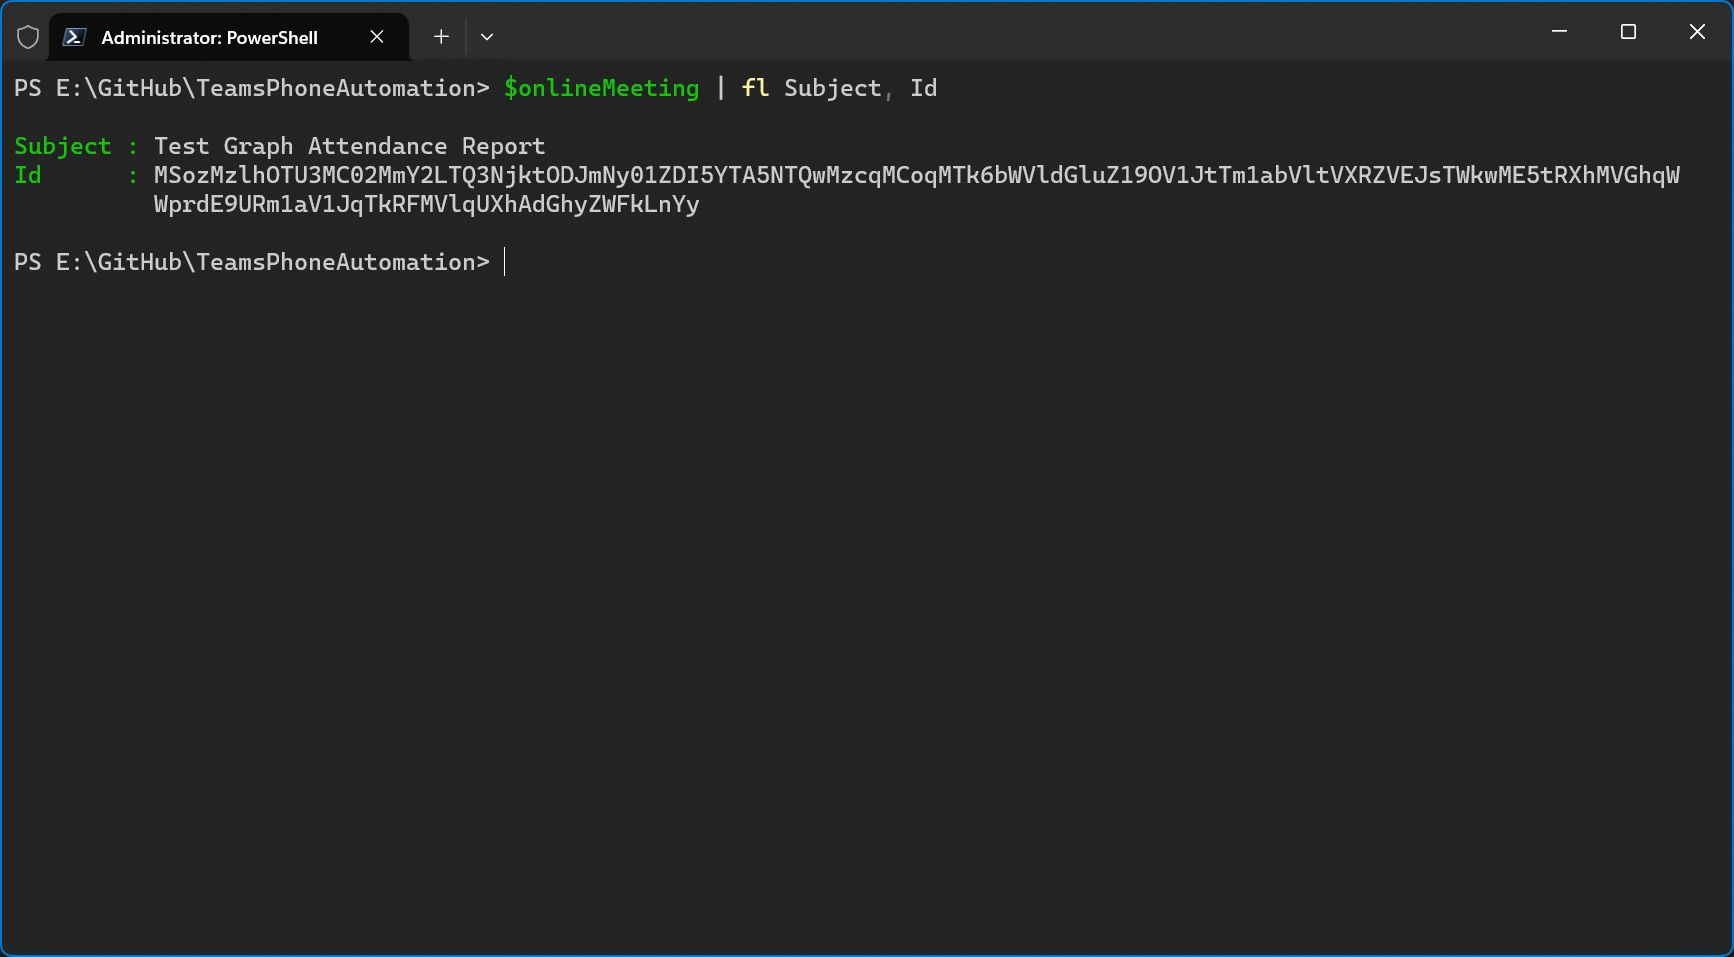
Luckily, anyone that was invited to the meeting in question can view the Meeting ID and send it to you. Alternatively, the meeting invite could also be forwarded to you. The meeting Id is located below the join link.
Once you have this ID, you’re ready to get the attendance report through PowerShell.
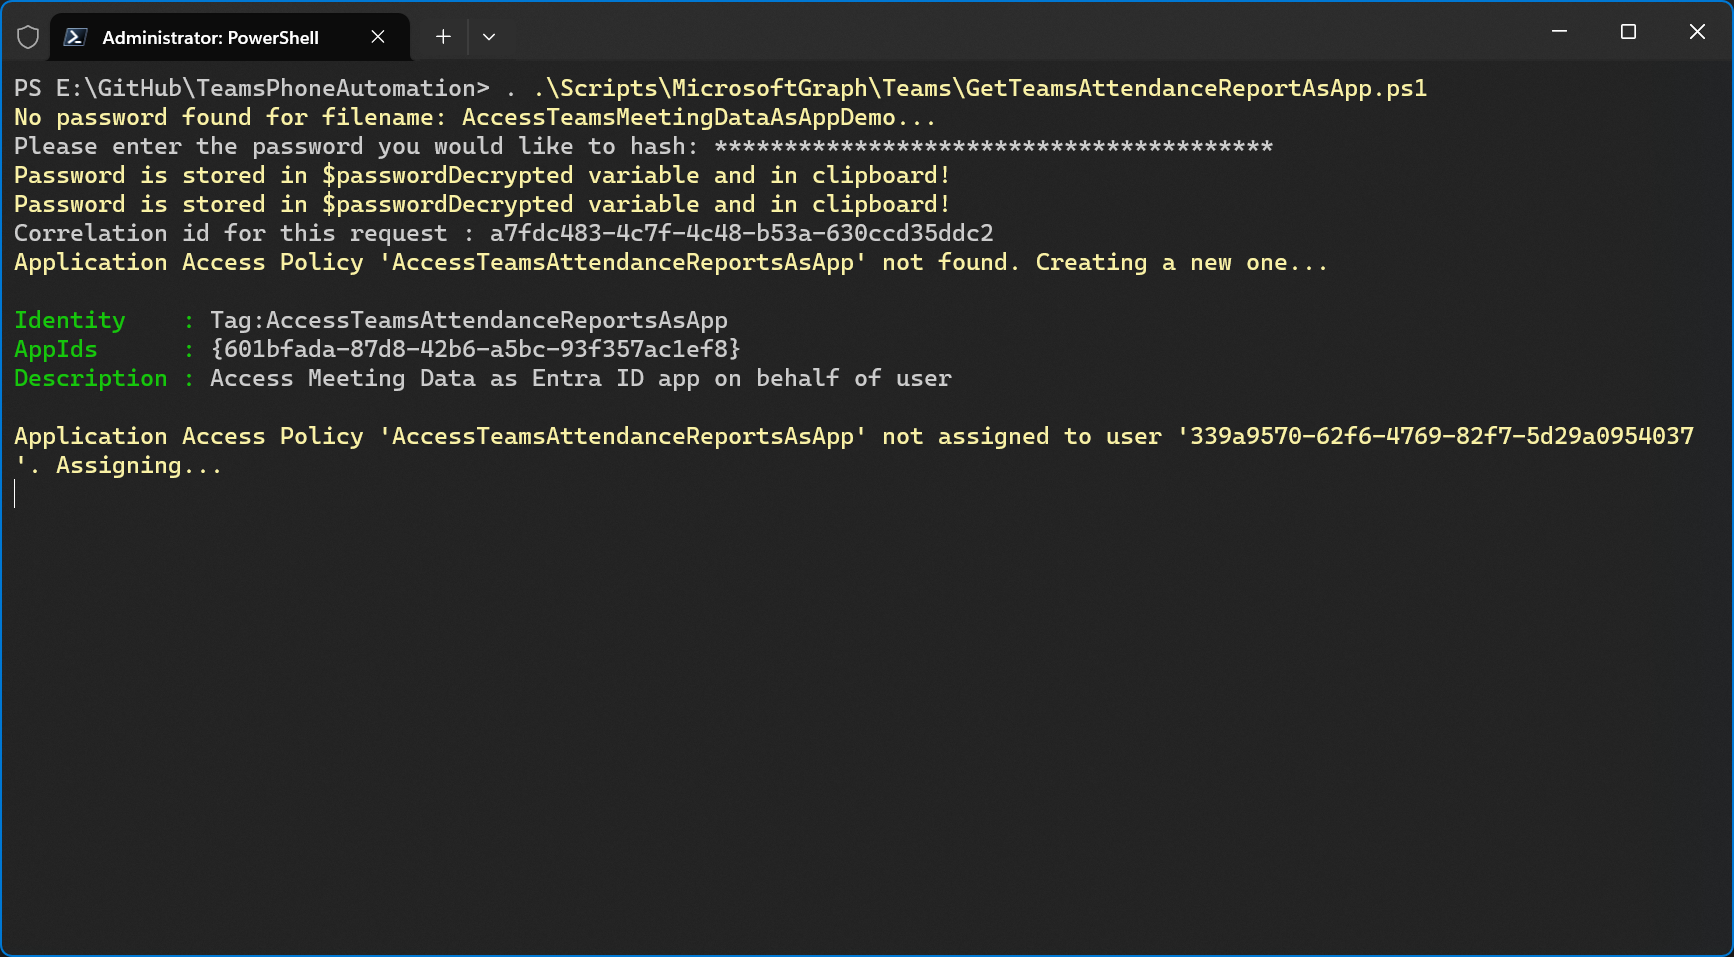
Teams Application Access Policy
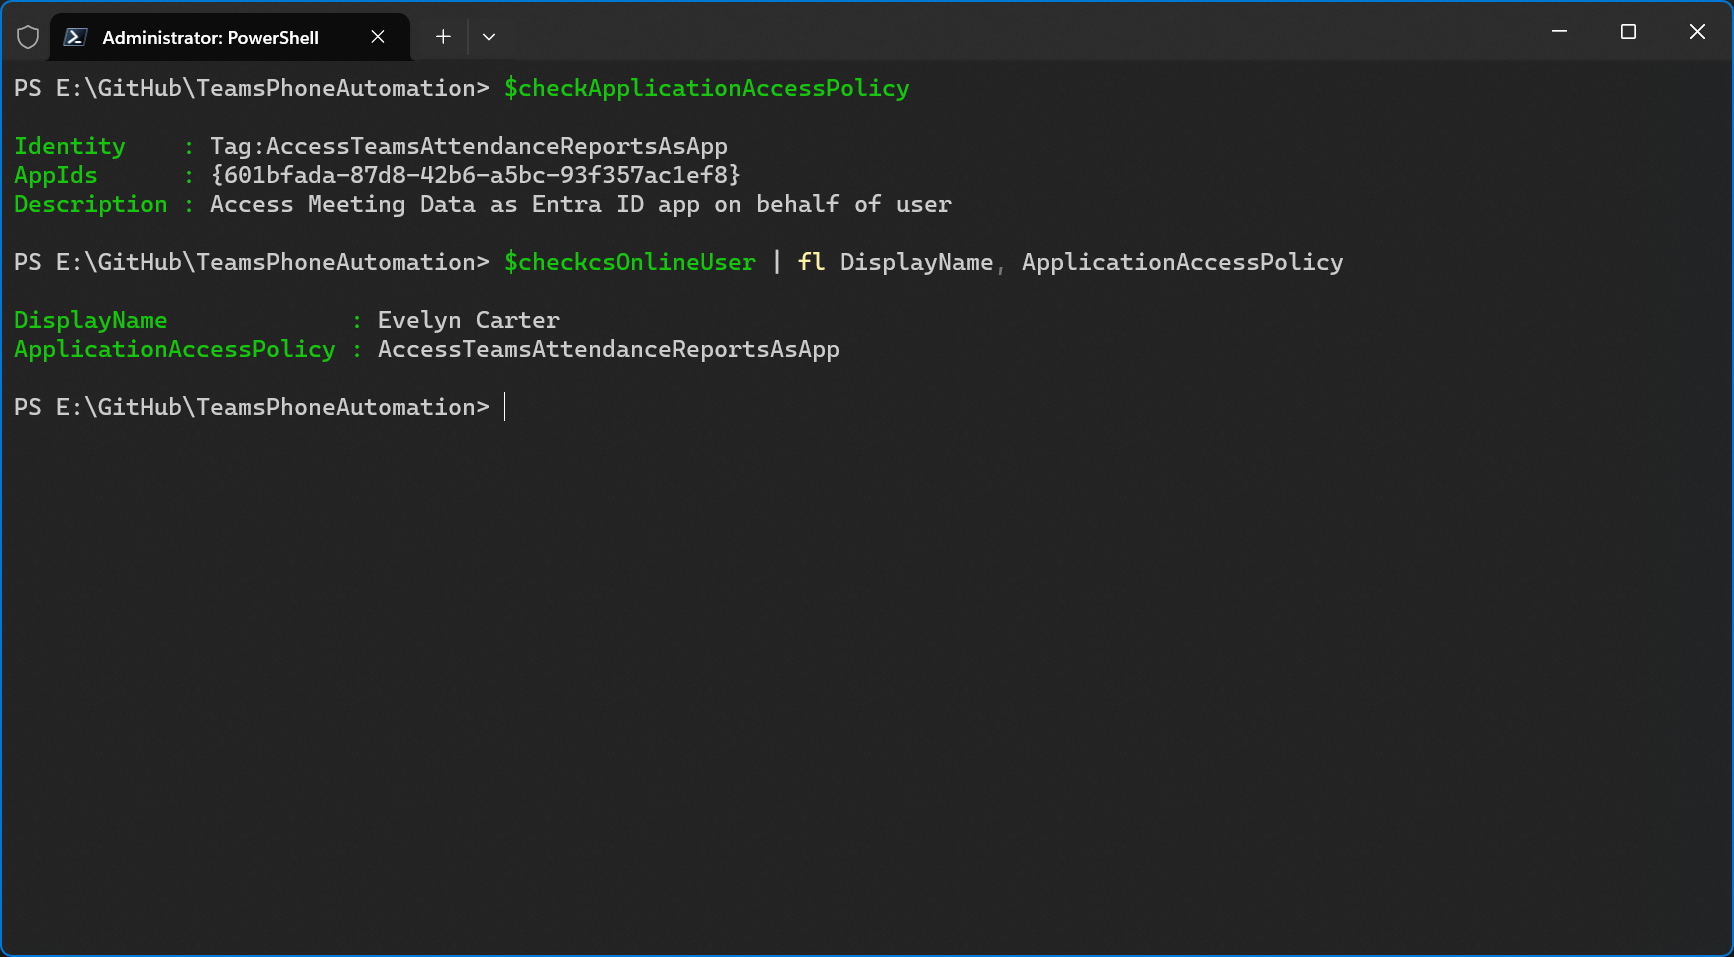
The Graph permissions alone are not enough to access the attendance report. We also need to create a new Teams Application Access Policy which includes the app id of the newly created Entra ID app and grant it to the meeting organizer. This is how you can do it in PowerShell.
|
|
|
|
Grant-CsApplicationAccessPolicy
But the script does all of this automatically for you.
Unassign Teams Application Access Policy
If you only want to get an attendance report once and need to remove the application access to another user’s meeting details, you can unassign the policy again by using this code.
|
|
Script Prompts
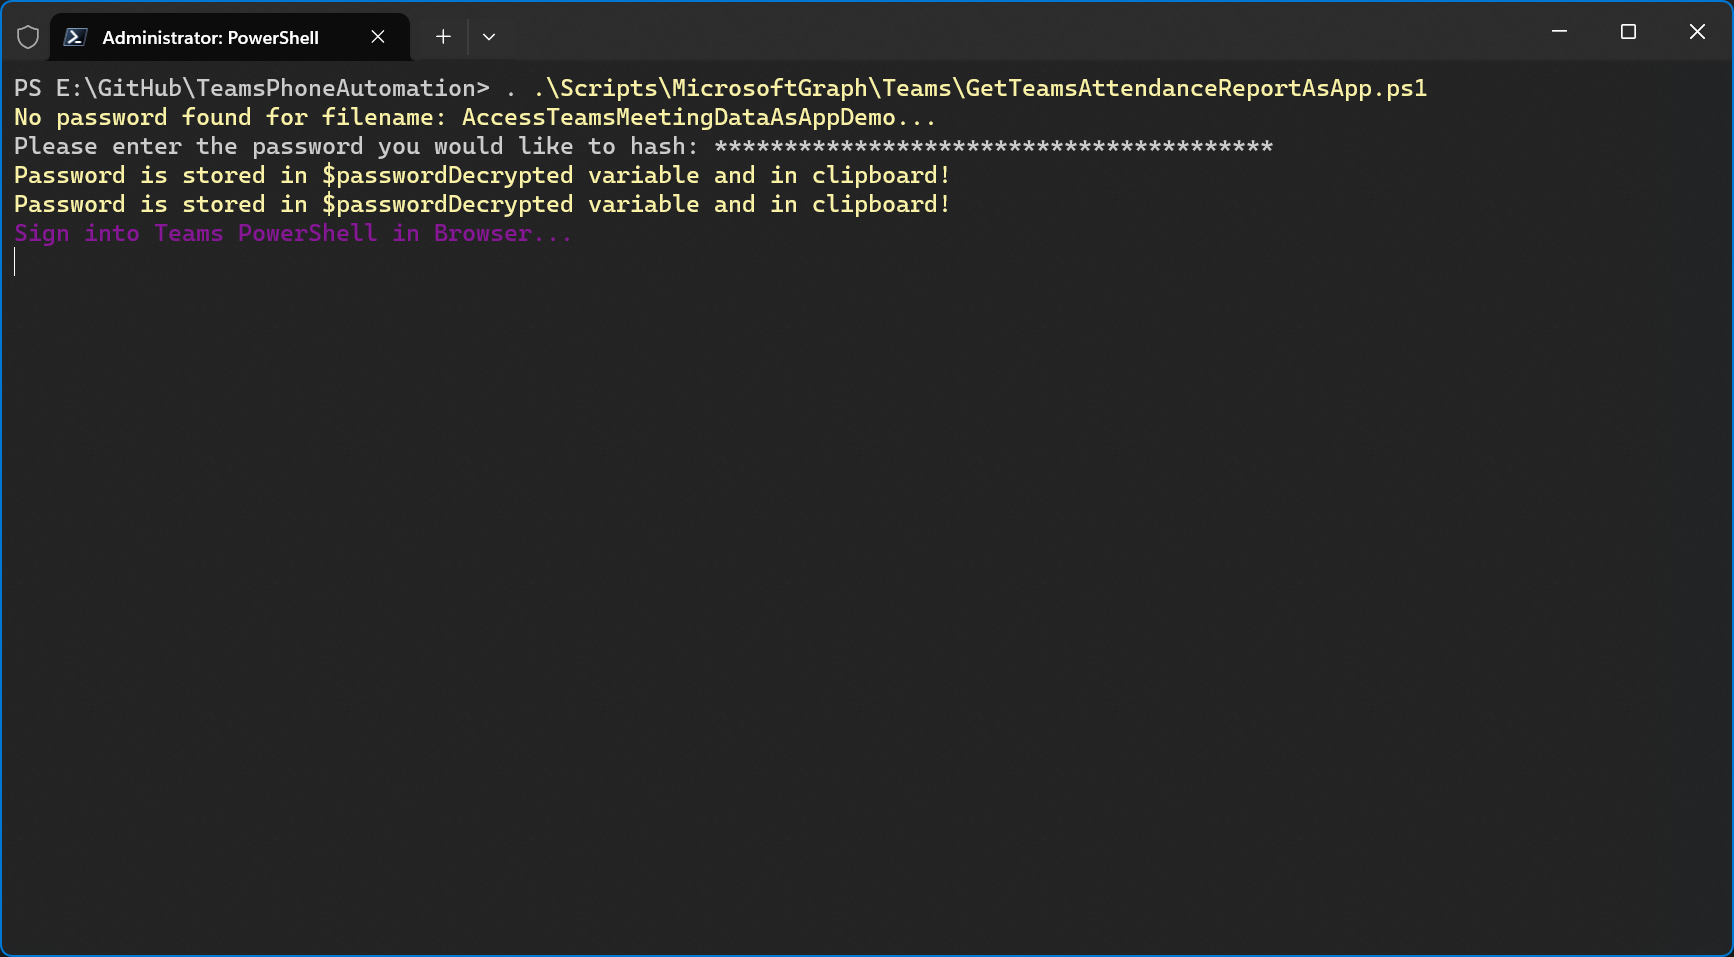
When the script runs for the first time it will ask you for your app secret. Paste it into the terminal. This will save your secret in an encrypted format. Only the signed in user (in Windows) can decrypt it and it can only be decrypted on the same machine on which it was encrypted. You’ll also be asked to sign into Teams PowerShell as well.

Results
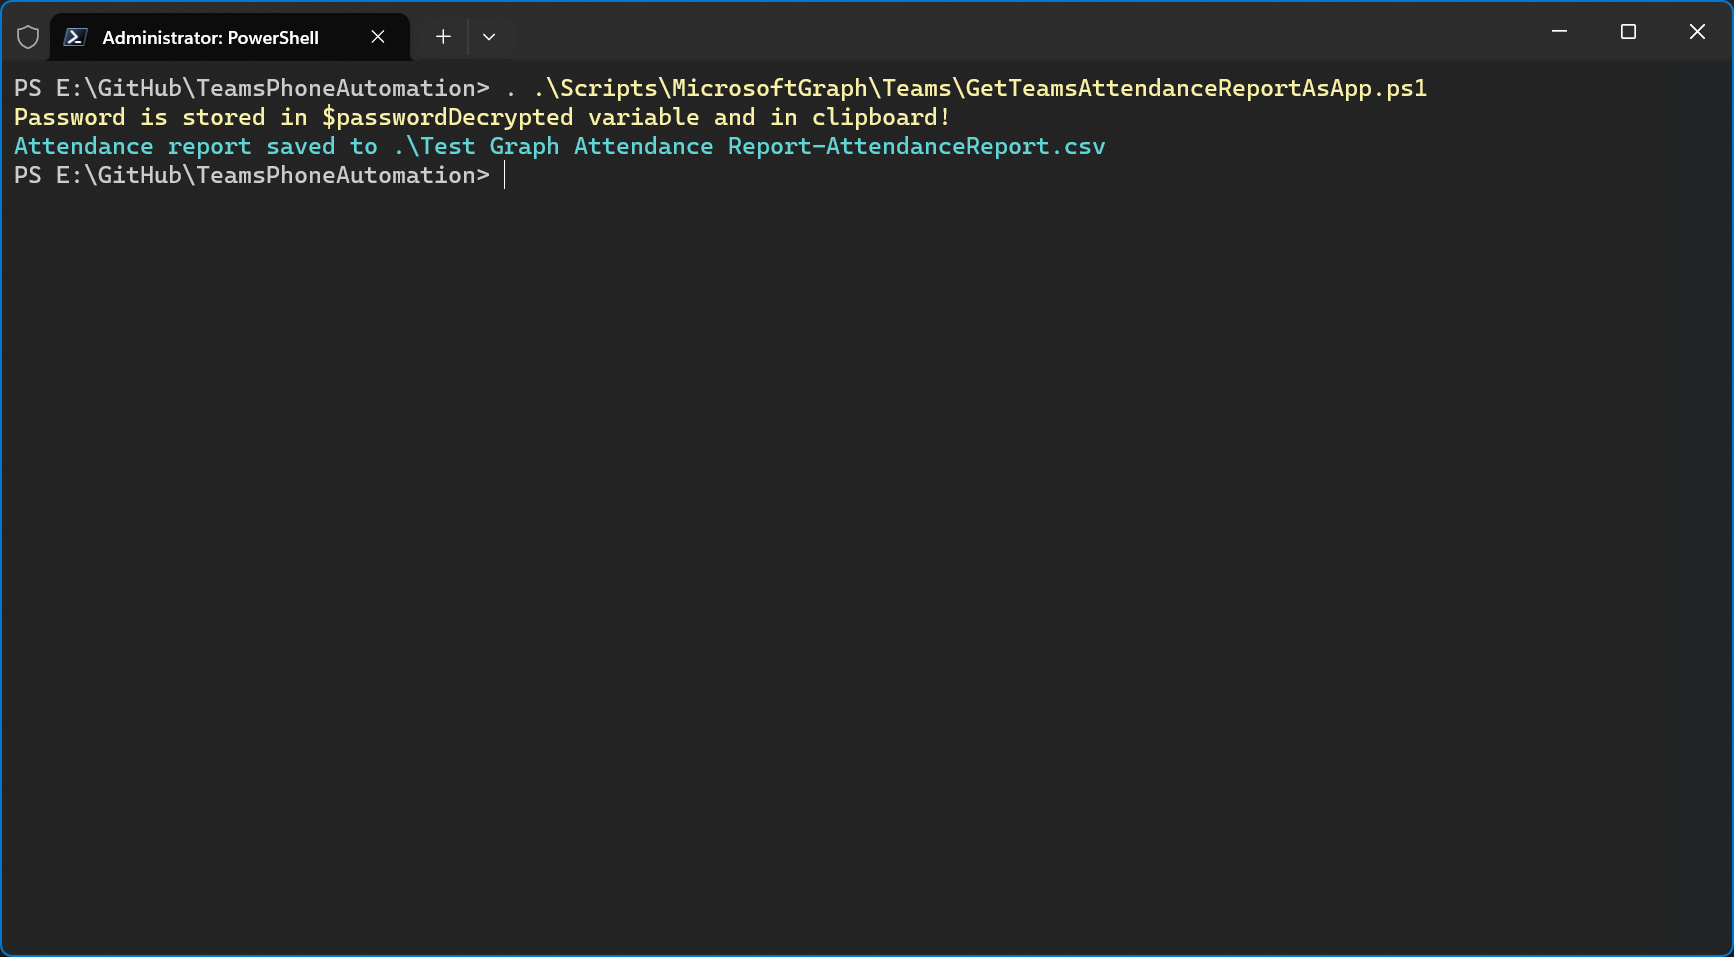
Once the Application Access Policy already exists and was already granted to the organizer, the console output looks much less cluttered. The report will be saved to the current directory and it’s filename will include the subject of the meeting.
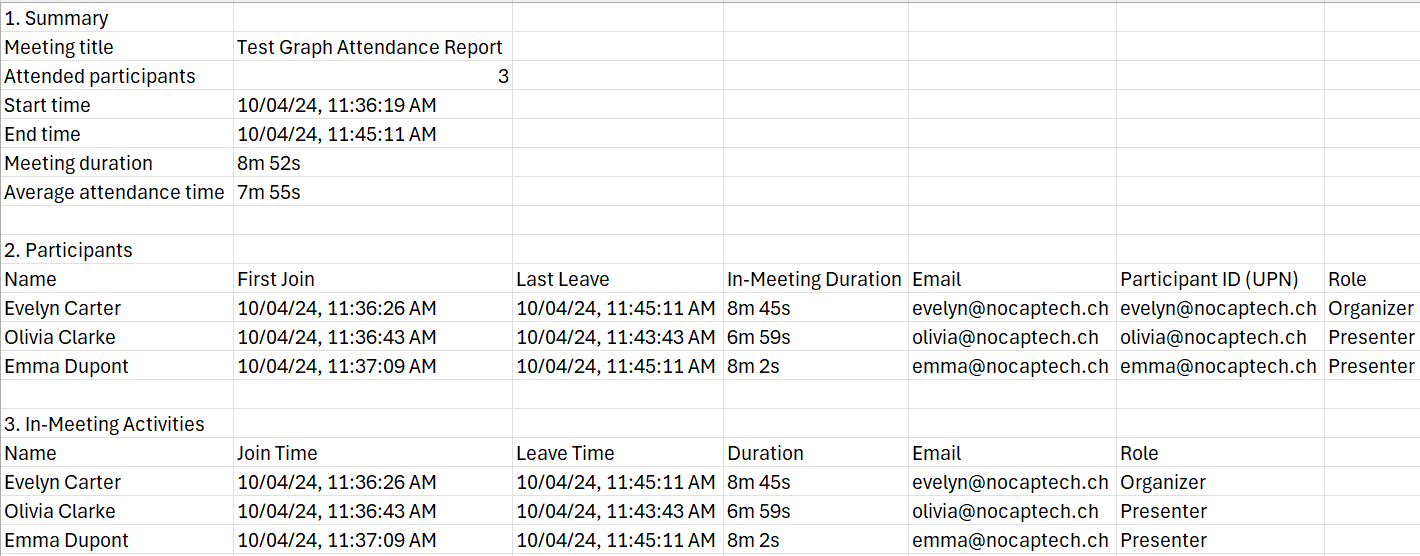
If there are multiple attendance reports for a meeting, like when a meeting already ended and someone joined again after that or when it’s a recurring meeting, all reports will be combined into a single CSV. The CSV does include the report id in the last column.
Let’s compare the CSV that was downloaded from the Teams client versus the one from my script.

As you can see, the output from my script gives you a nicely structured CSV which lists 1 participant per row so you can easily import it into other systems without manually changing the structure of the file. Because of that, I decided to create separate files for meeting/attendance summaries.

Summary
I personally believe that it’s very easy for organizers to access the reports themselves in Teams but having the possibility to get them as an admin via PowerShell as well is certainly a welcome addition to my script toolbox. This will be especially useful in case you’re asked to export attendance reports on a regular basis. While the fact that you need to know the unique meeting id before you can get an attendance report makes it a bit harder to truly automate this or you may have to chase other attendees for it, if you weren’t invited to the meeting yourself but overall, the join meeting Id should be easy enough to retrieve.