Hello friends.
A few weeks ago, Microsoft made a lot of Teams admins happy by rolling out a new feature which allows admins to change (or view) a Teams user’s calling settings directly from the Teams admin center. Gone are the days were we admins needed to be delegates of users to change these kinds of settings.
Those of you who know me a little better might know that I don’t have much experience with Skype for Business and thus only ever heard stories about SEFAUtil (secondary extension feature activation). From what I can see, this new feature is basically SEFAUtil for Teams.
I won’t go into detail about the functionalities in TAC as these has been covered plenty by other community bloggers already. As it’s often the case, this functionality has been available with PowerShell before it has made its way to the TAC. But anyways, here’s how it looks like in TAC.
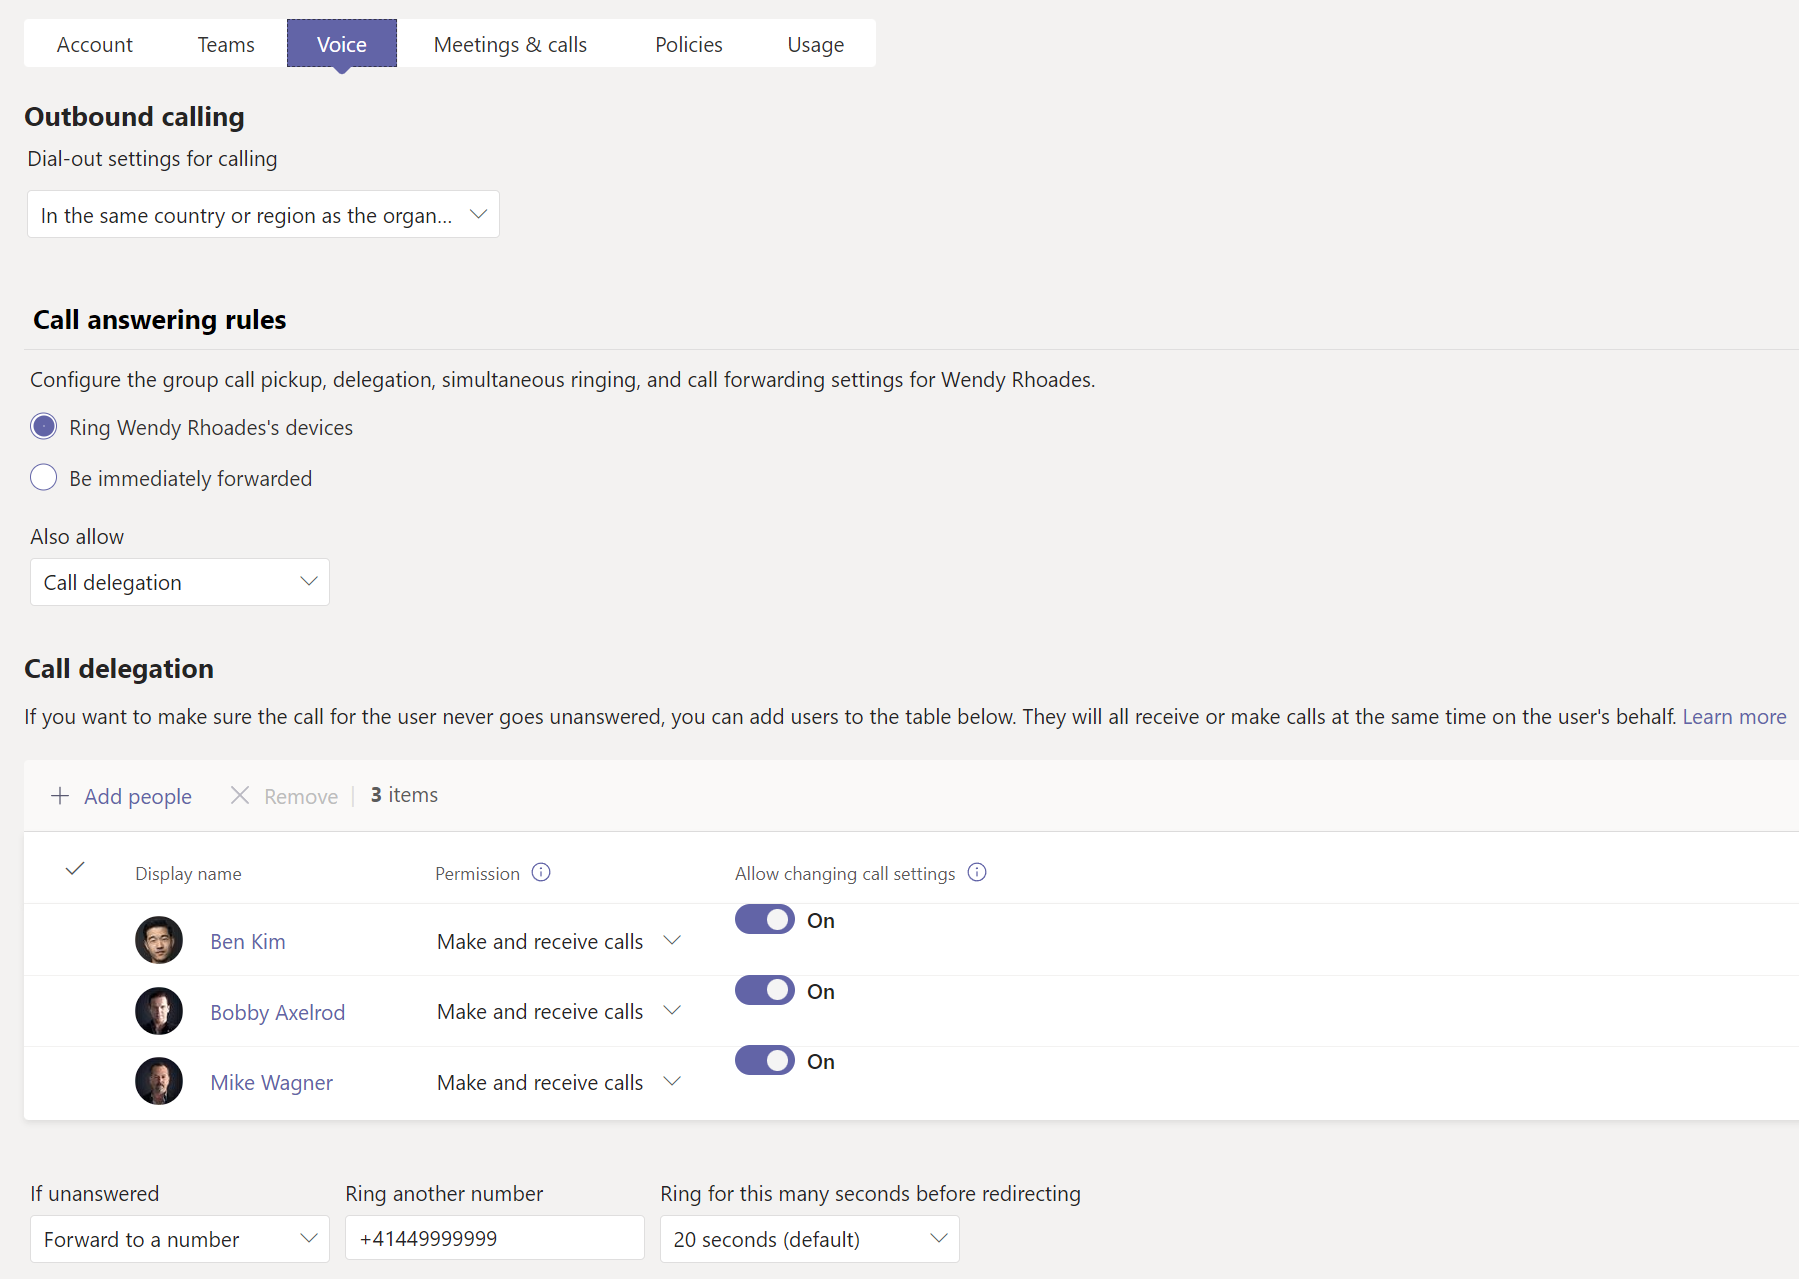
I haven’t used it much yet but one time I urgently needed to change a user’s forwarding settings, TAC was repeatedly throwing errors at me. I had no choice than to fall back to PowerShell.
Reading User Calling Settings with PowerShell
Of course, we can not only set them by PS but also read them:
Get-CsUserCallingSettings -Identity user@domain.com
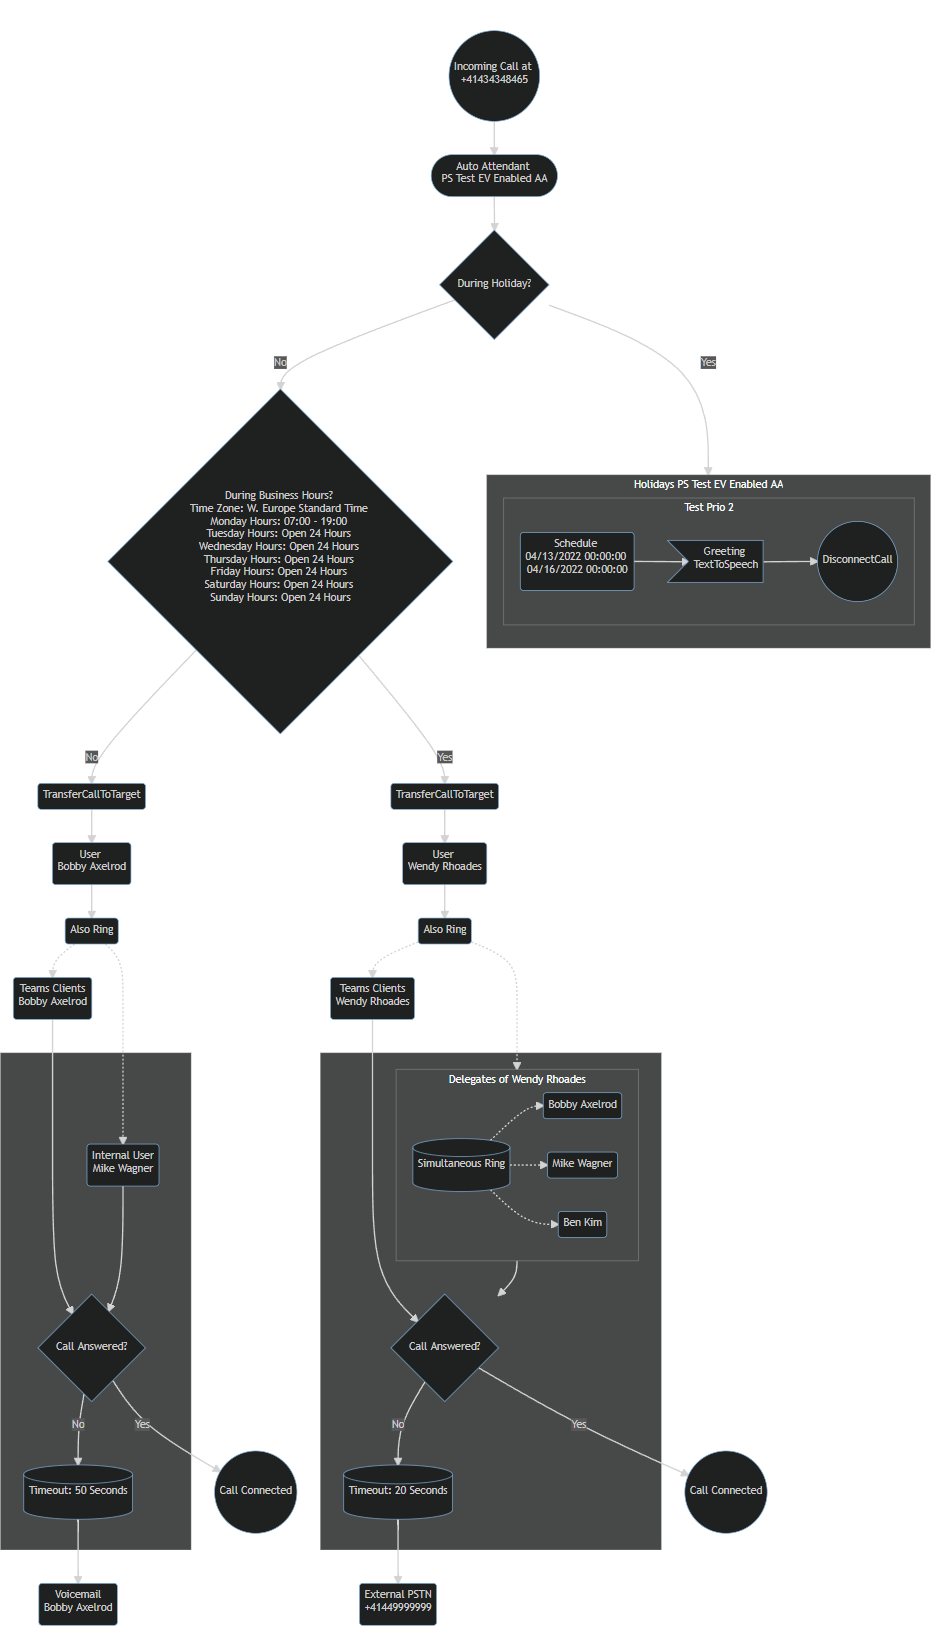
Since I’ve already done much more complex things by generating a diagram of huge Auto Attendant and Call Queue call flows, I figured why not leverage PowerShell to also draw diagrams from user calling settings?
I must admit that it turned out a little more complex than I anticipated. During final testing, I generated a diagram for each possible scenario, and I counted no less than 64 different ways an enterprise voice enabled user can configure his calling settings. This also includes simultaneous and serial ring for call groups. At least I already had a lot of practice on how to structure the code and how to draw the diagrams.
User Calling Settings Diagram Examples
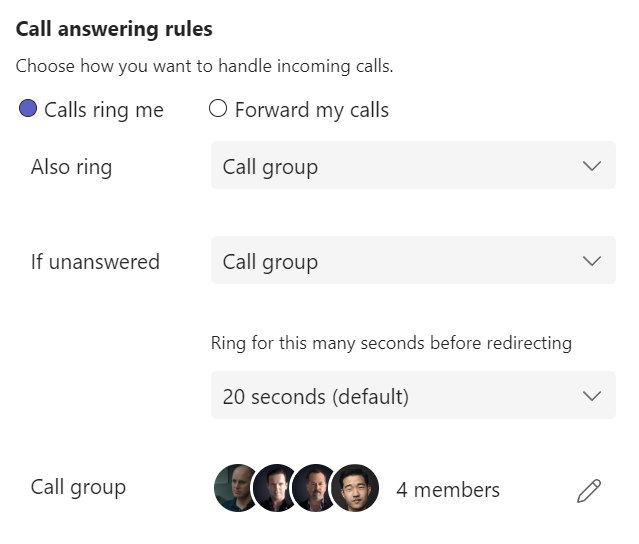
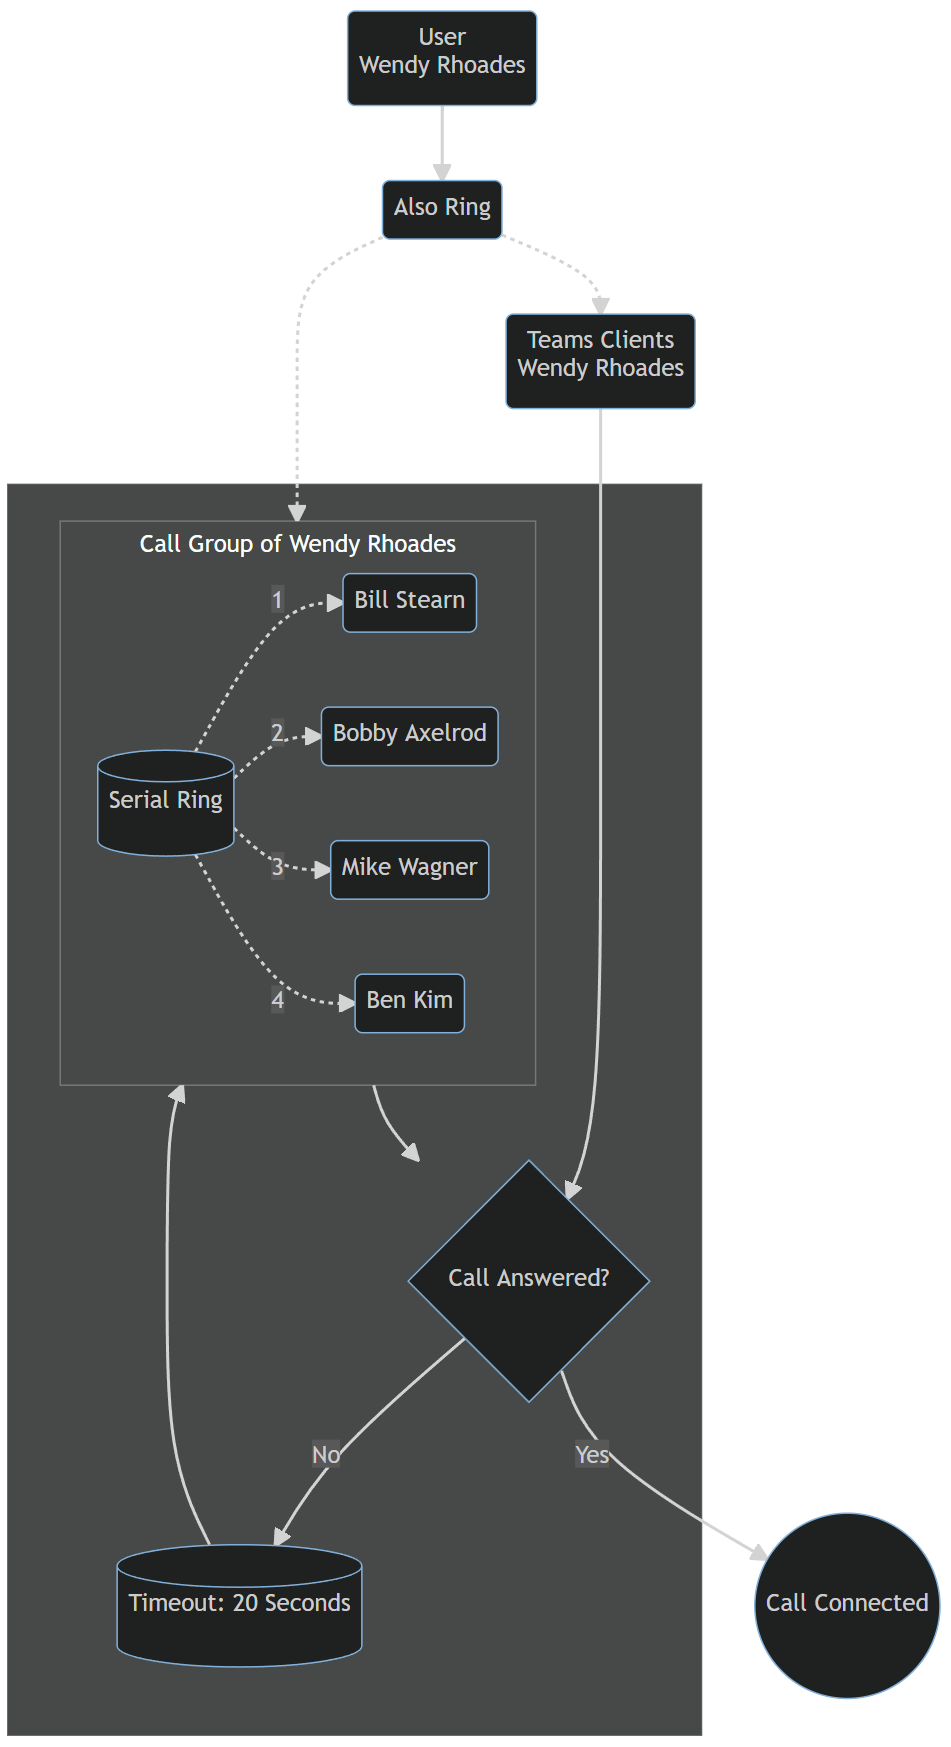
Here are some examples, including the corresponding Teams client settings.
In this example, “Also ring” and “If unanswered” are the same. Call group is the only forwarding target which supports this scenario.
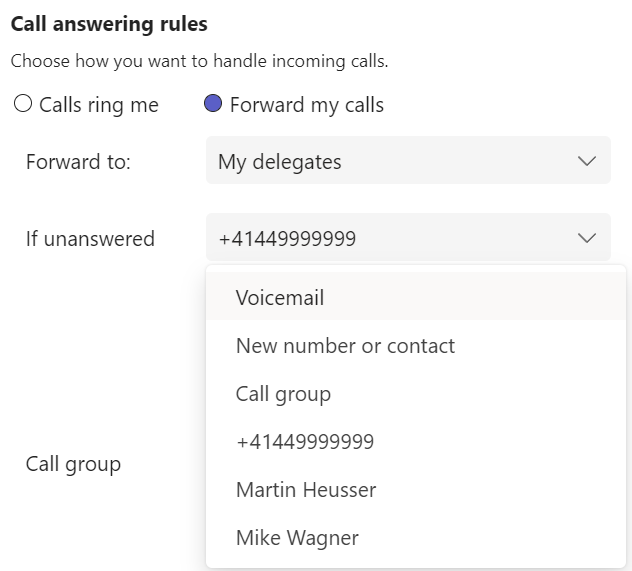
Here’s one where immediate forwarding is enabled:

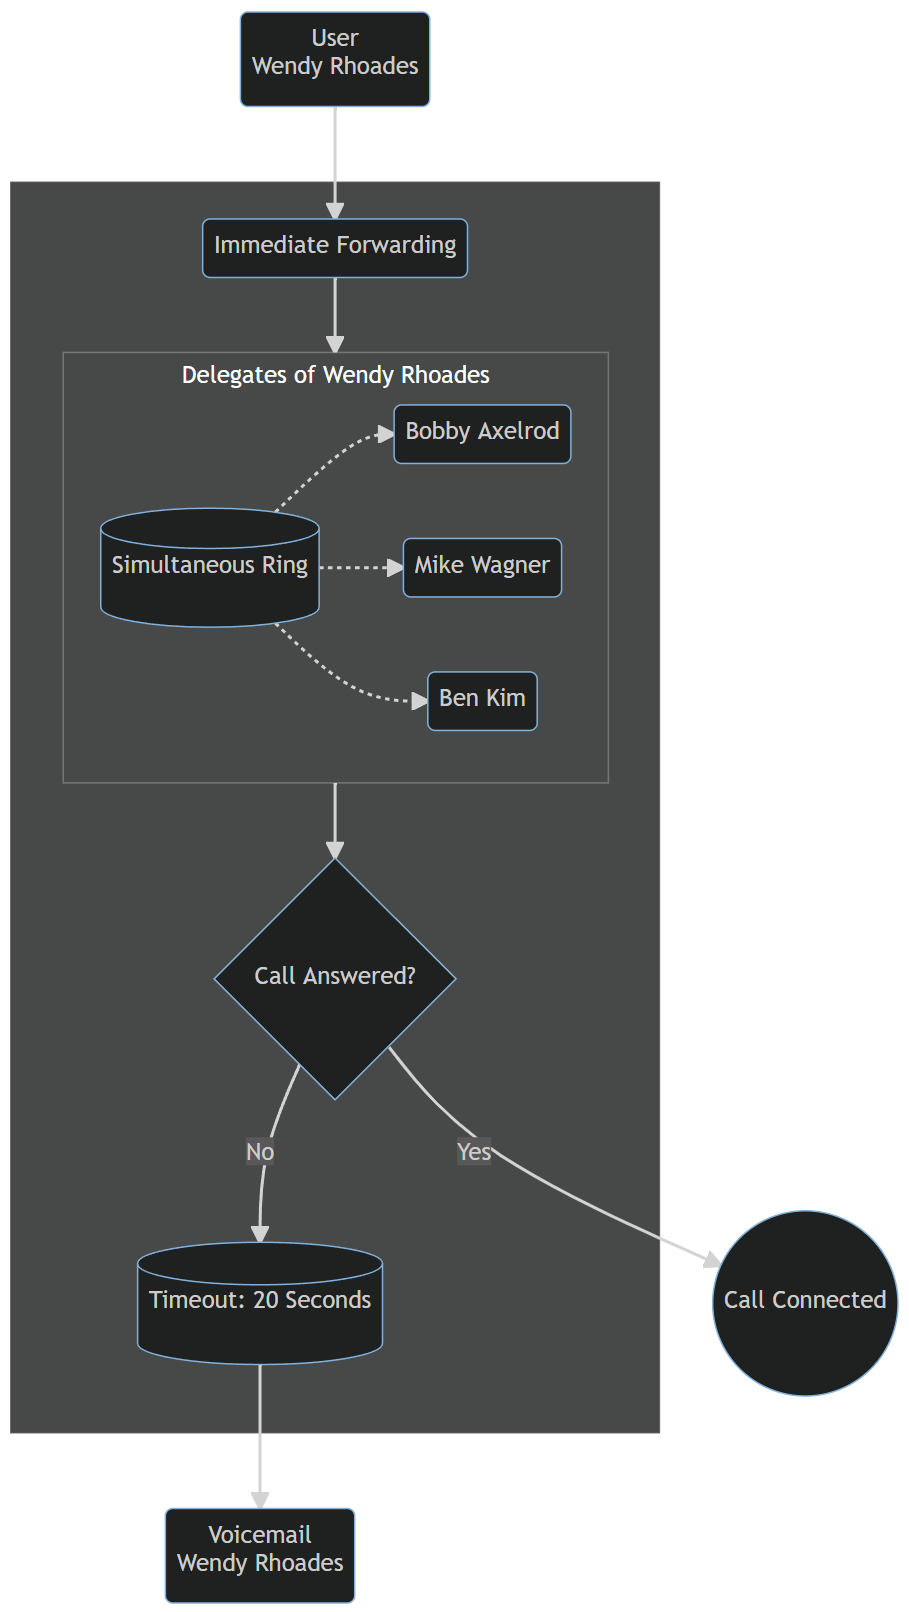
When immediately forwarding to delegates, an “If unanswered target is required”. “Do nothing” is not available in this case.
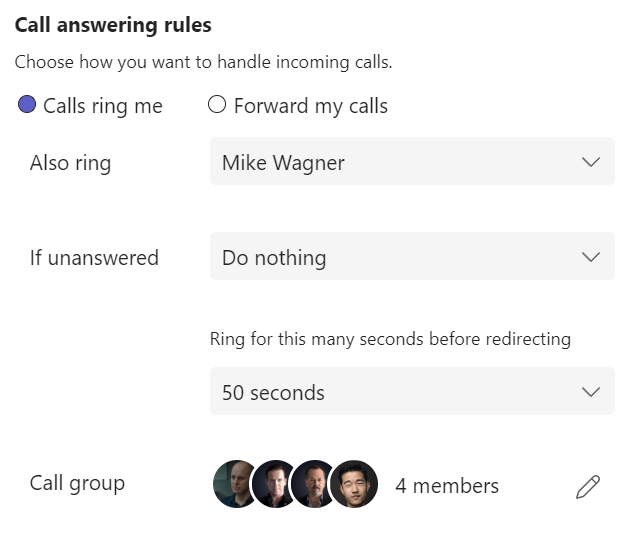
In this case, only “Also ring” is configured and “If unanswered” is set to “Do nothing”.

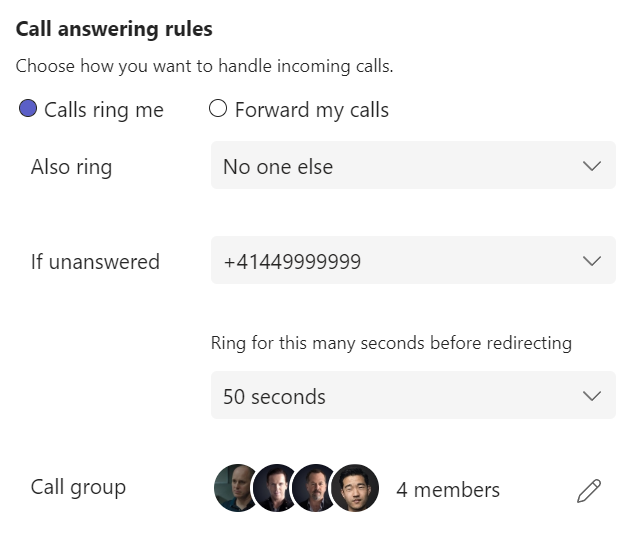
And here, “Also ring” is set to “No one else” but “If unanswered” is set to an external phone number with a timeout of 50 seconds.

If you like, you can check out all the examples here.
Render and Export Diagrams like a Pro!
Or you can head over to my GitHub Repo to clone it from there to try it for yourself. For now, the function is intended for standalone usage. Meaning, it’s not yet implemented into the M365 Call Flow Visualizer.
Once the repo is cloned, you can import the function by dot sourcing it in your terminal:
. .\Functions\Get-TeamsUserCallFlow.ps1
After that, you can just run the function by either using the -UserPrincipalName or the -UserId parameter where -UserId expects an Azure AD User Object Id from your tenant.
Get-TeamsUserCallFlow -UserPrincipalName user@domain.com
There are a few parameters to play with. By default, the function will generate an SVG image of the diagram and opens it in your default browser by leveraging the mermaid.ink service. It will also save the diagram to.\Output\UserCallingSettings by default. You can change this by specifying the -CustomFilePath parameter.
Although it has cost me a lot of time, I was finally able to pull off directly exporting an SVG image without using any additional, local dependencies. I’m doing this by encoding the diagram in Base64 and calling mermaid.ink. During testing I noticed that mermaid.ink is quite picky when it comes to these base 64 encoded URLs. At first, a lot of my diagrams failed due to illegal padding characters and so on. I believe that I was able to fix most of that. If any of your diagrams fail to render on mermaid ink, please let me know.
Create a Diagram for all your users
I’ve also included an example of how to draw a diagram for each enabled user in your tenant. You can copy it from this gist or run it directly from the root of the cloned repo.
Some Notes on Recursive User Calling Settings
I do not support recursive user calling settings in my first release. I’m not sure if there is a strong enough need for it too. I know that some teams like to forward calls to each other if they’re not available. It would certainly be handy for troubleshooting purposes as we could detect infinite forwarding loops created by users much faster. On the other hand, diagrams could get huge and hard to read. What do you think, should I work on recursive diagrams for a future release? Let me know!
What’s next
There are a couple of changes planned for this project. If you pay close attention, you can see that I already moved some functions like “Connect-M365CFV” out of the main script and import it by dot sourcing instead. Since the main script still has more than 3000 lines of code (including carriage returns) I’m planning to move most of the functions to separate files and dot source them as well.
When I get the time, I will also implement user calling settings into the main script. As an example, a call flow which forwards calls to a user will then render like this.
Whereas it currently “stops” at the users and looks like this:

I will also try to do the same with SVG export as I did for the user calling settings. I’m not entirely sure it will work with super large diagrams though.
I hope that you enjoy automatically drawing diagrams of your users calling settings as much as I do.
Happy Easter everyone!