As you might have heard, Microsoft will soon be deprecating the MSOnline PowerShell Module. Even though Microsoft is giving us a little bit more time (now after December 2022 instead of June 2022) it’s time to move on and start working with the new, Microsoft.Graph PowerShell Module. I’m already using it in my Microsoft 365 Call Flow Visualizer.
Today, I updated a Direct Routing provisioning script which I wrote at work. This script does everything that’s needed to set up Direct Routing in a tenant.
- Add the FQDN of the SBC as a new Domain to the customer tenant
- Add the TXT verification DNS record to our Azure DNS zone
- Verify/confirm the domain in the customer tenant
- Create a resource account to activate the domain without a license
- Add the gateway, PSTN usage, voice route and voice routing policy
- Remove the activation user/resource account
Prepare Graph PowerShell
Before you can use Microsoft.Graph PowerShell you need to install the Module.
Install-Module Microsoft.Graph
This will install all Graph Modules. It’s also possible to install only select modules (e.g. Install-Module Microsoft.Graph.Users) but since many modules have dependencies (e.g. Authentication etc.) it’s easier to just install all Modules from the get-go.
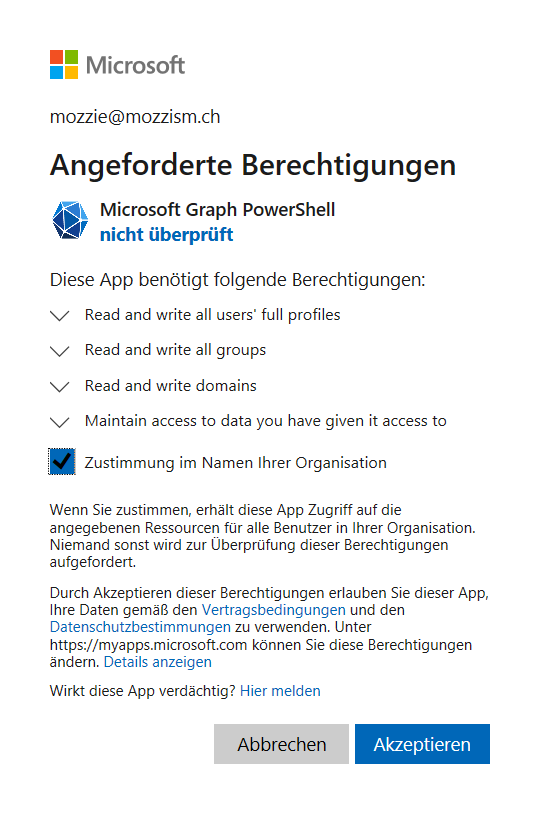
When you connect to Microsoft Graph PowerShell you need to provide the required scopes. For the Cmdlets shown in t his blog article you need at least the following:
Connect-MgGraph -Scopes “User.ReadWrite.All”,“Domain.ReadWrite.All”
If you connect to Graph PowerShell for the first time, you will need to grant consent for the defined scopes. I’ve also defined the scope “Group.ReadWrite.All”, that’s why it also requests access for Read and write all groups.

Here are the old MSOnline Cmdlets vs the new Microsoft.Graph Cmdlets for the relevant actions.
Add the Domain
MSol
New-MsolDomain -Name “sbc001.domain.com”
Mg
New-MgDomain -BodyParameter @{Id=“sbc001domain.com”;IsDefault=“False”}
IsDefault is optional. The domain won’t be added as the new default domain, even if you don’t include this key in the hash table. You can still include it though, it might give you some sort of comfort.
Get the Verification Text
This was the only one which was a bit tricky since the actual value is hidden in the “AdditionalProperties” property which won’t be shown in the output.
Output:

If we use | Format-Lsit or | Select-Object * we will see that there’s a property called “AdditionalProperties”.
This code, however, will store the verification code in the $MgVerificationCode variable.
Mg
$MgVerificationCode = (Get-MgDomainVerificationDnsRecord -DomainId “sbc001.domain.com” | Where-Object {$_.RecordType -eq “Txt”}).AdditionalProperties.text
Msol
With Msol, the code did not include the first “MS=” why I needed to add it to the variable before getting the value. This is not the case with Graph anymore.
$MsolVerificationCode = “MS="+ (Get-MsolDomainVerificationDNS -DomainName $FQDNs.Values.FQDN).Label.Split(”.")[0]
Verify the Domain
If you use an Azure DNS zone you can now use Az.DNS to create a new TXT record which contains $MgVerificationCode as the value.
New-AzDnsRecordSet -Name “sbc001” -RecordType TXT -ResourceGroupName “ResourceGroupX” -TTL 3600 -ZoneName “domain.com” -DnsRecords (New-AzDnsRecordConfig -Value $MgVerificationCode)
Once the record is created, we can confirm the domain. This usually works within seconds if you use Azure DNS.
Mg
Confirm-MgDomain -DomainId “sbc001.domain.com”
Msol
Confirm-MsolDomain -DomainName “sbc001.domain.com”
Remvoe the User
When everything is set up, the activation user can be removed again.
Mg
Remove-MgUser -UserId $UpnAA
Msol
Remove-MsolUser -UserPrincipalName $UpnAA -Force
While we needed to specify the -Force parameter with MSol, we don’t need to specify anything when using Microsoft Graph. If you wish to make the script interactive and have a user confirm the deletion when using Remove-MgUser, you can use the -Confirm parameter instead.
That’s all for today. Don’t fear Microsoft.Graph and happy scripting everybody!