At the beginning of July 2024 Microsoft announced that they will retire Office 365 Connectors in Teams. This was published in the Message Center with post ID MC808160. Initially, Microsoft communicated a rather short deadline but then decided to extend it by quite some time. Users will still be able to add new connectors until December 31st 2024 before they will be retired in December 2025. Microsoft also published this information here.
How To Find Out Who Set Up Connectors In My Organization?
The biggest challenge will be finding out which Teams in your organization are currently using Office 365 Connectors in Teams. Luckily, Tony Redmond has created a much appreciated script to scan your tenant for any Teams that are using connectors. I quickly tested this script and can confirm that it lists all the incoming webhooks configured in my lab tenant.
Now that we know which Teams are utilizing incoming webhooks, the natural next step is to contact the owners of the affected Teams and help them transitioning their apps to sending data to Power Automate instead. But first we need to make sure that we know how to set up notifications via Power Automate.
Pros And Cons About This Change
The only connector I ever used was the incoming webhook. I mainly used them to send Adaptive Cards to Teams channels and I blogged about different use cases here and here. That’s why this blog post will also be focusing on sending Adaptive Cards through Power Automate and not Office 365 Connectors in general.
These examples mostly used the schema for Legacy Actionable Message Cards and not true Adaptive Cards. While I was able to introduce some Adaptive Card features into the Message Card payloads, it was never really clear to me which features are supported and which aren’t. This required a lot of trial and error. Now that we’re transitioning to Power Automate, we can fully utilize all the Adaptive Card features which are supported in Teams. More importantly, we can finally relay on the information that’s published on the Adaptive Card Schema Explorer.
The downside is that you might have to spend more money on additional licenses for Power Automate service accounts. If you’re not using service accounts to send Adaptive Cards to Teams, you’ll face the risk that some notifications will stop working when the person who set up a Flow leaves the company. On the plus side, using Power Automate will also give you more flexibility and also more security. (More on that later.)
Set Up a Power Automate (Workflows) Connector
Let’s take a look at how you can set up a Power Automate Flow to replicate the functionality of an incoming webhook directly in Teams.
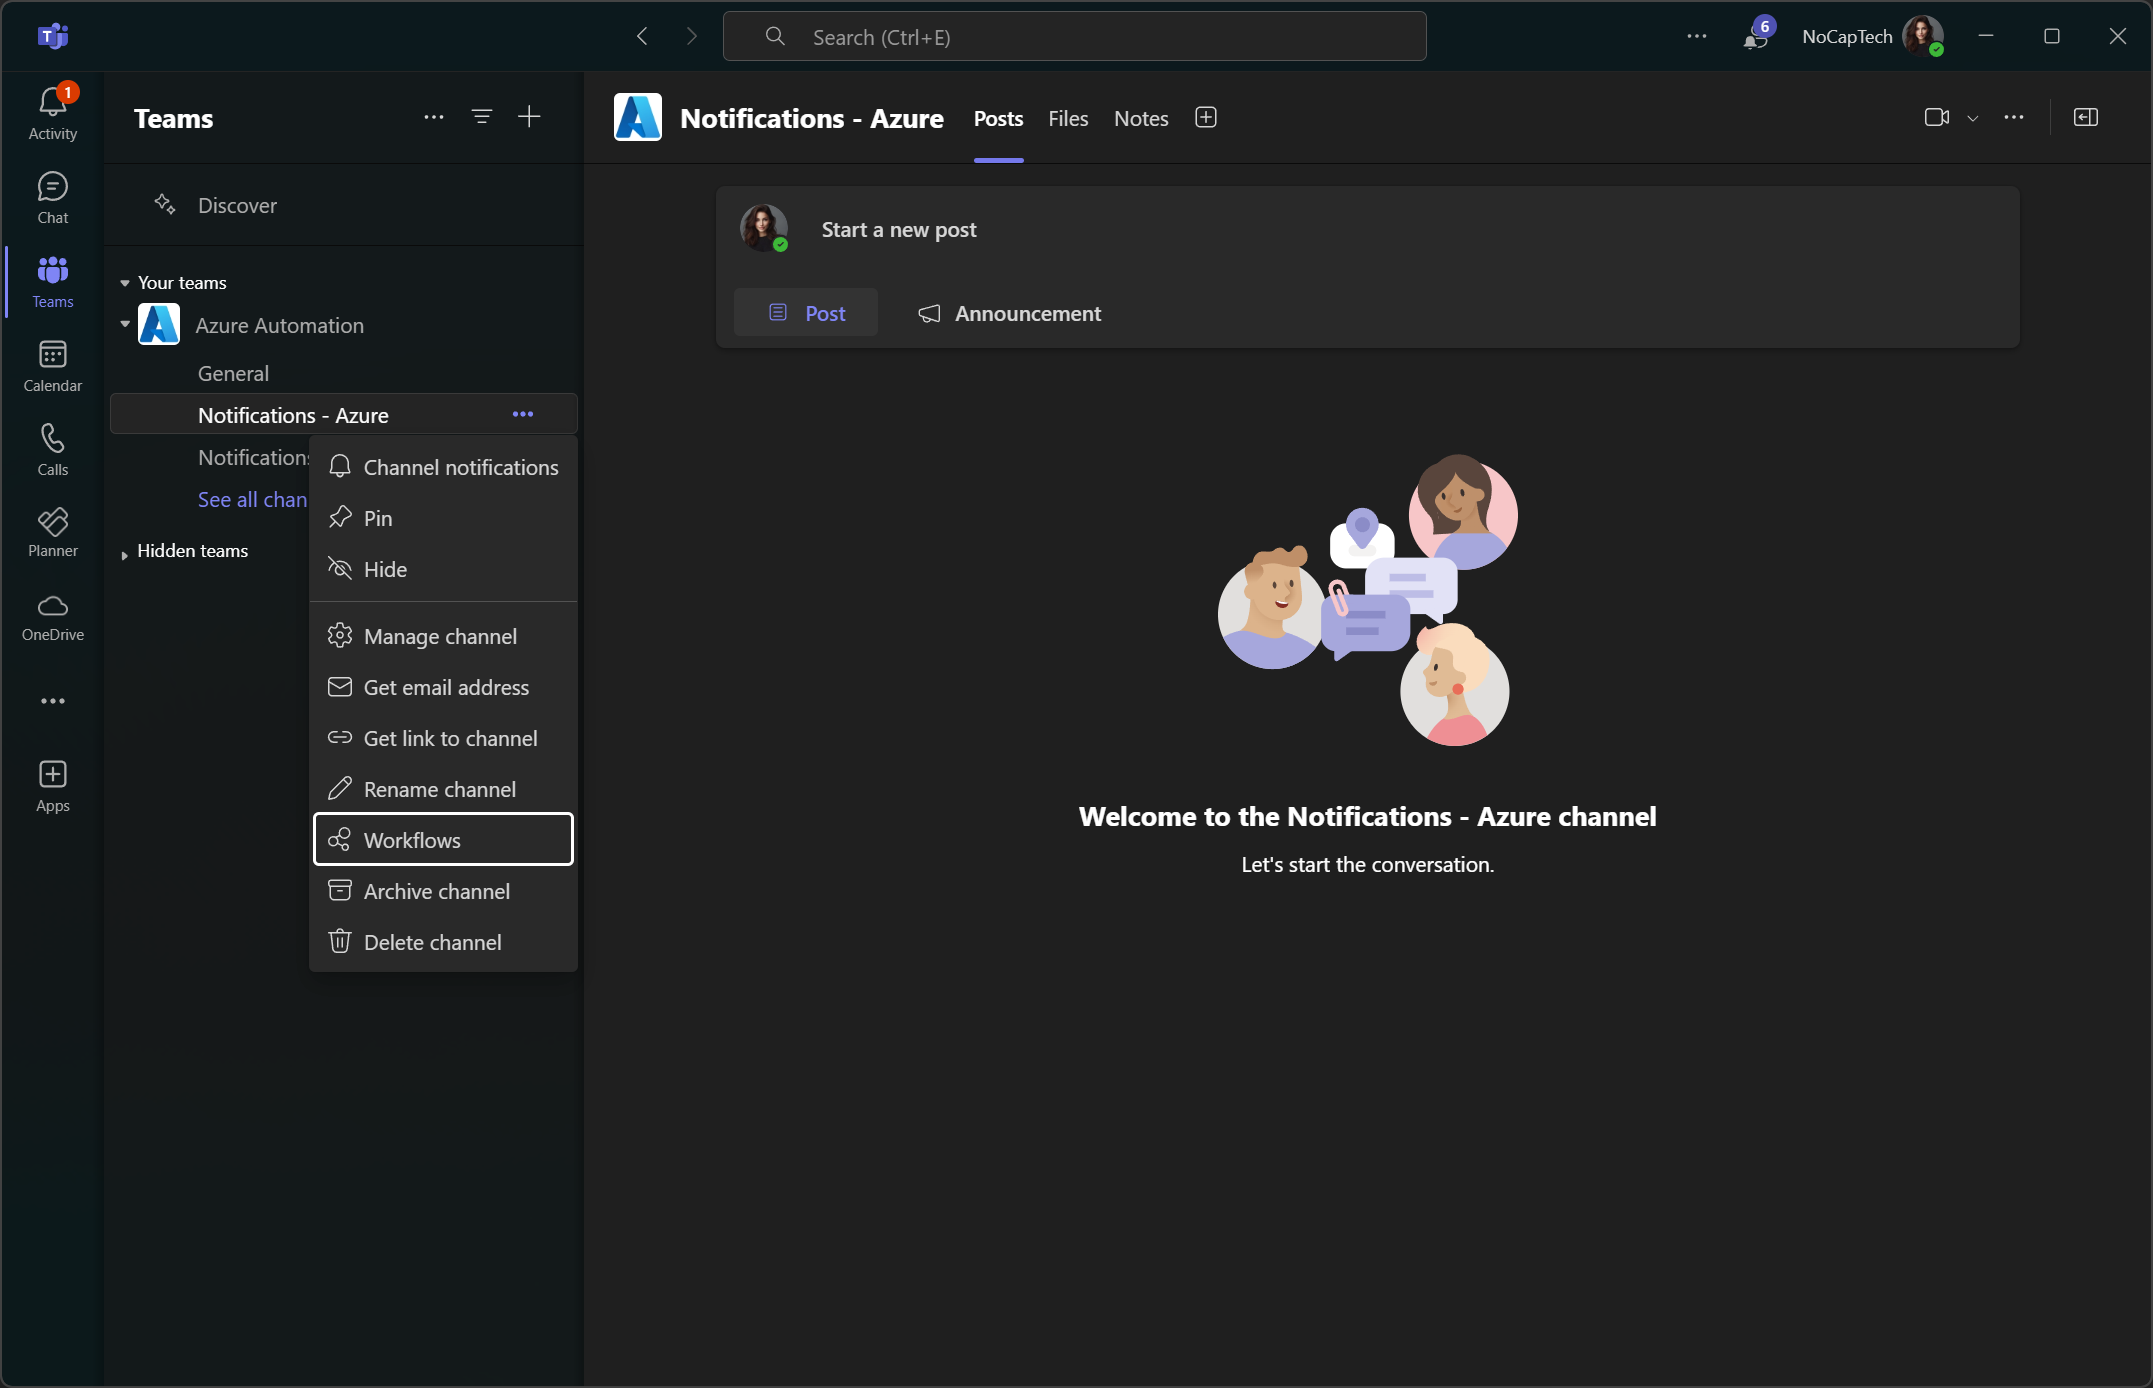
Select the channel where you want to receive the notification and click on the 3 dots. Then click on Workflows.
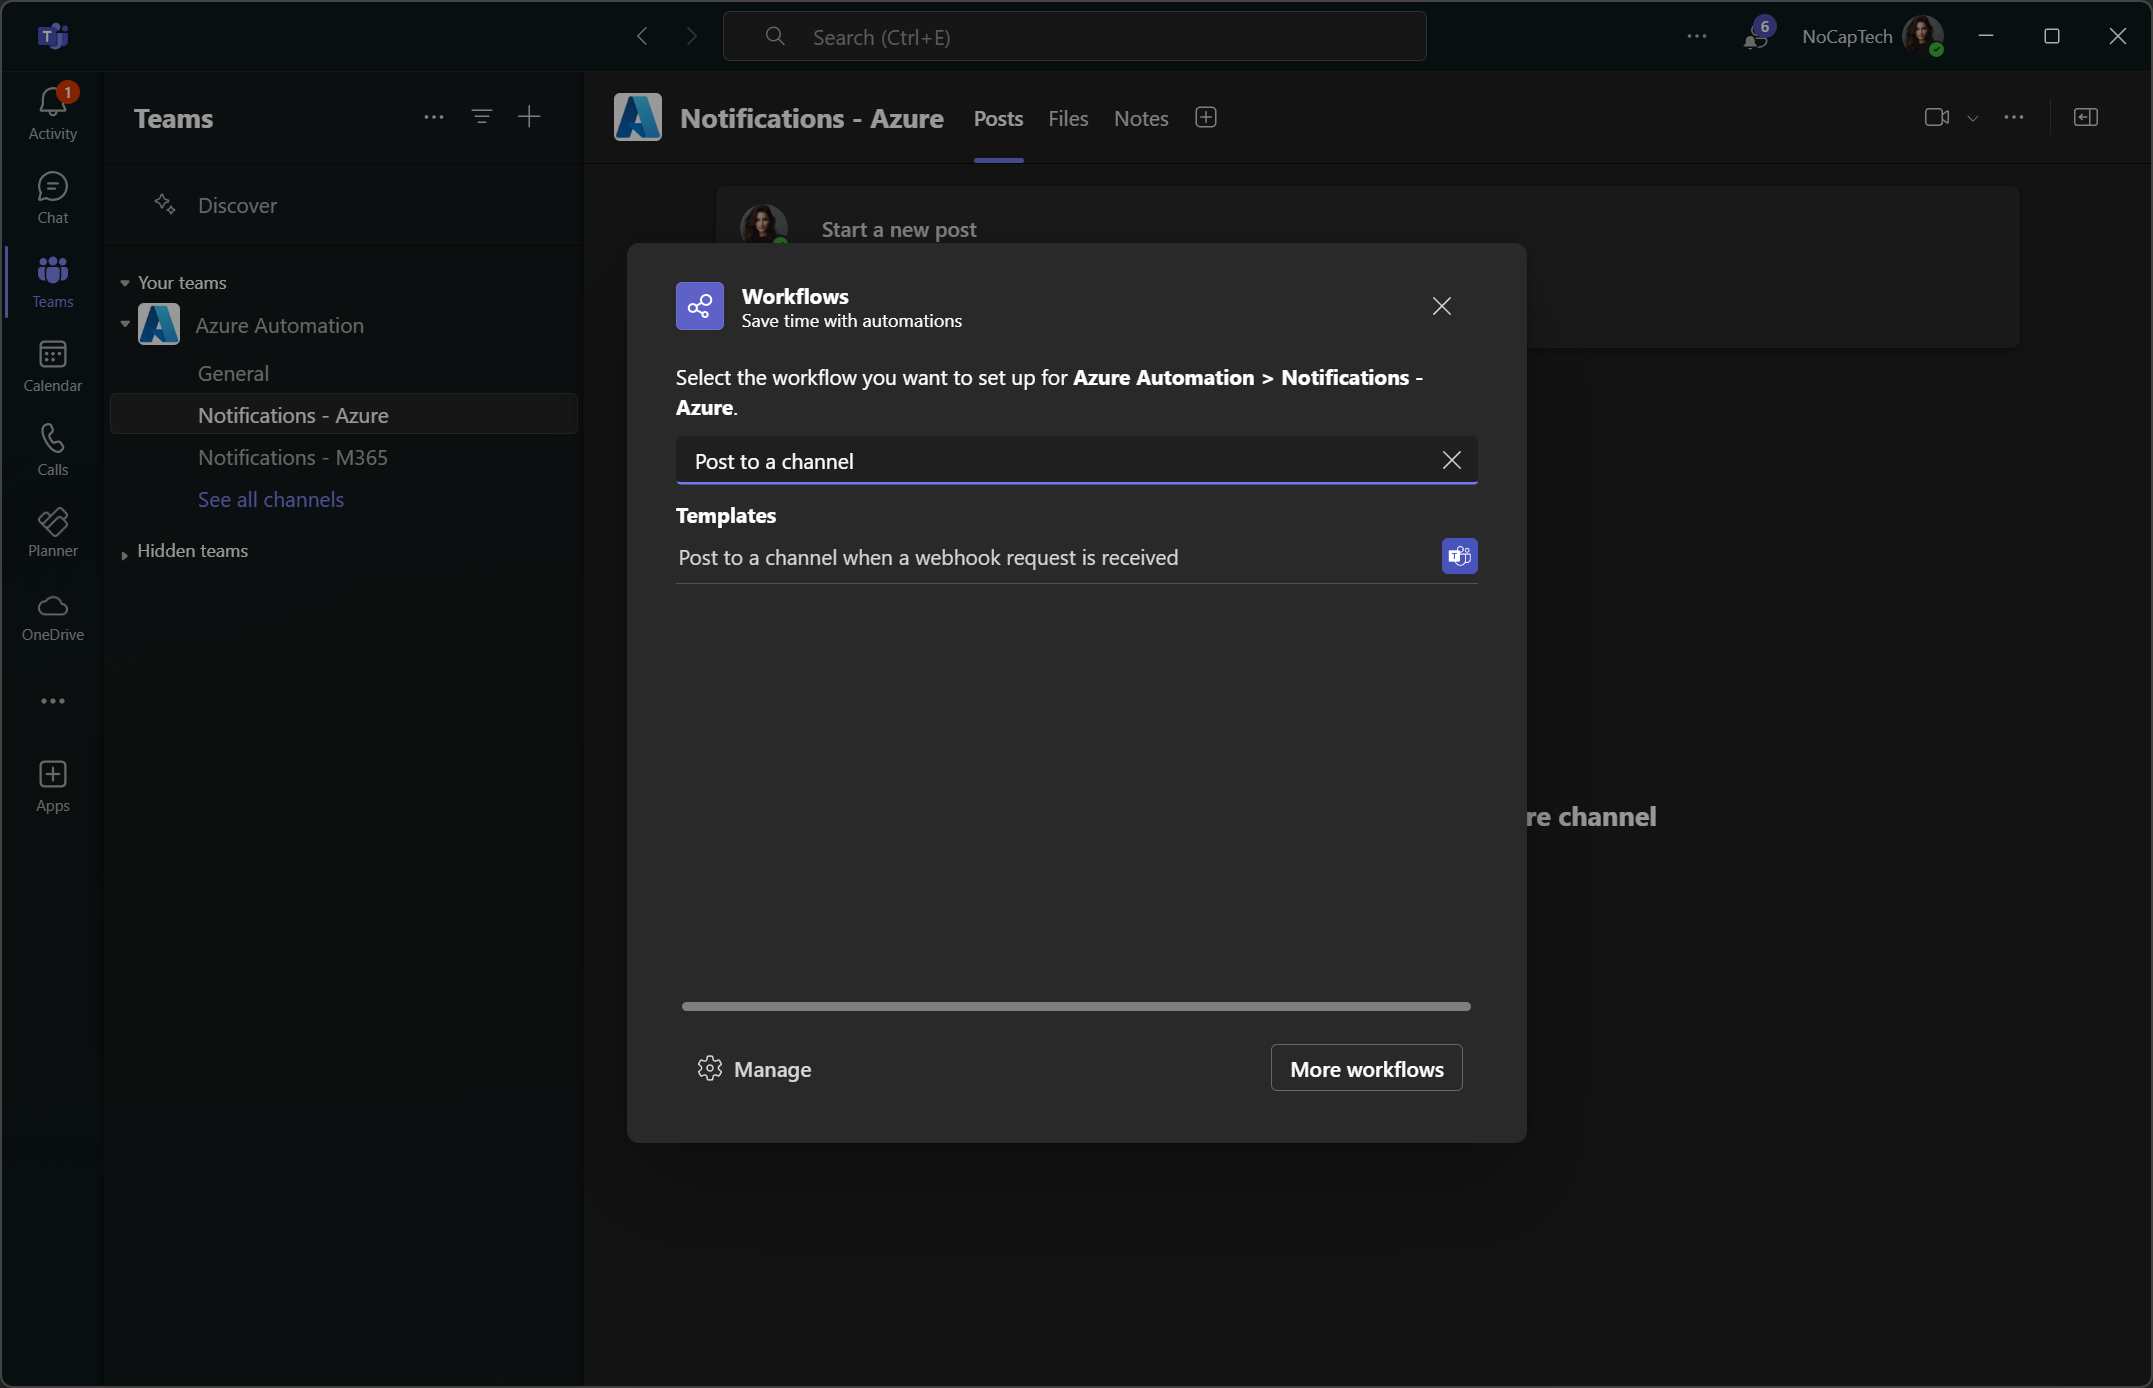
Next, search for Post to a channel to find the action shown in the screenshot below and click it.
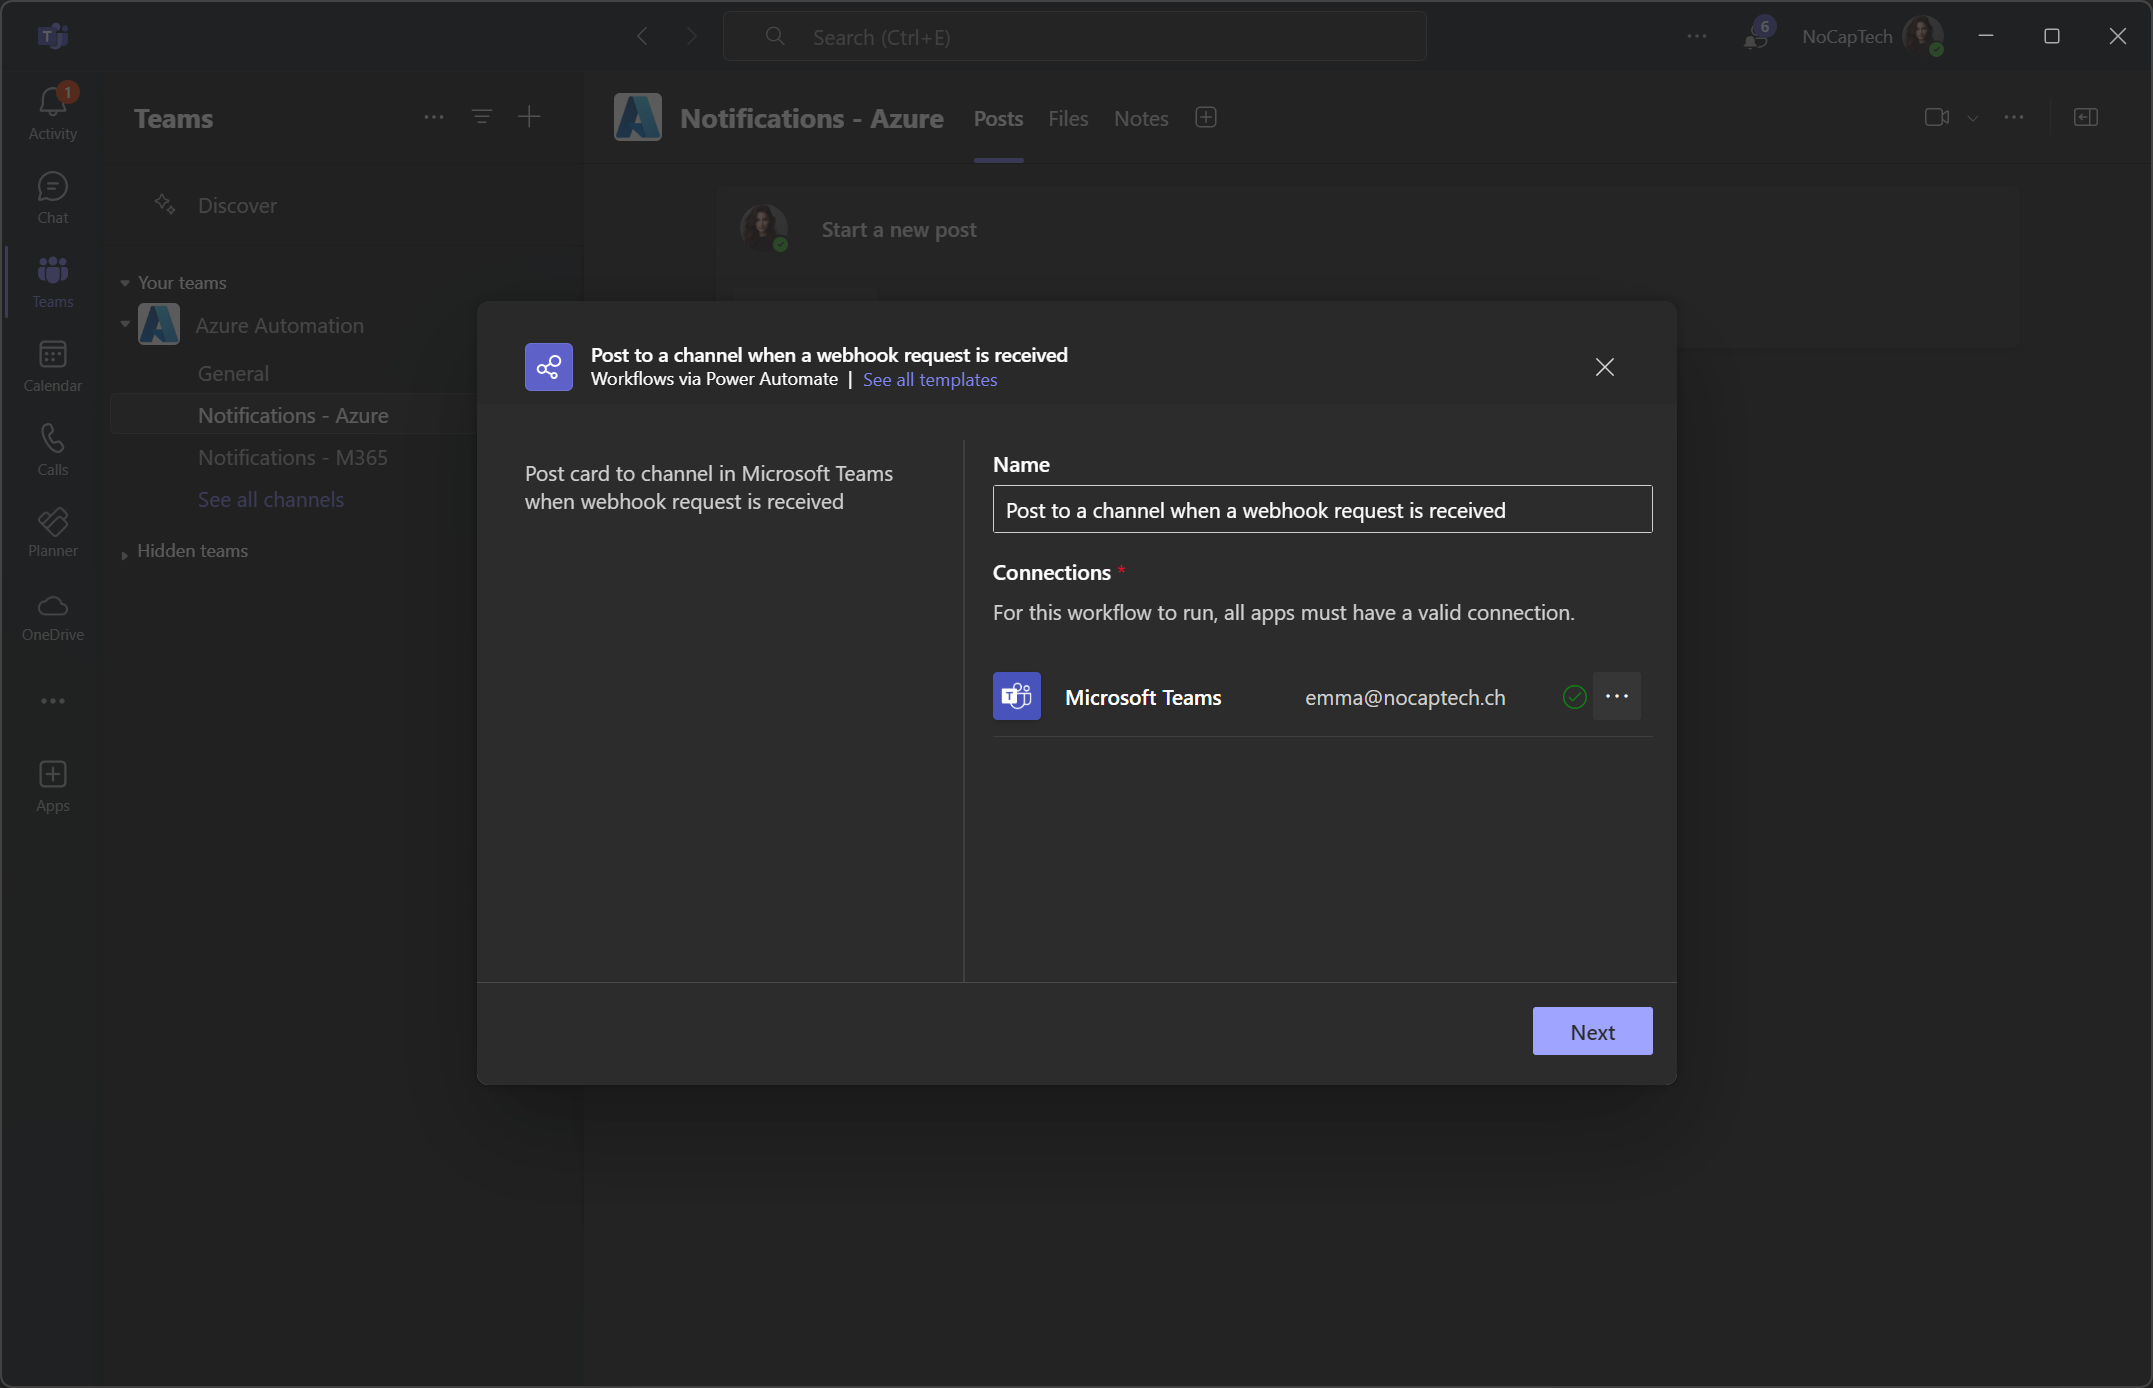
Click Next and then Add workflow
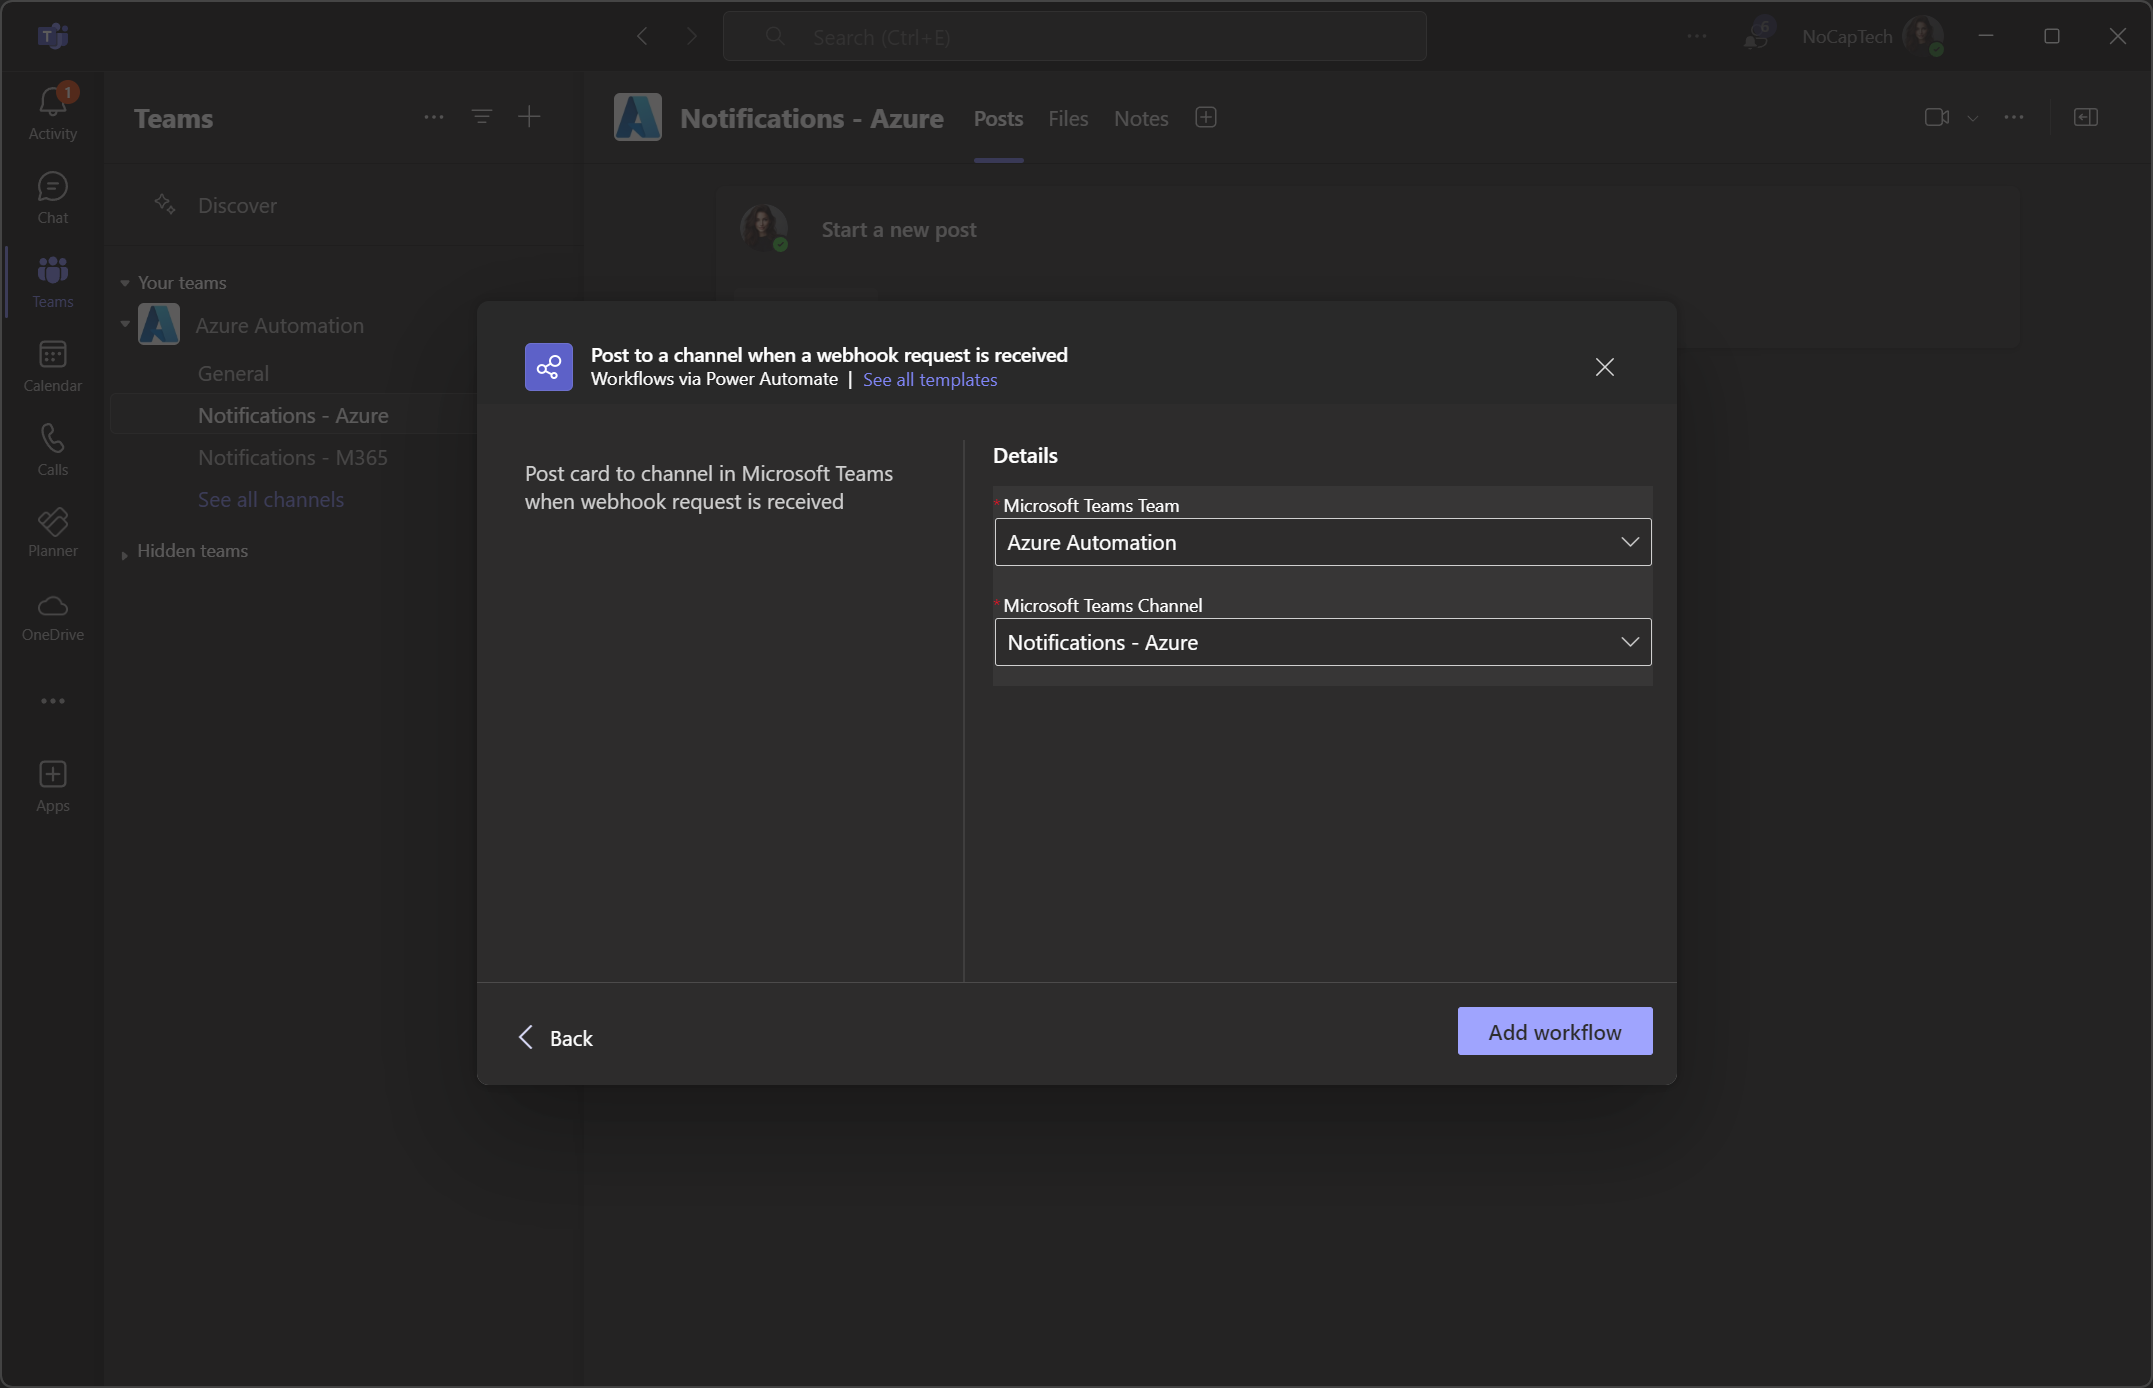
Finally, copy the URL. You’ll need this to send Adaptive Cards to your channel.
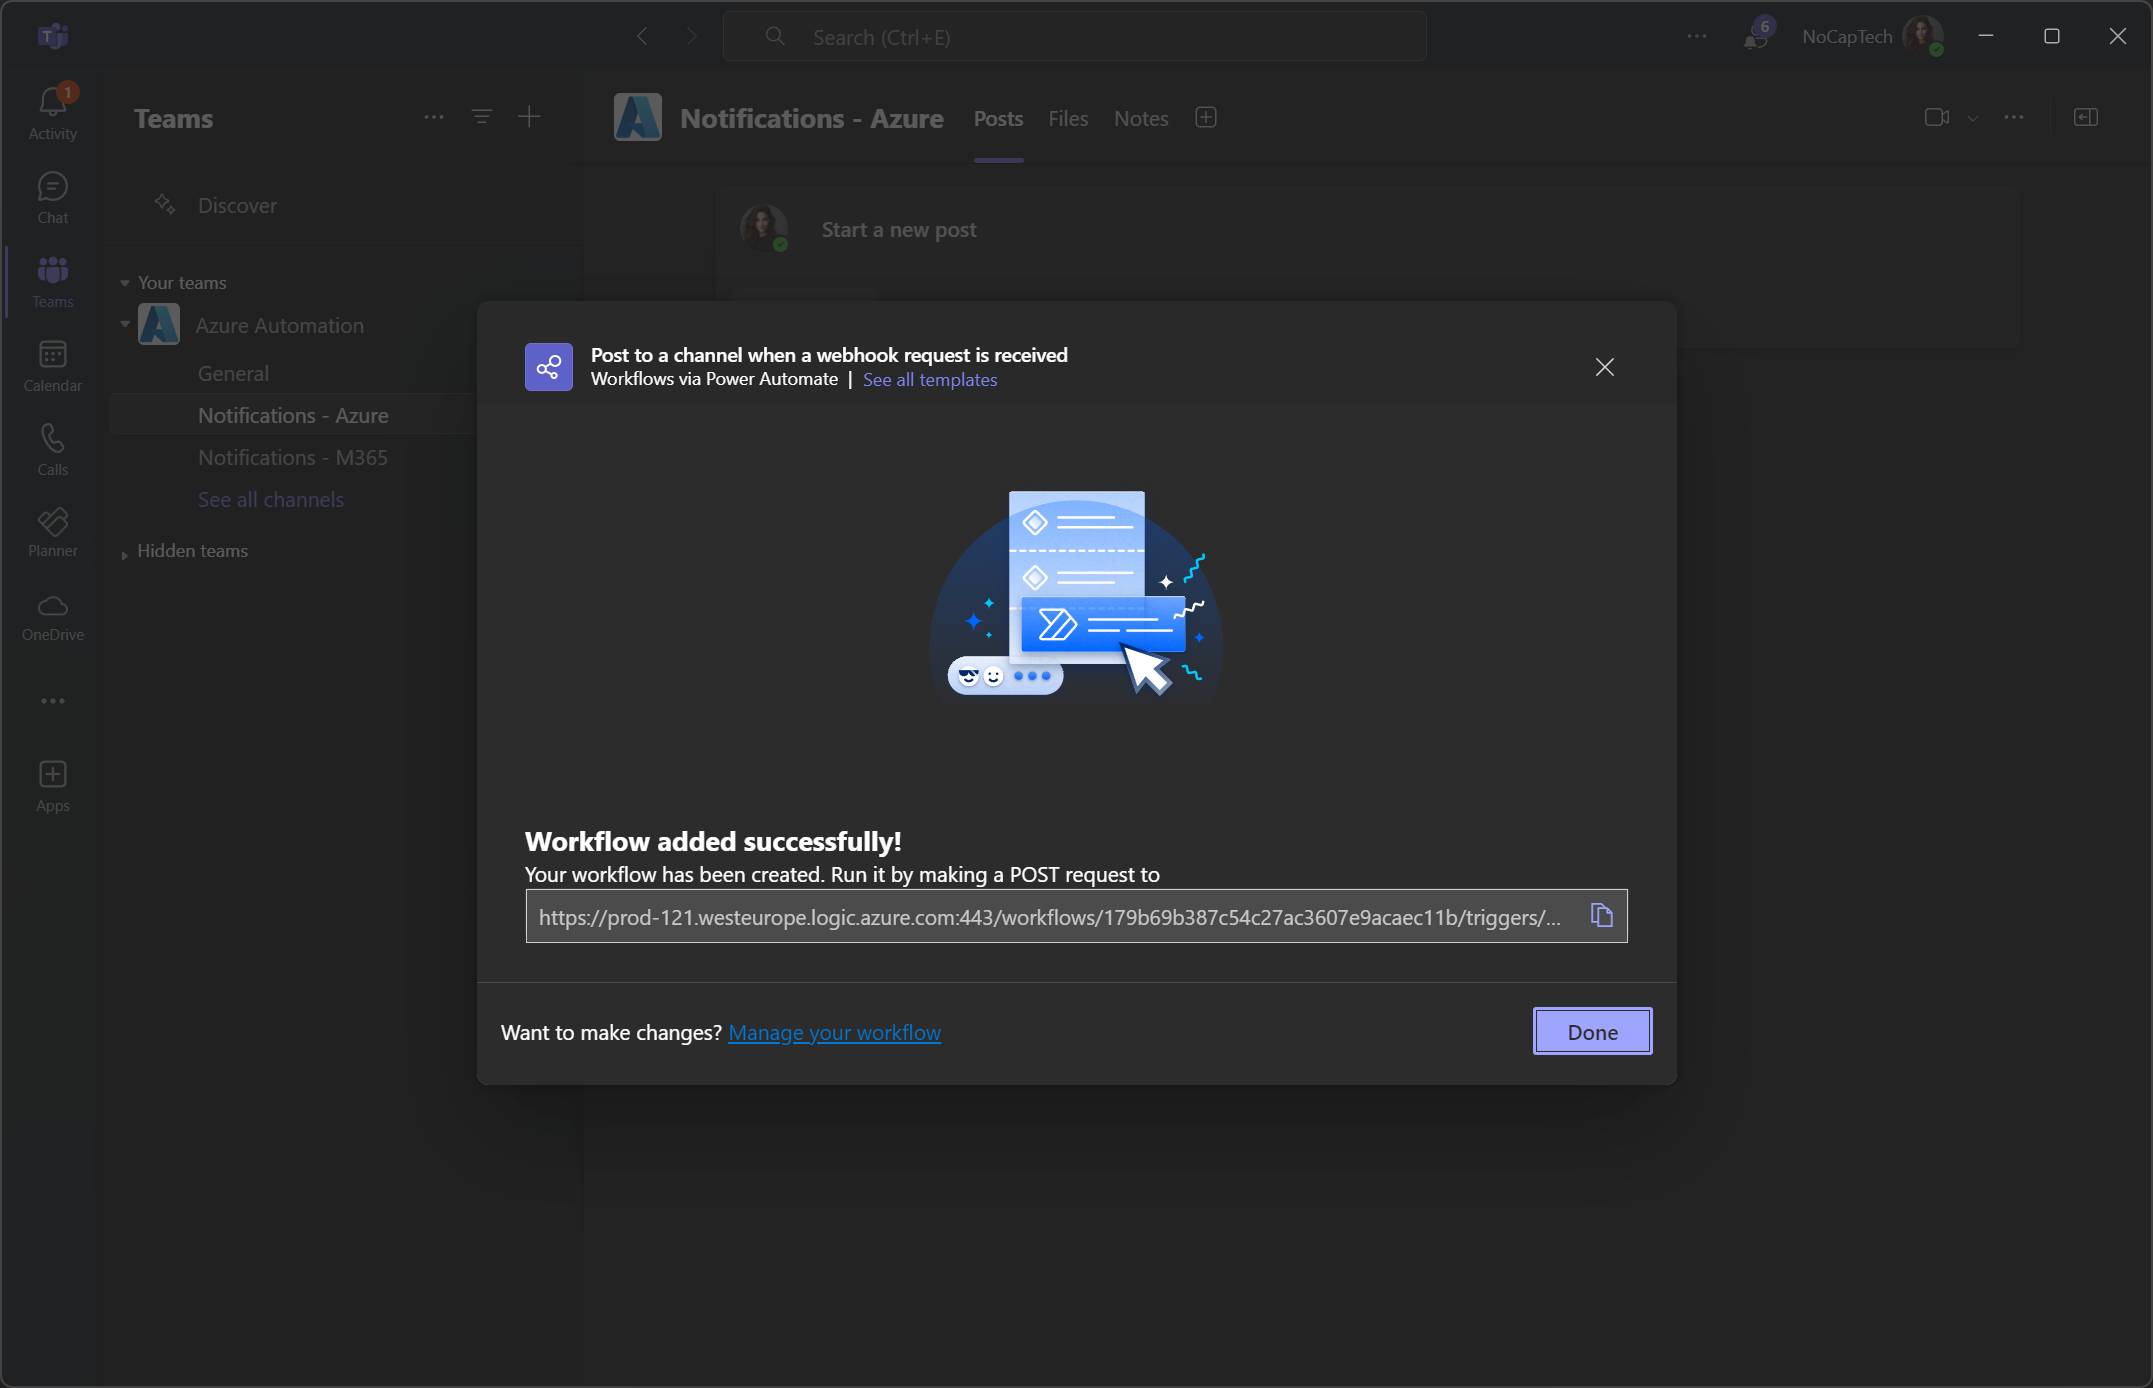
That’s it. The Flow is now set up and can be triggered by sending a POST request to the trigger URL.
Of course I expected this to work straight away and tested it by sending a very basic Adaptive Card:
|
|
To my surprise, this failed. This is how I have typically been sending data to incoming webhooks.
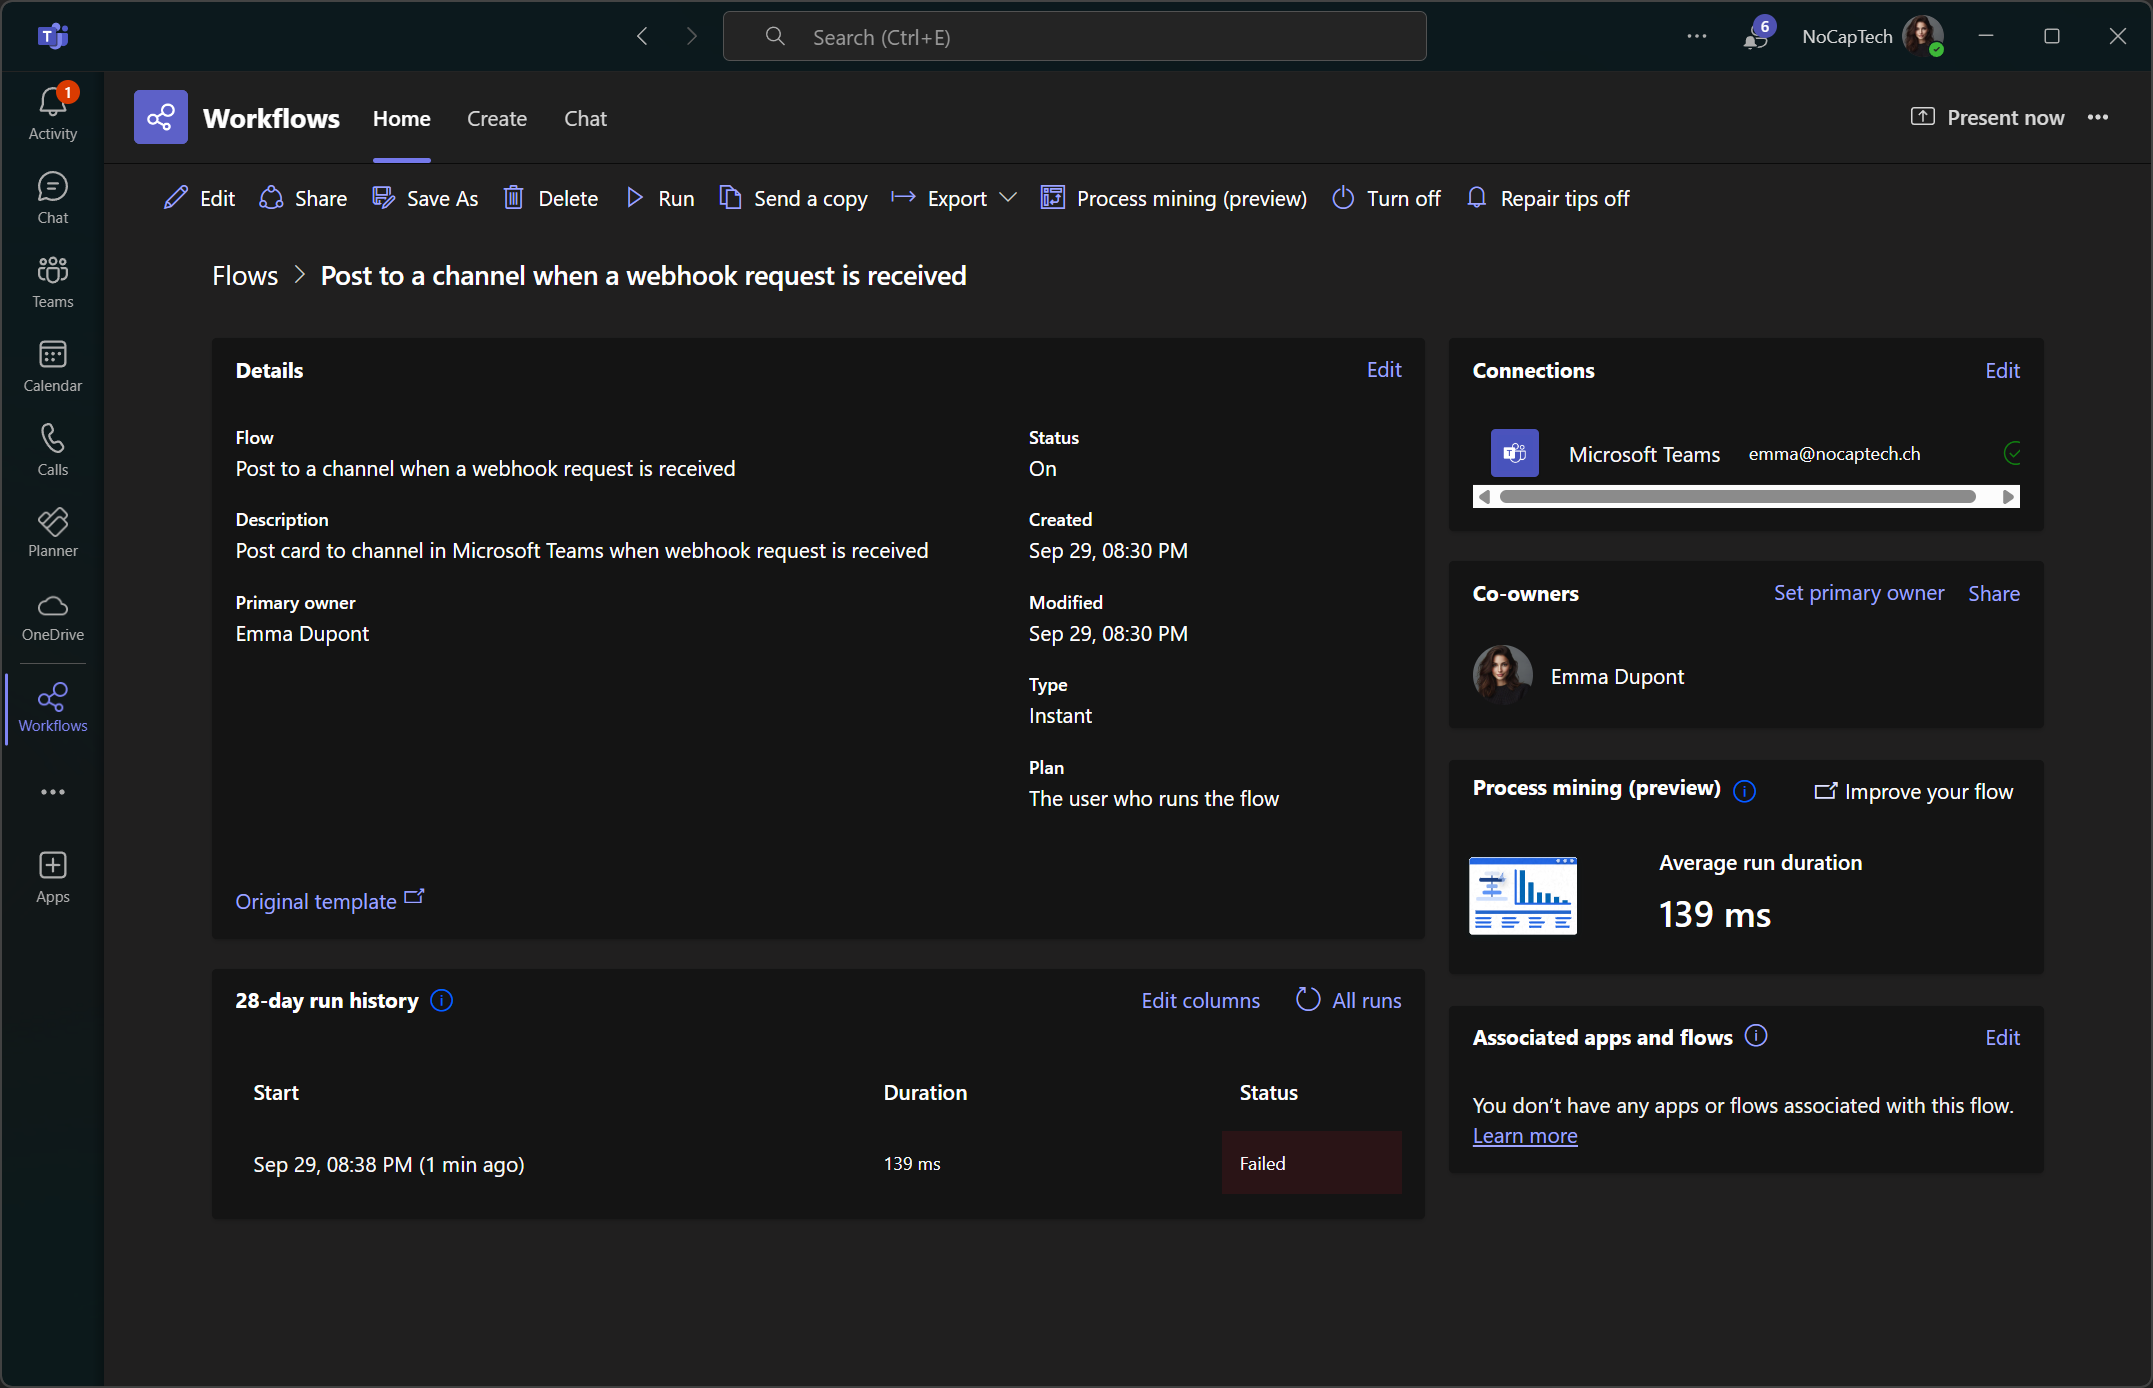
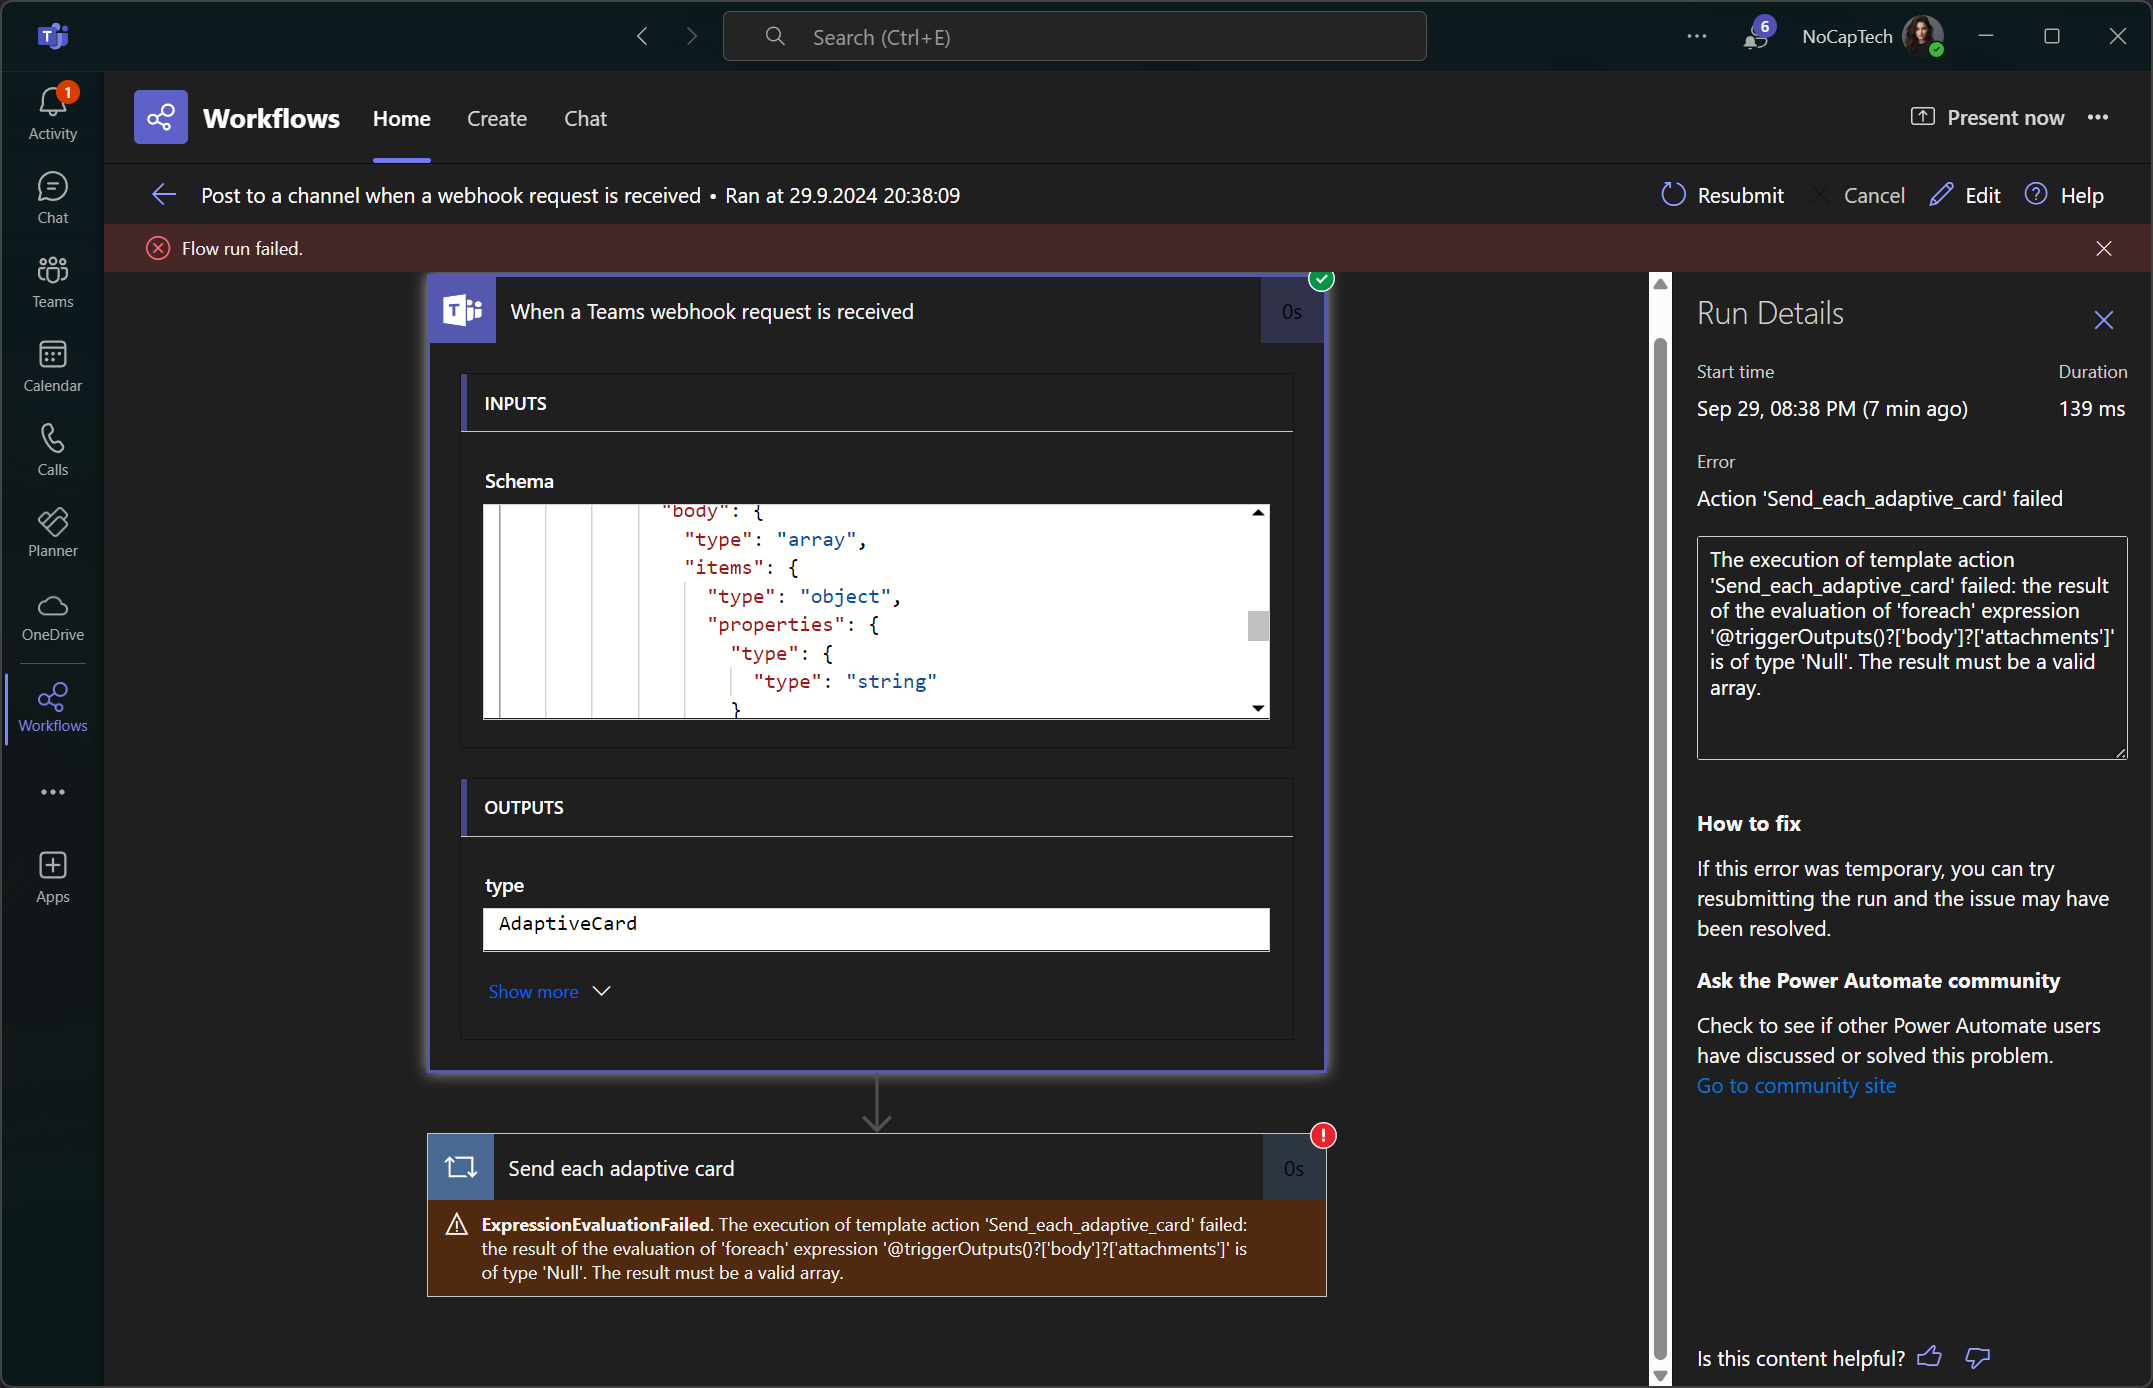
The Workflows app in Teams doesn’t show all the details but on on make.powerautomate.com I was able to see that the Adaptive Card Payload was indeed received.
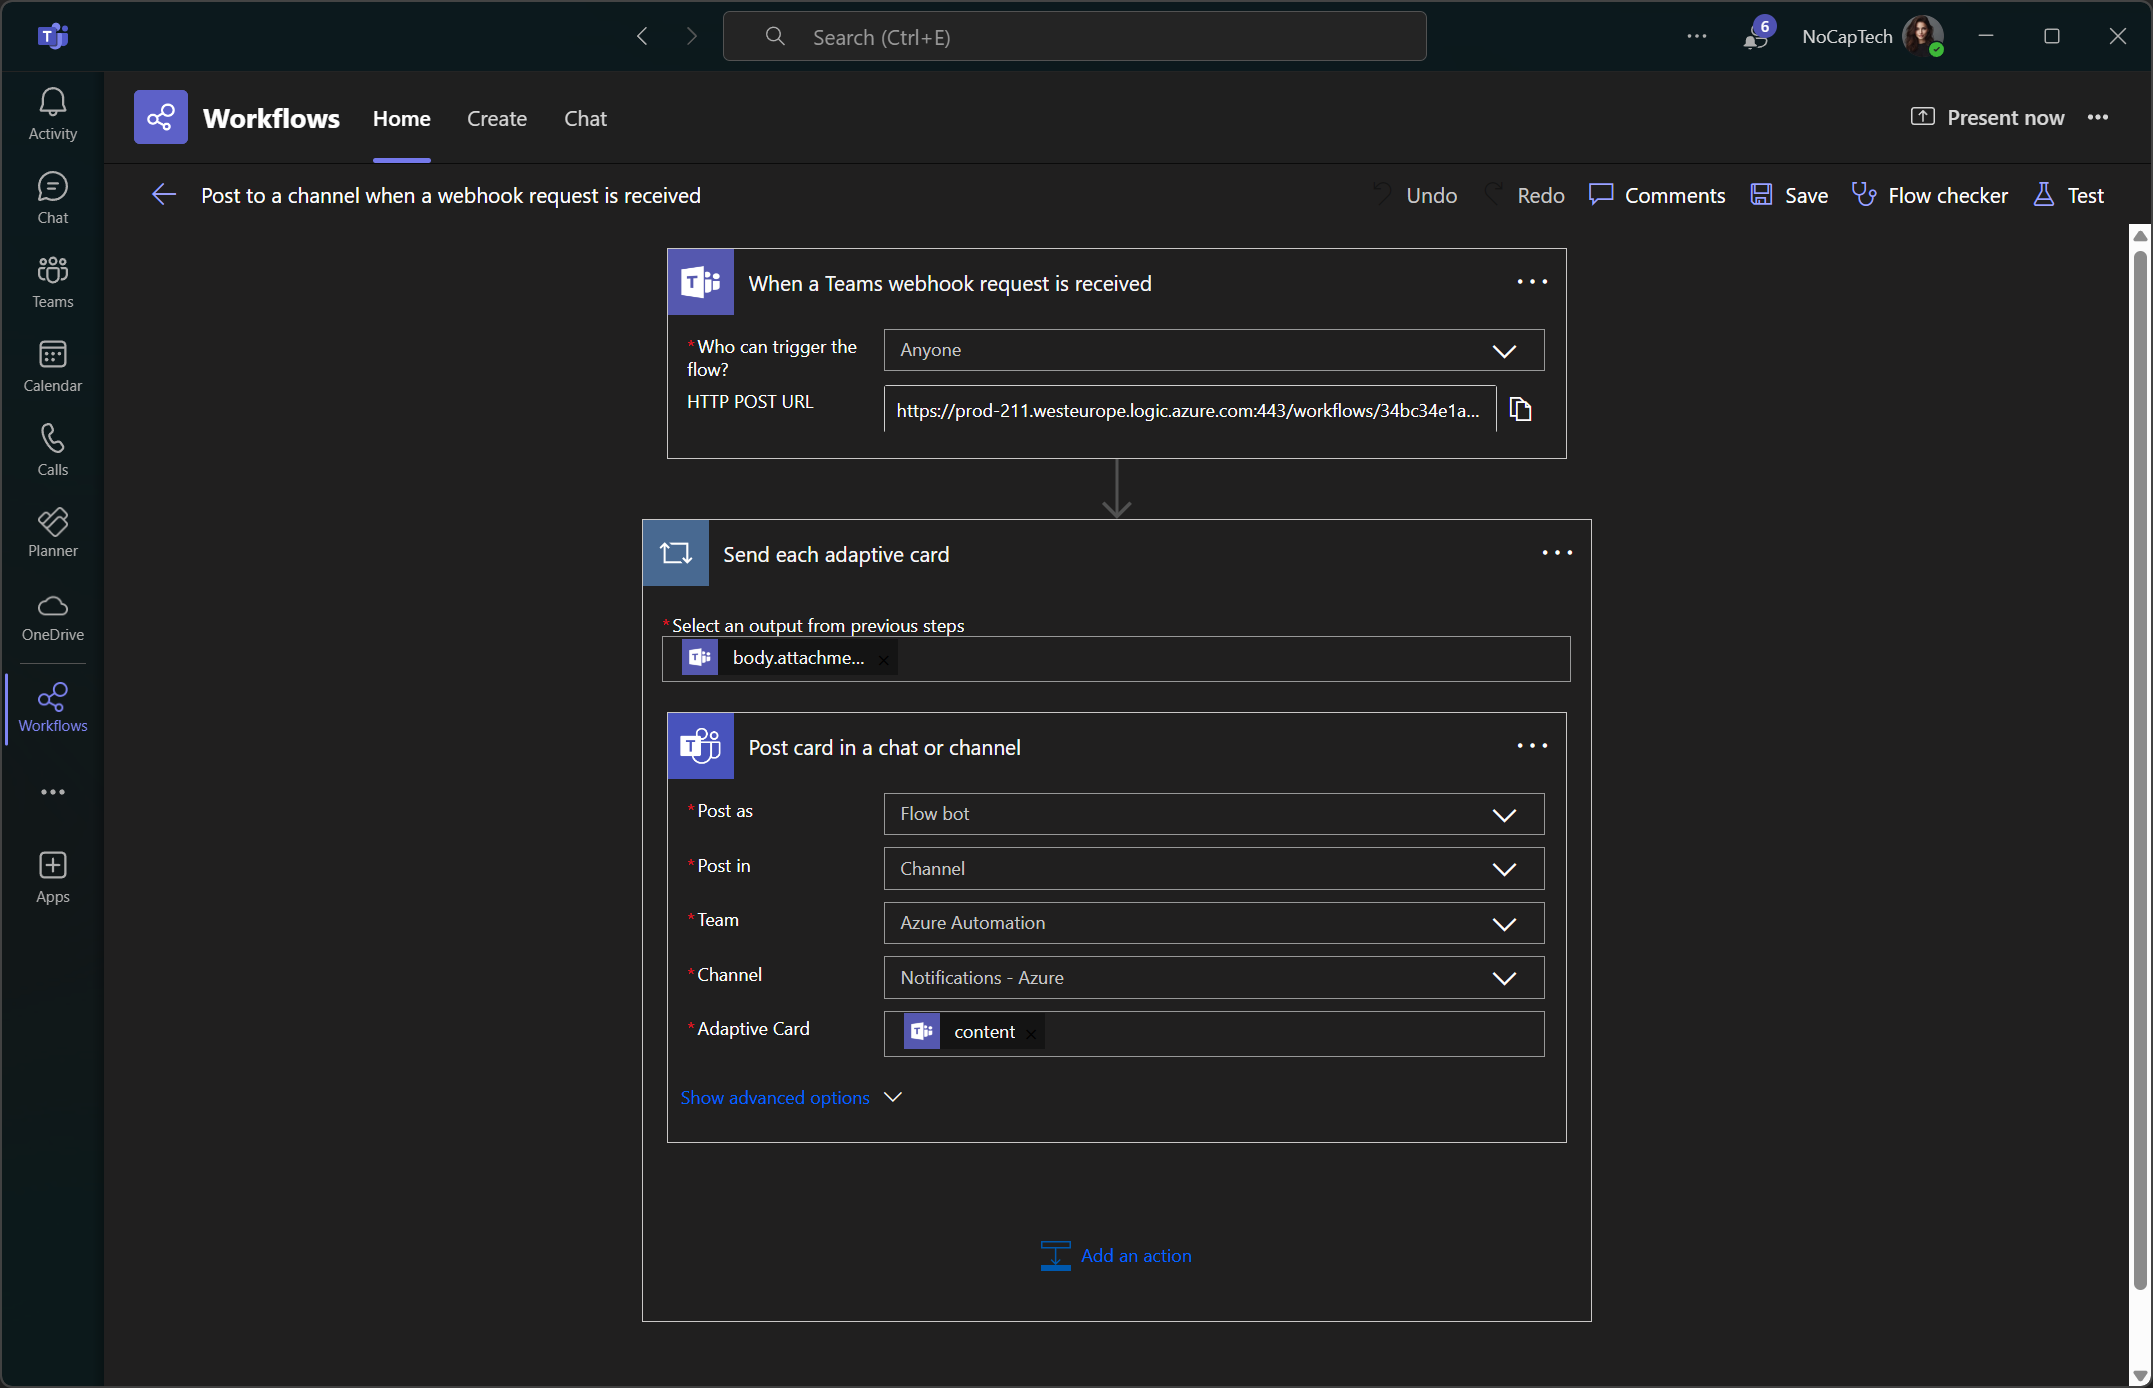
For the record, this is how the Flow that was created from the template looks like.
I then did some more research and stumbled upon another blog post from Tony Redmond. This blog post also includes a link to his script on GitHub.
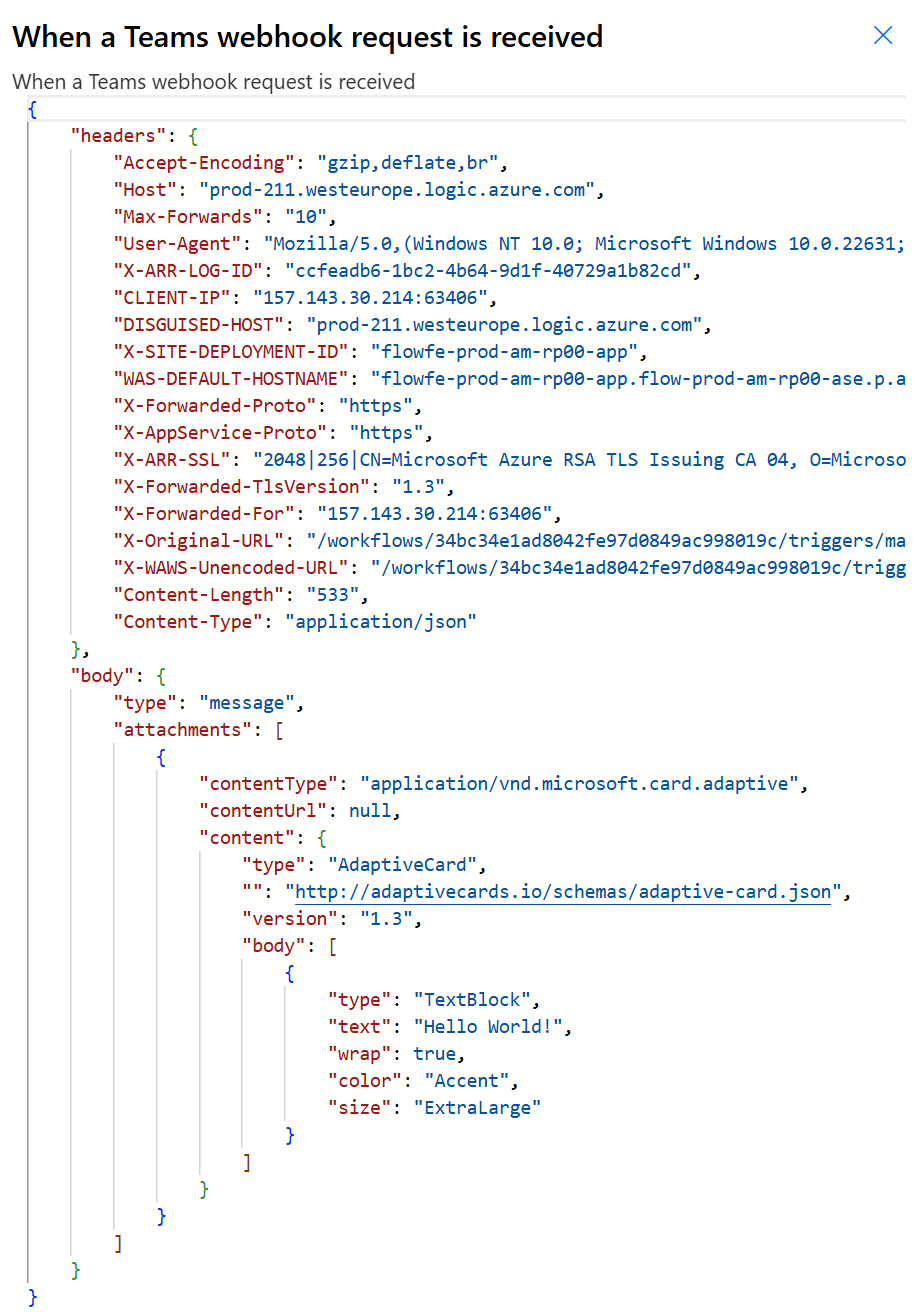
From this, I learned that the Flow is expecting the actual Adaptive Card JSON to be inside content which itself is an item in the attachments array. Also the JSON needs to include "type": "message" and attachments needs to other properties before content too.
|
|

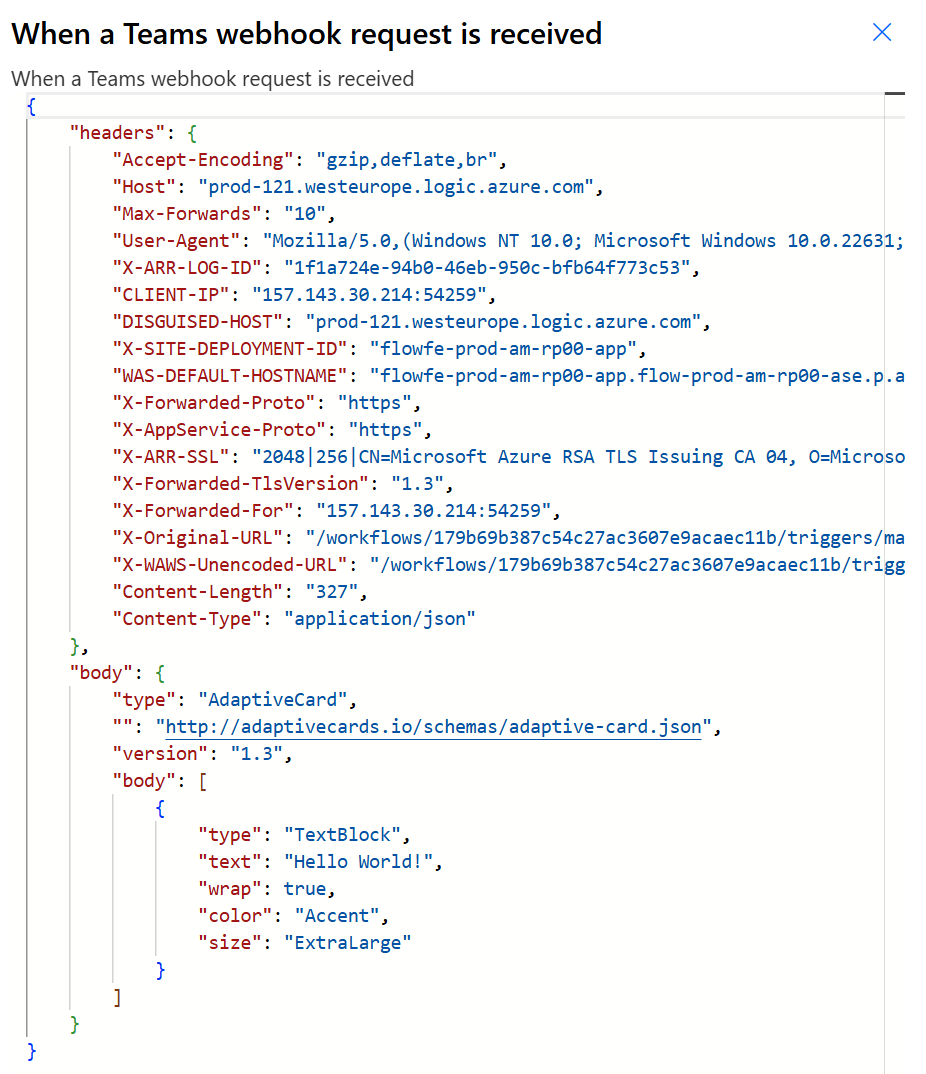
For comparison, here’s the trigger outputs.
Before I found this information, I long tinkered with the Flow itself and made it accept a payload which only includes an Adaptive Card. I basically made this just a few days after the change was announced but I only had time to write about it and figured out how to successfully use the default Flow (Thanks to Tony’s post) today.
Since I’ve been using my Flow for months now and it’s working great, I see no harm in showing you an alternative way which will accept a payload which only includes an Adaptive Card, just like incoming webhooks did.
Set Up a Flow From Scratch
My goal is to minimize the changes I have to do to my scripts and only swap the old webhook Uri for the new Power Automate trigger Uri and update the payload to use the official Adaptive Card schema. By using this method, I don’t need to bother about changing the structure of the JSON payload as well.
When the Flow is set up through Teams, it’s set up in the environment of the user which created it. This is not what I wanted anyway. I want this to run under a service account. So let’s take a look on how to build a working Flow from scratch.
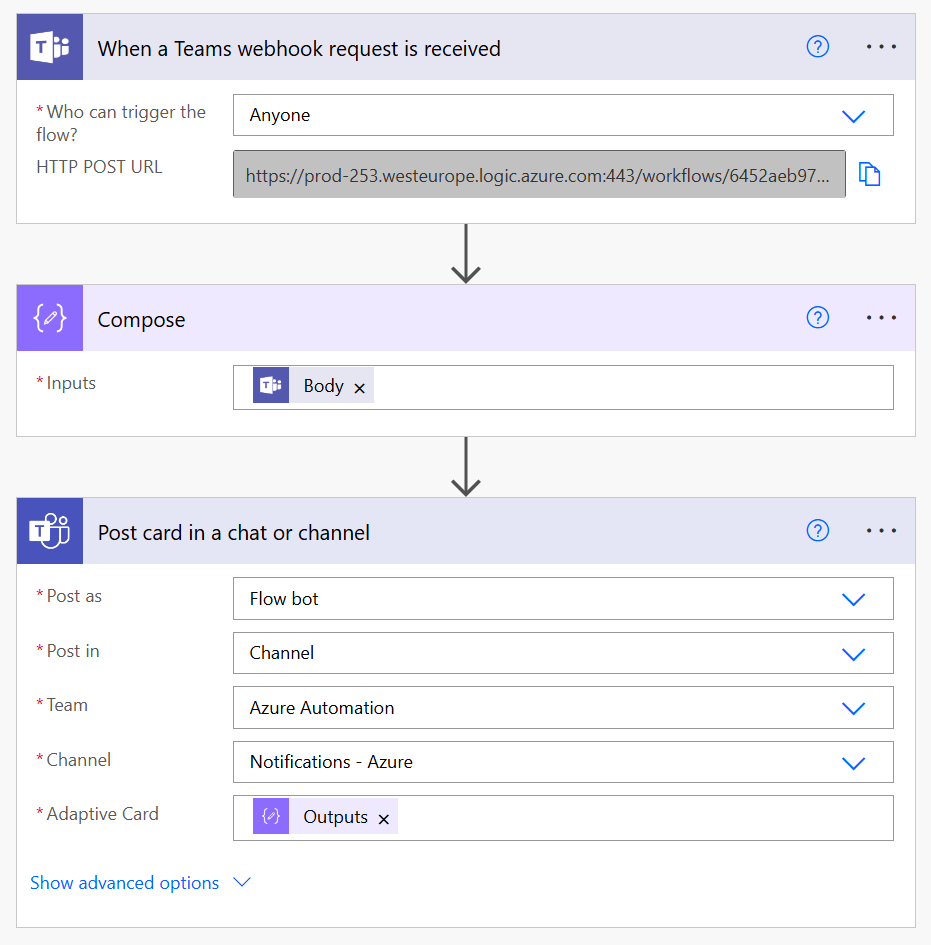
Step 1: Start by creating a new Flow and search for Microsoft Teams Webhook for the trigger. Select the only option which is called When a Teams webhook request is received. Make sure that the option Who can trigger the flow? is set to Anyone. (Why this trigger still used the old Teams logo is beyond me…)
Step 2: Then add a Compose action and add the Body as Inputs from the dynamic content selection. (Note: Select the one with a capital B.)
Step 3: Add a Post card in a chat or channel action and select your Team and Channel and then select the Outputs of the Compose action in the Adaptive Card field.
Note that my custom Flow doesn’t include an Apply to each action and thus, it’s not possible to send multiple Adaptive Cards at once. While this would be possible when you’re using the default Flow, I don’t really see why I’d need that.
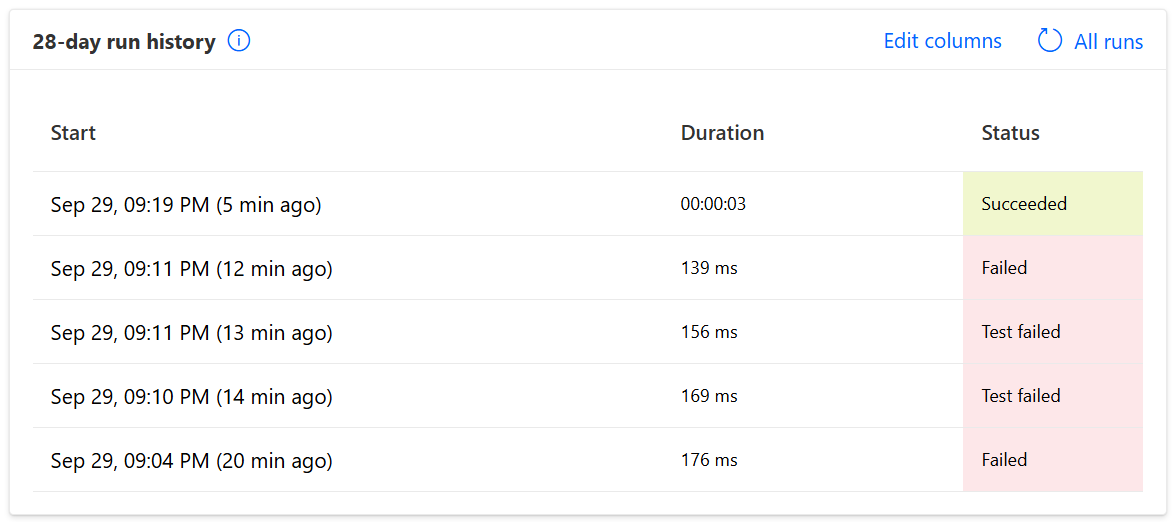
When I use the same code example from above, which only includes the Adaptive Card JSON to send the POST request, the Flow doesn’t fail anymore and the card is posted in Teams.

Advanced Scenarios
Now that we have a working Flow, let’s look at some other cool stuff we can do now…
Password Protect The Flow
Office 365 Webhooks in Teams didn’t support any kind of authentication. The only security measure we had was keeping the webhook URI a secret. With Power Automate Flows, you can select between different options for Who can trigger the flow?. Valid choices are Any user in my tenant, Specific users in my tenant or Anyone. At this point, I haven’t actually figured out how user authentication would work.
Anyway, I already mentioned that my goal for this migration is to make as little changes as possible to my scripts. Therefore I’m sticking with anyone can trigger the Flow. By the way, this is also what’s used as the default value when you add a new Flow through the Workflows app in Teams as shown in chapter 3 of this article. However, that doesn’t mean that I can’t add at least some security to this.
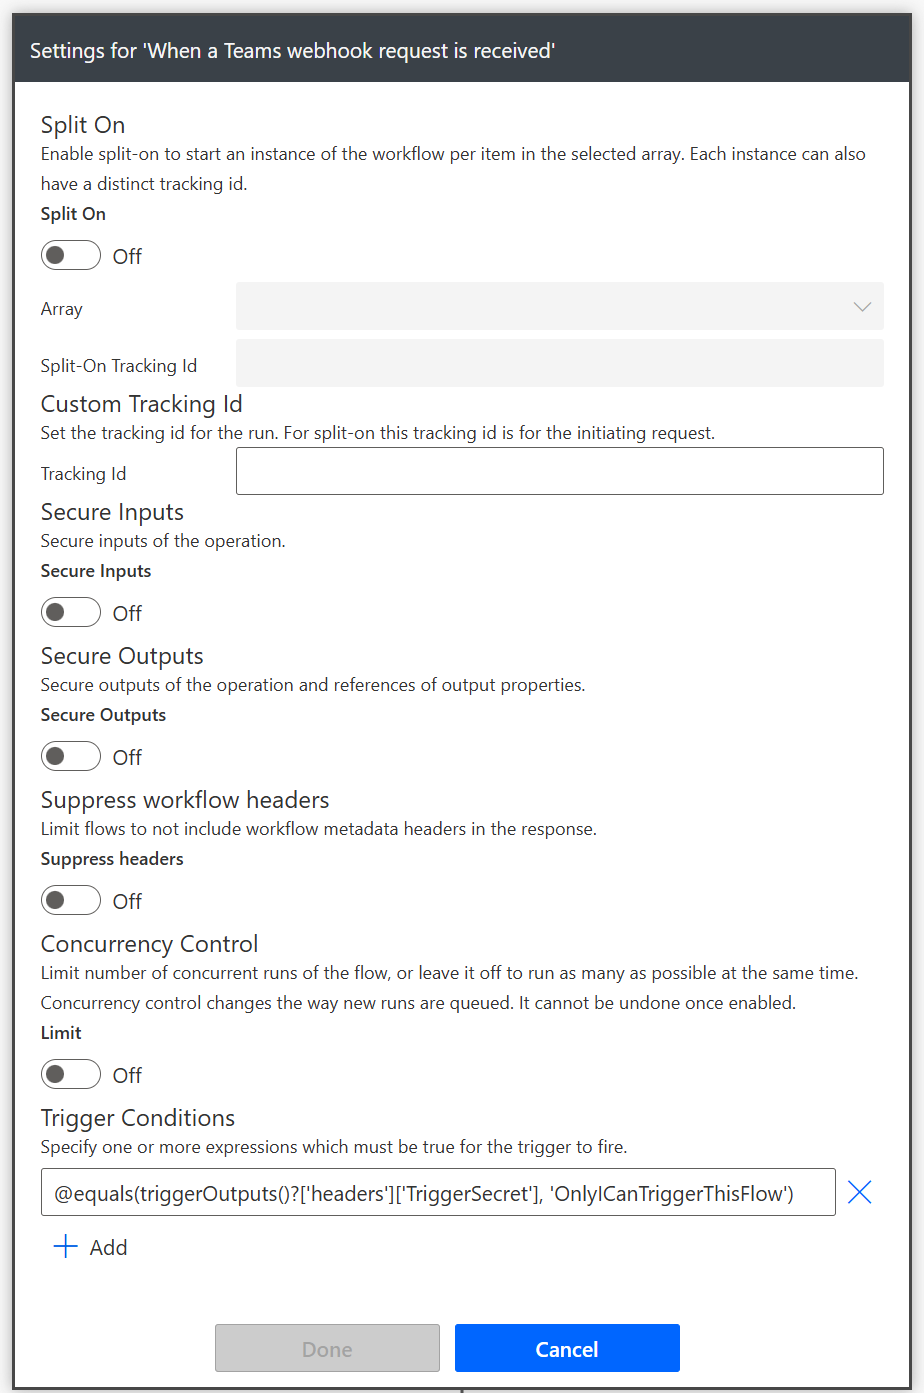
By using a trigger condition, we can limit who can trigger the Flow as well. To do this, click on the three dots on the trigger and then select Settings. Then scroll to the bottom, enable trigger conditions and past the following code:
@equals(triggerOutputs()?['headers']['TriggerSecret'], 'OnlyICanTriggerThisFlow')
Then click Done. The value I set for the trigger secret now essentially becomes the password required to trigger this Flow now. Of course, you can change it to whatever you like.

In the request to trigger the Flow, the password must be added to the headers and they must be included into the request:
|
|
If the TriggerSecret is missing from the header or if it’s value is wrong, the Flow won’t trigger at all. This means that you won’t even see a failed Flow action if the trigger URI is called with a wrong password.
Use The Same Flow For Multiple Channels
Another cool thing about the move to Power Automate is that we can use the same Flow and the same trigger URI to send notifications to different channels. You don’t necessarily need to create a Flow for each channel like it was the case with incoming webhooks.
The principle here is the same as with the trigger secret, we just add information about the target channel to the request headers:
|
|
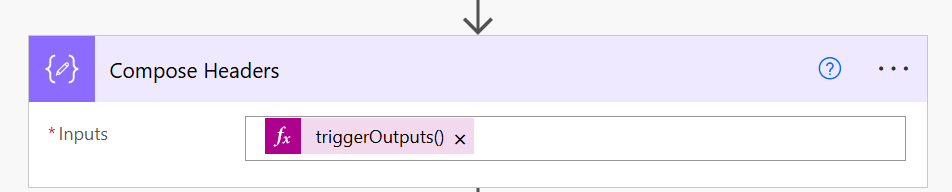
To access this data in Power Automate, we need to add another Compose action with the following expression:
triggerOutputs()?['headers']['Channel']
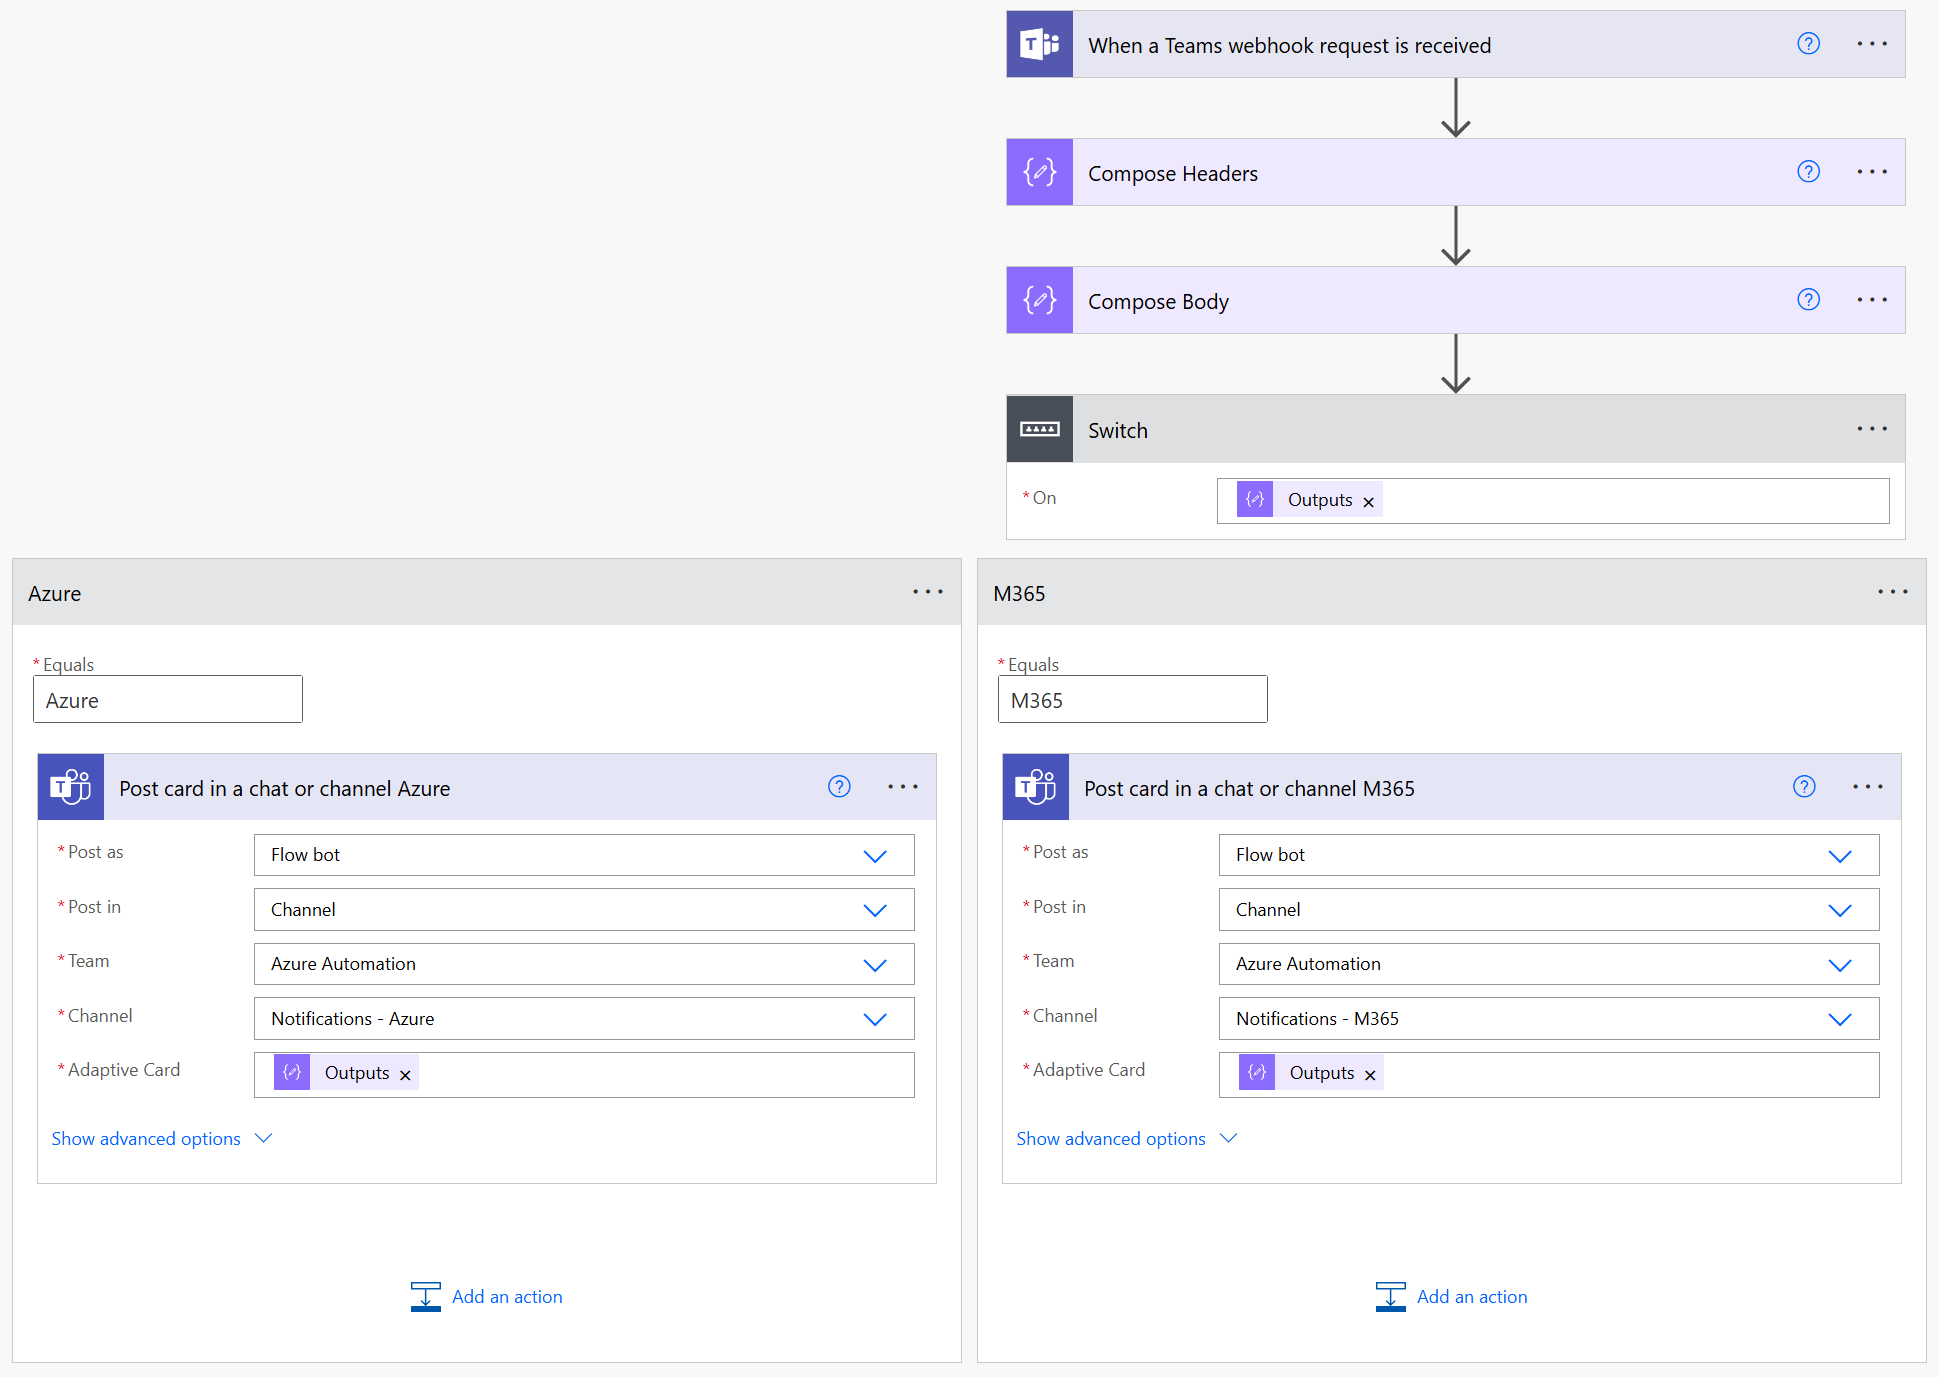
Next, we’ll just create a switch statement in which we’ll add a Post card in a chat or channel action for each case we want to cover. This could be different channels inside the same Team or even channels from other Teams the service account is a member of.
Result
Even though, I was using the same Flow, with the same trigger URI, this message was now received in the Notifications - M365 channel and not in Notifications - Azure.
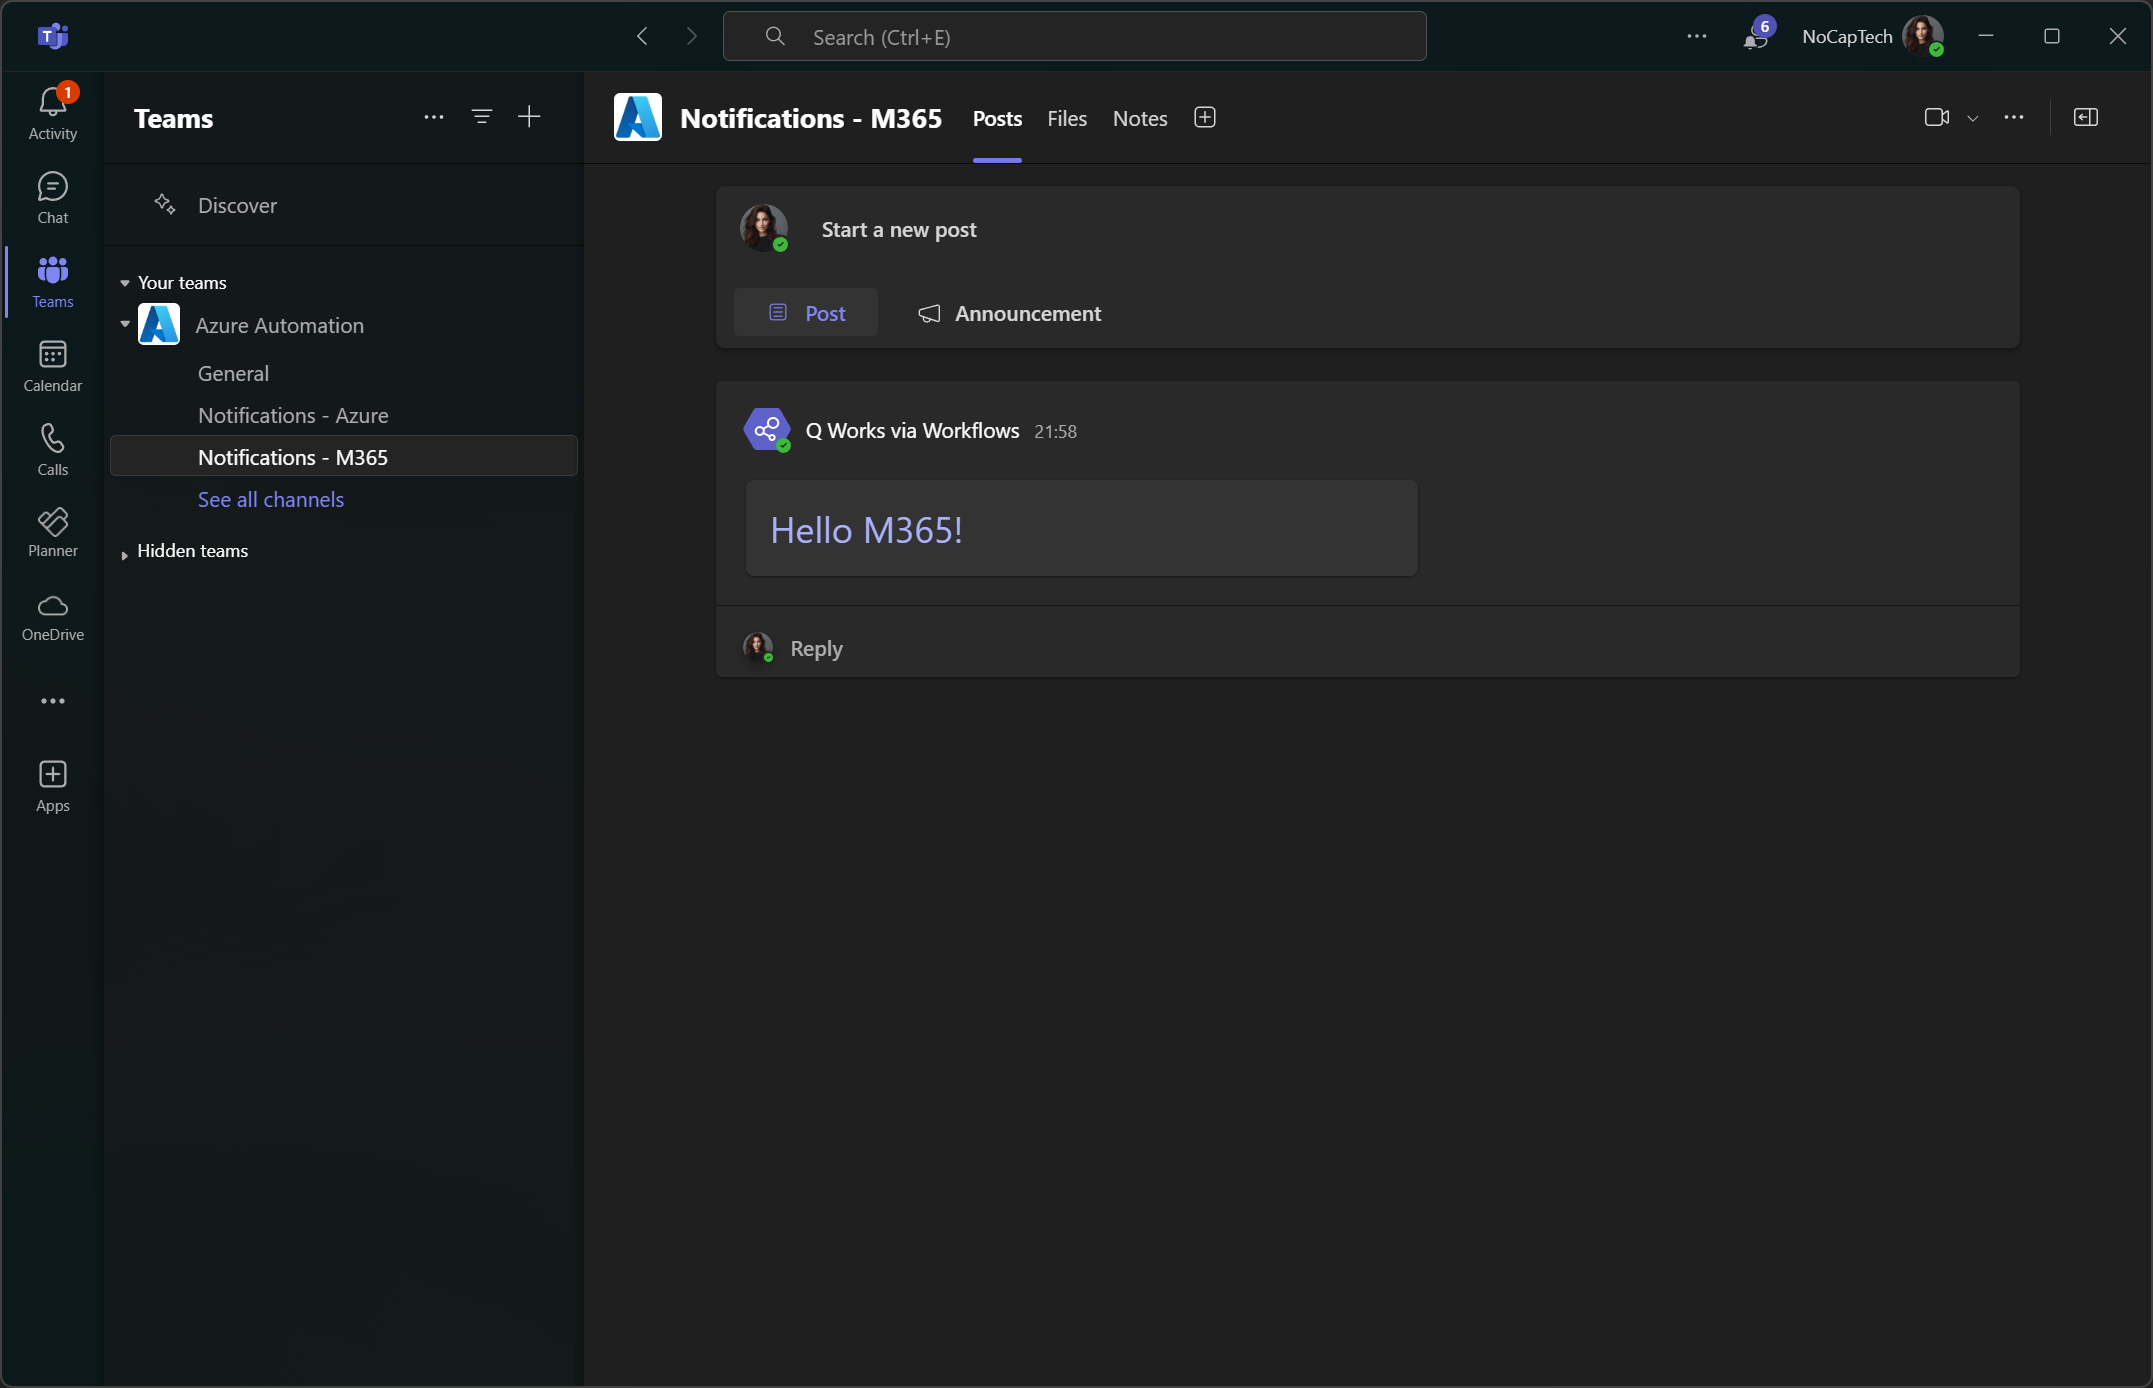
Pretty cool, right?
Summary
Over all, I really like this change. The biggest advantage to me is that we’ll finally be able to fully utilize the huge potential of Adaptive Cards and there’s no trial and error involved anymore to find out which card elements are supported and which are not.
Finding out which Teams are using Office 365 Connectors/incoming webhooks should be easy enough using Tony’s script. Approaching all the users and letting them know that their integration will break unless they take action will be the painful part of this migration. But in my opinion this also presents itself as an opportunity to get a hold on which of your end users are making use of sending data to Teams channels and offer them to set up service accounts for them.
However, this doesn’t mean that there won’t be users which will set up or keep setting up their own Workflows in Teams. With incoming webhooks, Admins had the possibility to block the use of the app through Teams app permission policies. If you want to block users from using the Workflows app, that’s still possible through the same policy but that would also mean that you’re blocking them from using the Workflows app entirely, which might be suboptimal in many scenarios.
To end this post on a positive note, I’d like to mention that I believe that this change will make a lot of sense in the future. Power Automate is a very well established platform and has seen some great improvements and adoption over the last years. This gives us a much better supported and a very promising foundation to build awesome notification and user input processes powered by Power Automate and Adaptive Cards.
Oh, and I also really like the fact that unlike the HTTP trigger, the Teams webhook trigger doesn’t require a Power Automate Premium license.