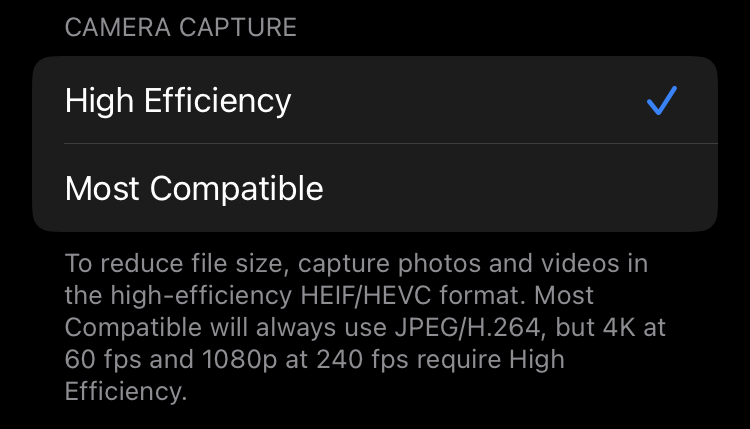
By now, most people should have heard about HEIC (or HEIF) and HEVC. HEVC — High Efficiency Video Codec is a video codec optimized for 4K content and HEIC is the file name extension for images saved with the High Efficiency Image File Format. Apple iPhones have supported these formats for quite some time now. However, they are mutually exclusive options to each other. Meaning, we can’t use HEVC for videos and JPG for photos. We can only choose if we want to use the new or the legacy formats in iOS.
I back up / sync all my photos from my iPhone to OneDrive. Often, these are not just vacation pictures but also photos which I might need to share with others. While most modern systems can display and work with HEIF photos without issues, there are still some scenarios for which a JPG is simply better suited.
If you need to share a *.HEIC image, chances are that the corporate IT department of some companies are lagging behind and might have blocked these AppDownloads. The only solution was to convert the images and send them again.
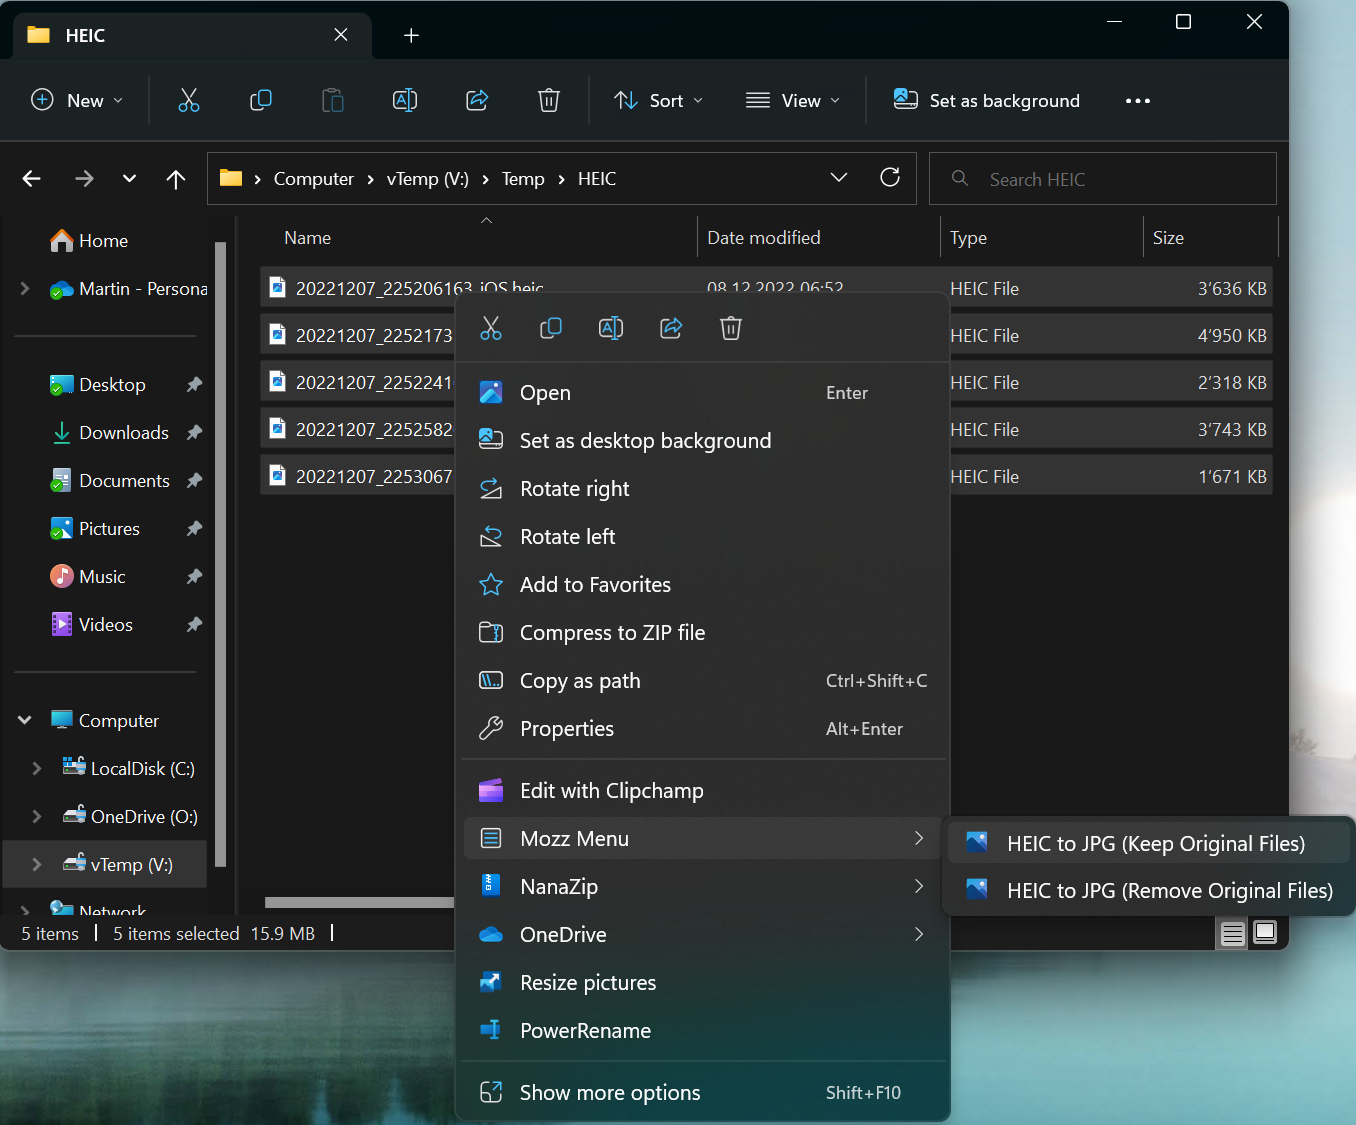
If you bing “HEIC Converter” you’ll be overwhelmed with the number of websites which claim to offer the best HEIC converter. However, I was looking for a much simpler way. All I want to do is to right click any HEIC image and have it converted to JPG.
In this post, I explained how the App Custom Context Menu can be used to create your own context menu entries in Windows 11.
Before we create a custom context menu entry for that, we need to install ImageMagick. This is a command line tool which lets you do all kinds of image conversion operations.
Once that is installed, create a new custom context menu entry like in this example.
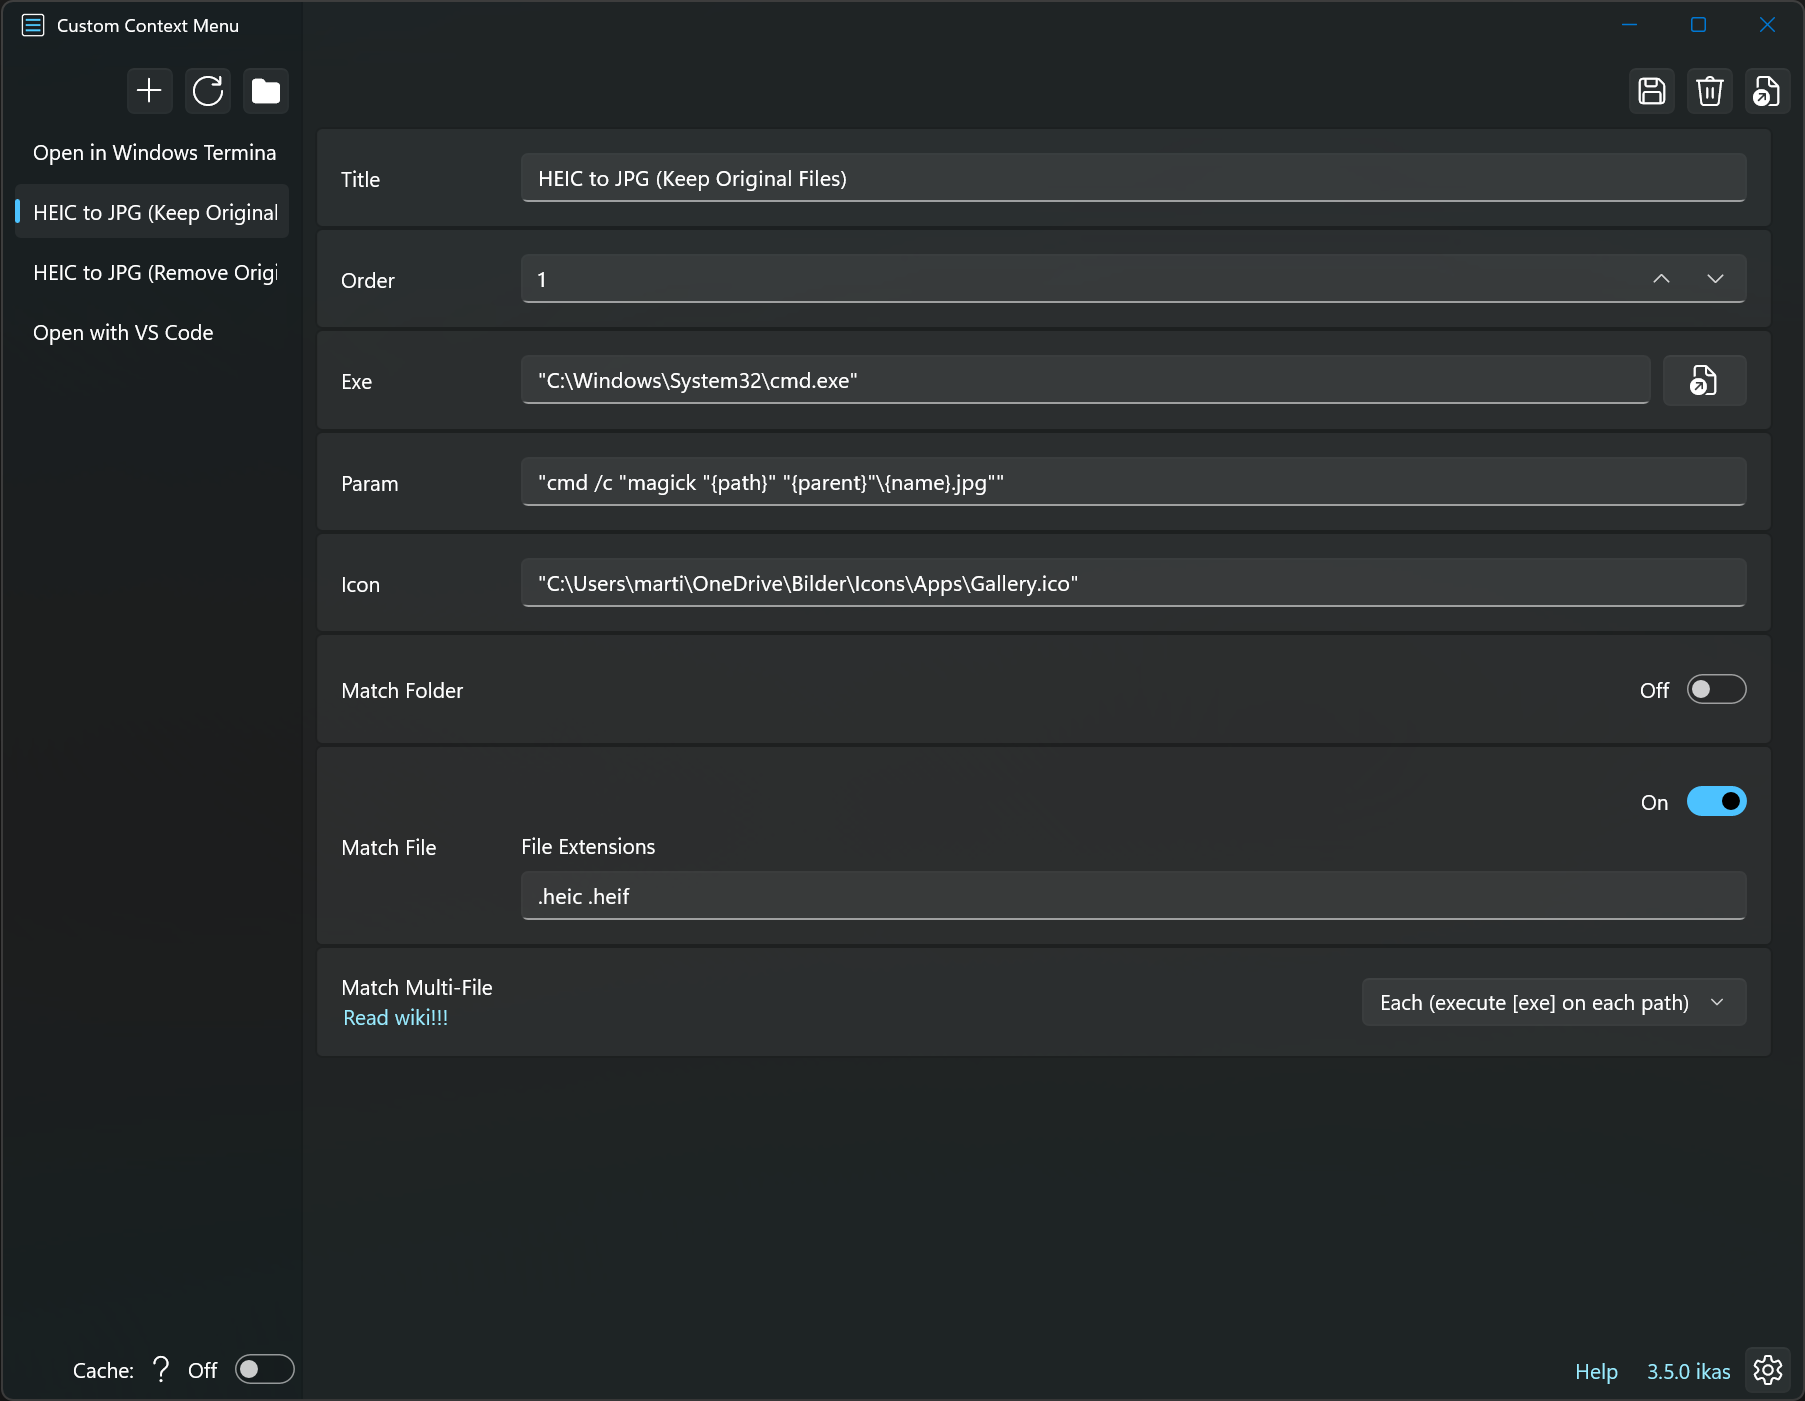
Param:
“cmd /c “magick “{path}” “{parent}”\{name}.jpg””
If you like, you can also create a second one which will remove the original HEIC files after they have been converted to JPG.
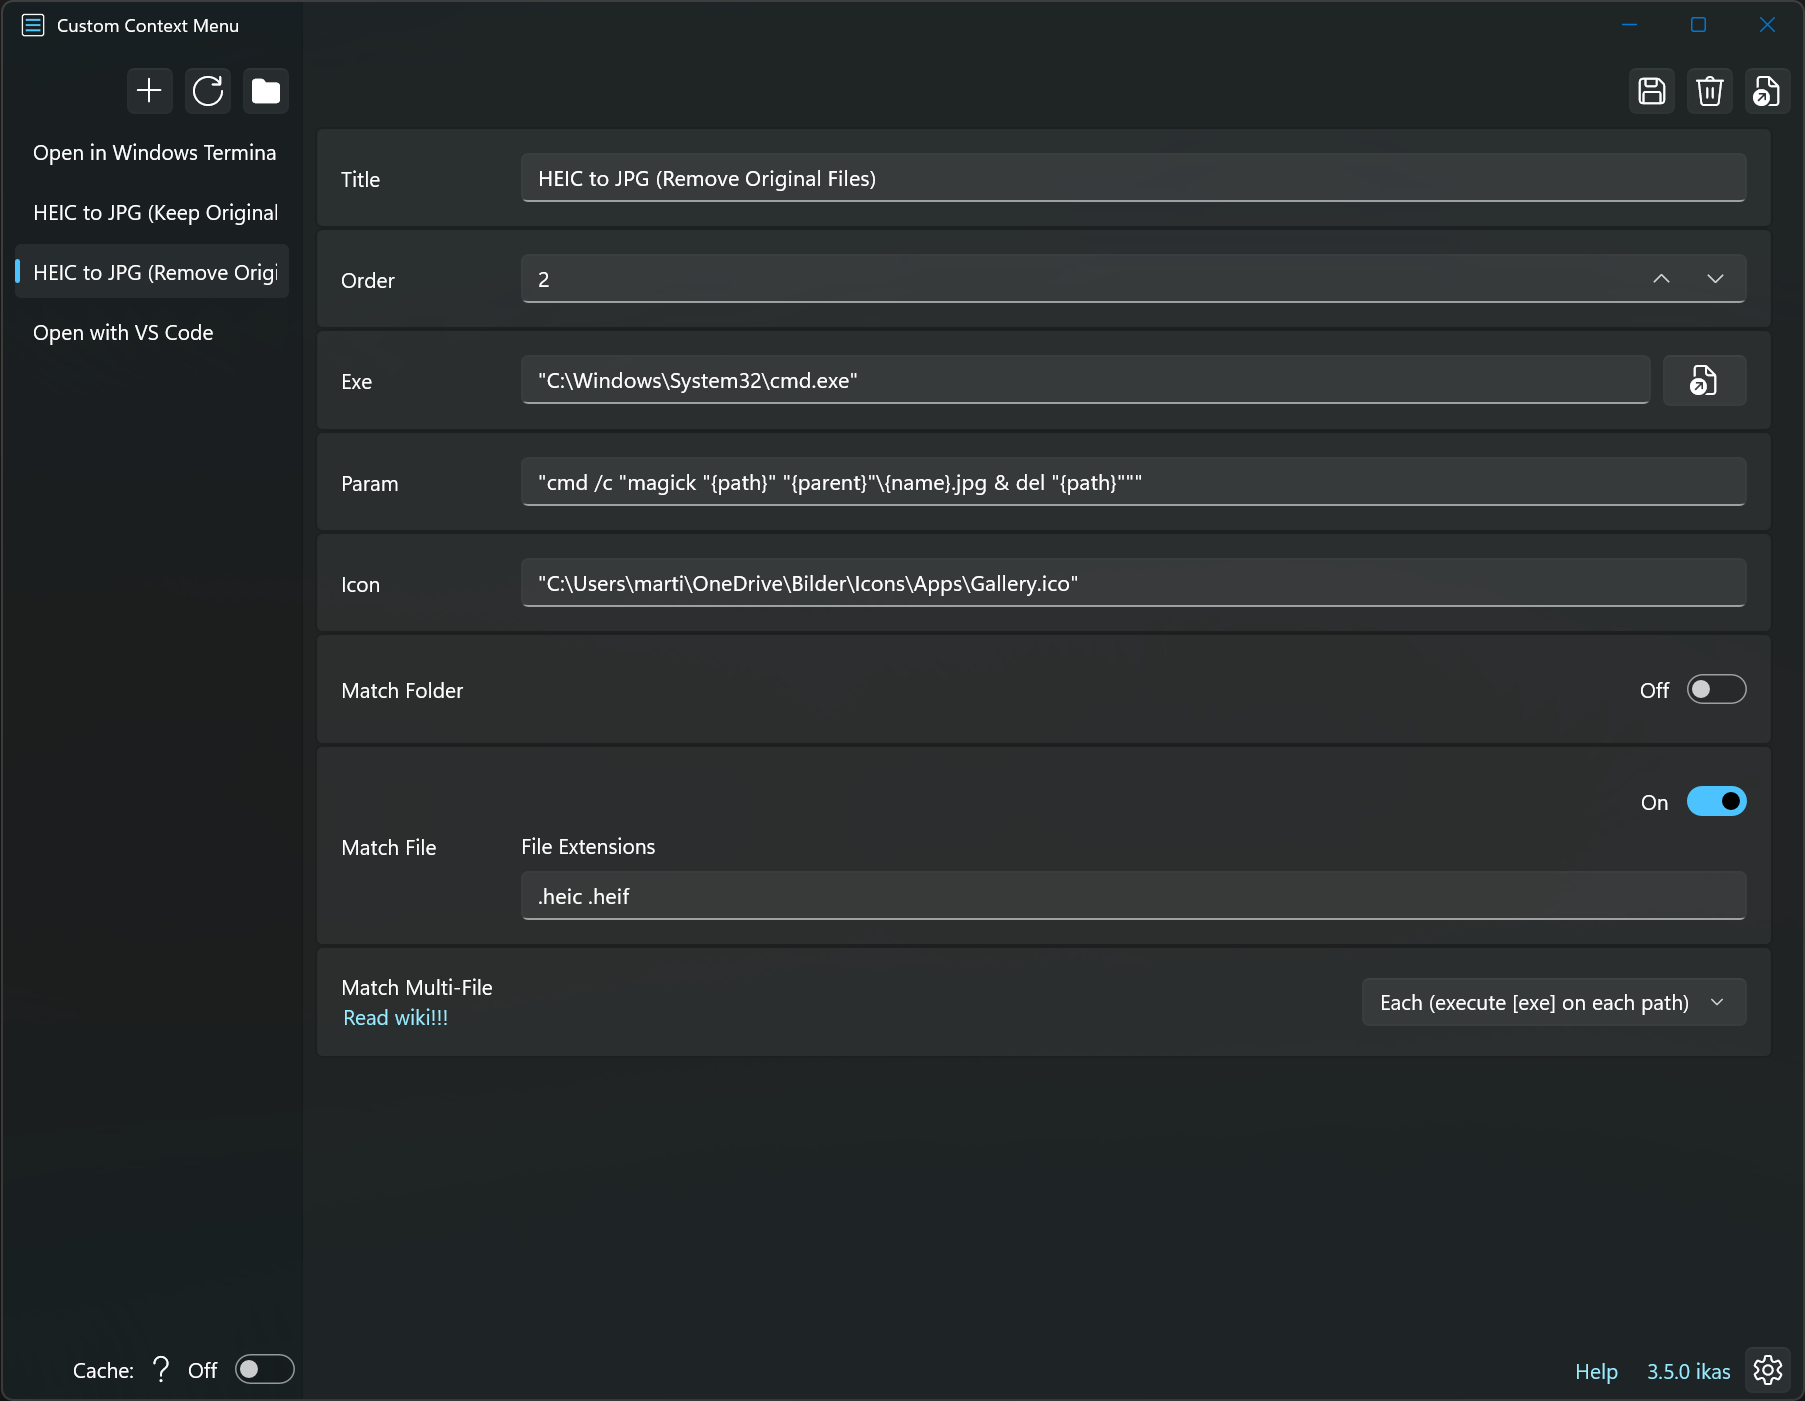
Param:
“cmd /c “magick “{path}” “{parent}”\{name}.jpg & del “{path}”””
Make sure to copy the params exactly as they are as the double quotes are important.
Or alternatively, open your custom context menu folder by clicking the folder icon in the upper left corner and create a new *.json file for both the examples.

Example: Keep Original Files
| |
Example: Remove Original Files
| |
Save and restart your PC.
The next time you need to quickly convert a HEIC file to JPG, simply right click the file (or files) and select one of the options from your custom context menu.
Here’s a short demo of both actions.
Even though it requires some steps to set up, this is by far the easiest and most convenient way to convert HEIC to JPG. There’s no need to install any annoying shareware or let alone pay for one.