The M365 Call Flow Visualizer focuses on retrieving configurations of Teams Auto Attendants and Call Queues which have already been built. And it does so by using PowerShell.
But what about the opposite? Can we use PowerShell to create a new call flow from scratch in just a few minutes as well?
In this article, I’m going to show you how you can create a basic, yet fully functional call flow with PowerShell. The only thing you’ll need to do yourself in the end is to add users to the Team.
What is Needed to Build a Call Flow?
Before we get into the script, let’s look at what steps we need to take to build a call flow.
- Create resource accounts
- License resource accounts (and set Usage Location)
- Assign a phone number (and voice routing policy if it’s a Direct Routing number) to the resource accounts
- Create a Microsoft 365 Group with a Team (For voice enabled channel and shared voicemail)
- Configure M365 Group for Follow in Inbox and Show in Outlook
- Create and configure the Call Queue
- Assign the Resource Account to the Call Queue
- Create the Auto Attendant and configure forwarding to the queue during business hours
- Assign the Resource Account to the Auto Attendant
These are quite a few steps to conclude but the hardest part about this is remembering the correct order of all the steps so you can do it as fast as possible. For example, if you forget to set the Usage Location to the same country as the phone number you want to assign, you will have to go back and wait for the change to be propagated.
Another example is that you should always start at the back of your call flow. You can’t fully configure a Call Queue if you don’t have the Team or the M365 Group for shared voicemail yet. And you can’t finish configuring your Auto Attendant if you haven’t built the queue before.
If you want to learn more about resource accounts or shared voicemail, I suggest the following articles of mine.
Everything You Ever Wanted to Know About Teams Resource Accounts | by martin heusser | Medium
Some Notes About This Script
The script follows my personal best practices when building call flows and considers all the aforementioned examples of steppingstones for maximum efficiency.
This is not intended to build super complex call flows. Instead, it is just an example of how one can write a deployment script, which does everything from A-Z in an efficient order. It can, however, build multiple call flows in a row.
While it would be possible to make it even more efficient by, for example, creating and licensing all the resource accounts from the CSV entries first, then create all the Call Queues and at last all the Auto Attendants, I decided not to pursue this road for the sake of simplicity. Instead, the script will create each call flow after the other, which probably takes slightly longer to complete.
There are some steps where we need to wait for the previous steps to complete. For example, when a Resource Account is created, it usually takes a few seconds for the corresponding User Object in Teams to be created as well. Rest assured though; the script will handle all of that on its own. So don’t get spooked if you see some red error messages in PowerShell. These are just standard error messages, where the script tries to query a user which couldn’t be found yet.
Because we’re also querying a tenant’s domain names and modify licenses this script requires some additional scopes for Microsoft Graph. So be sure to have a Global Admin account ready to consent to these scopes.
Connect-MgGraph -Scopes “User.ReadWrite.All”, `
“Group.ReadWrite.All”, `
“Domain.ReadWrite.All”, `
“Organization.ReadWrite.All”, `
“Directory.ReadWrite.All”
To configure the Microsoft 365 Group the script requires the ExchangeOnlineManagement PowerShell Module in addition to MicrosoftTeams and Microsoft.Graph**.** If you don’t have it already, you can use the following command to install it.
Install-Module ExchangeOnlineManagement
How Does it Work?
In my GitHub Repository, you will find a sample file called “VoiceAppList.csv”. All you need to do is to fill in your information there. And run the script.
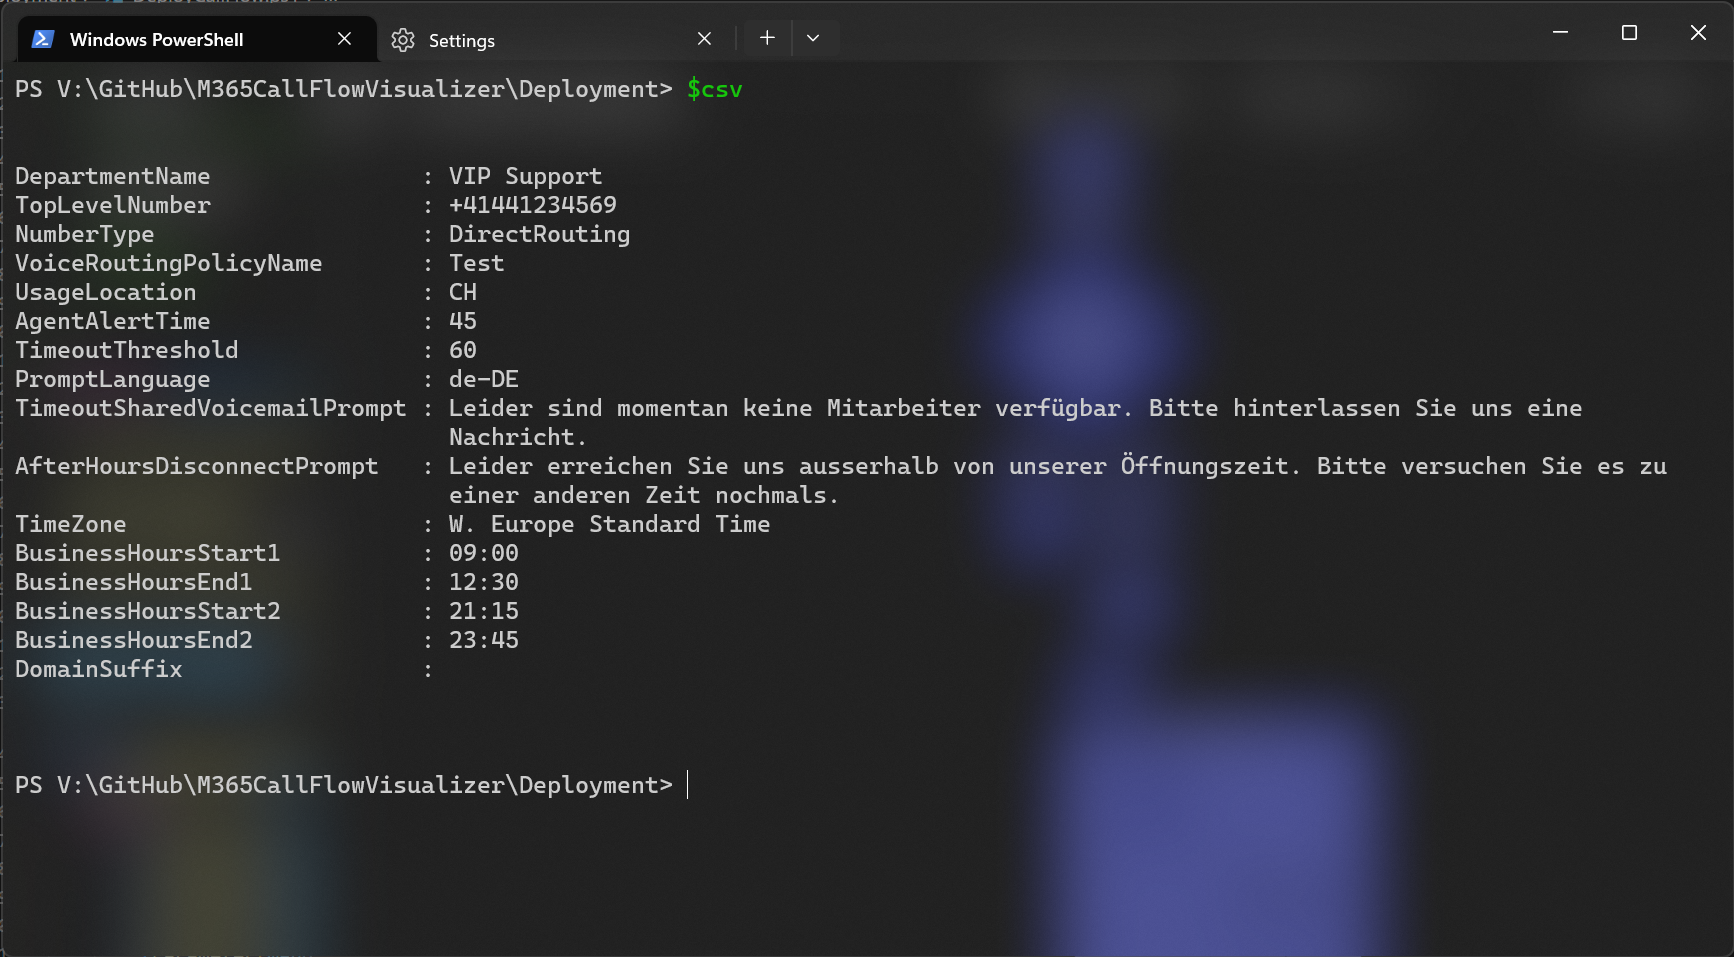
These are the details which can be passed from the CSV file to the script.
- DepartmentName
This name of the queue or Team. It will be added to all elements in the call flow: Team, Channel, Resource Accounts, Auto Attendant, Call Queue. For example, if you set “Marketing” as your DepartmentName, your queue will be called “Marketing CQ”. - TopLevelNumber
The number which is called by customers and assigned to the Auto Attendant. It must be an E.164 number. See this for more information. - NumberType
This is required for the phone number assignment. Valid values: CallingPlan, OperatorConnect, DirectRouting,$null. Leave the field empty in the CSV if you don’t want to assign a number just yet. - VoiceRoutingPolicyName
This is only required if you want to assign a Direct Routing number. It’s only needed if the AA should be capable of external transfers later on. It’s only added as a precaution. You can read how to get the name of your voice routing policies here. - UsageLocation
This must be the same as the Phone Number if your’re using Calling Plans. E.g. “CH” or “GB”. - AgentAlertTime
Set-CsCallQueue (SkypeForBusiness) | Microsoft Learn - TimeoutThreshold
Set-CsCallQueue (SkypeForBusiness) | Microsoft Learn - PromptLanguage
This is the language of the text to speech prompt. See this MS Learn article for more information. You will be prompted byOut-GridViewif you specify an invalid language Id. - TimeoutSharedVoicemailPrompt
Set-CsCallQueue (SkypeForBusiness) | Microsoft Learn - AfterHoursDisconnectPrompt
New-CsAutoAttendantPrompt (SkypeForBusiness) | Microsoft Learn - TimeZone
The time zone of the Auto Attendant. See this MS Learn article for more information. You will be prompted byOut-GridViewif you specify an invalid time zone Id. - BusinessHoursStart1
If none of the business hours fields are populated, the script won’t create an after hours call flow for the Auto Attendant. If only BusinessHoursStart1 and BusinessHoursEnd1 are populated, the AA will only have one time slot. If BusinessHoursStart2 and BusinessHoursEnd2 are populated as well, the AA will have two time slots, e.g. lunch break.
E.g.08:00 - BusinessHoursEnd1
E.g.12:15 - BusinessHoursStart2
E.g.13:30 - BusinessHoursEnd2
E.g.17:45 - DomainSuffix
By default, the script will use your tenant’s default domain for resource account UPNs or MailNicknames. If you want to change that, you can specify and domain that’s available in your tenant as-DomainSuffix. E.g. “example.onmicrosoft.com”.
Running the script will deploy a simple call flow with an Auto Attendant, business hours and one Call Queue which uses a Voice Enabled Channel for each line in the CSV file. Outside of business hours, the Auto Attendants will play a message and disconnect the call.
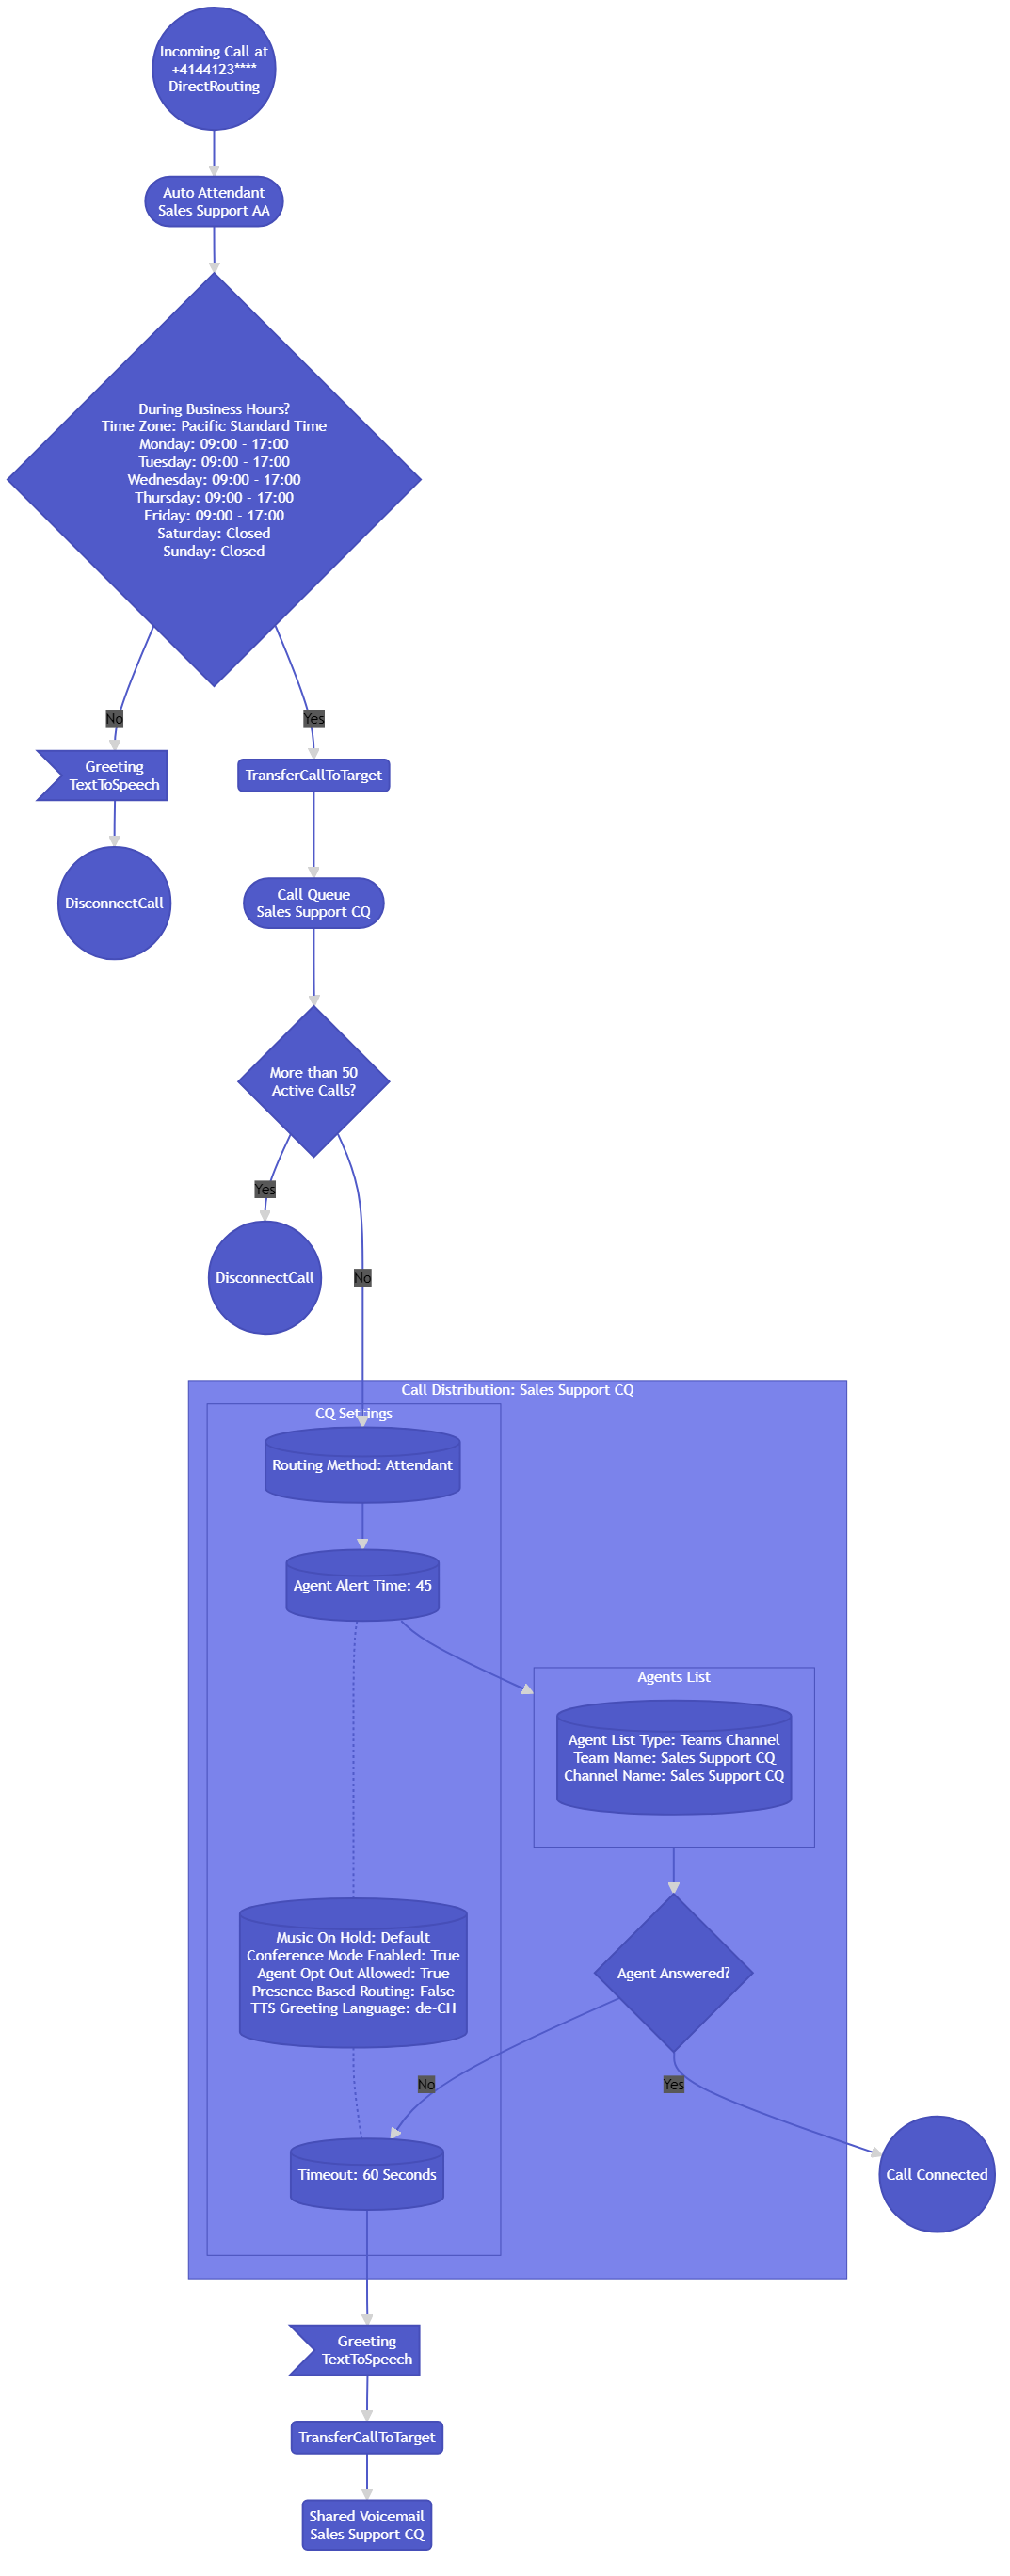
The Call Queues will time out after the amount of seconds which is defined in -TimeoutThreshold and then forward the call to shared voicemail once the greeting has been played back.
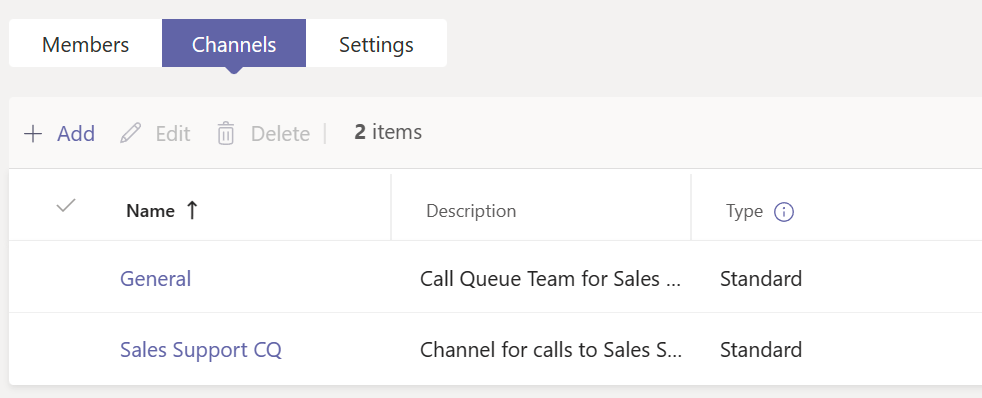
The script automatically creates a new Team and a Channel for the Queue as well. I prefer to use dedicated over existing Teams and Channels because not all team members of an existing team are potentially going to answer calls.
When a new Team is created and the Microsoft 365 Group has not existed before, the group is by default hidden from Outlook Clients. Because we want the agents of the queue to have access to the group mailbox in Outlook, the script will automatically enable the Follow in Inbox feature and unhide the group from Outlook Clients.
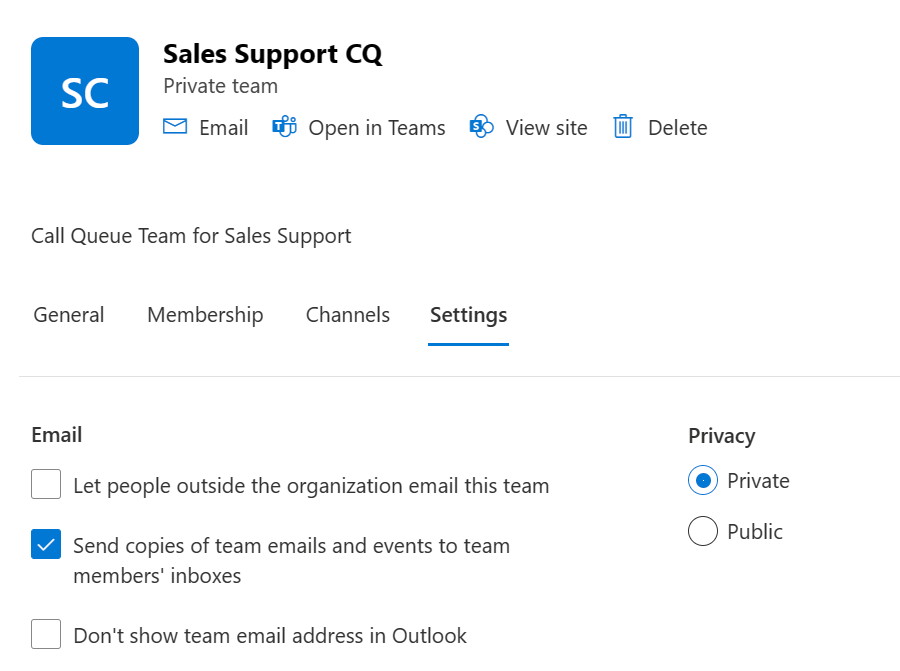
Shared voicemail is another reason I like to use dedicated groups. With a new group, we can make sure that the only kind of emails received in this group’s inbox are voicemails, and we can enable Follow in Inbox without any concern of potentially spamming dozens of other team members by sending all group emails to their personal inboxes.
The Script
Finishing Up
While the call flow is technically already able to receive calls after it has been deployed by the script, you’ll still need to add members to the queue. Otherwise, the calls will never be signaled to any agent.
Remember that only members of the Team who are also Enterprise Voice Enabled will be added to the queue’s agent list. If you don’t want to wait a few hours for the agent list to update after you have added the members, you might want to check out this article. It explains how to force sync an agent list of Call Queues.
As mentioned before, this is a mere example of a very simple call flow. However, if most of your call flows only consist of an Auto Attendant forwarding calls to a Call Queue (Like it’s common in many small businesses), PowerShell can still be immensely helpful to lay the ground works.
Naturally, you can still go into TAC and adjust everything to your needs after the script has built your scaffolding. You just won’t have to bother adding resources accounts and associating them with your voice apps etc.
Creating Auto Attendants with PowerShell is quite a complex process compared to Call Queues or other Microsoft resources. If you want to adjust my script to your specific needs, a good place to start is the official documentation from Microsoft. As far as I can tell, they recently added updated example scripts which might be helpful.
New-CsAutoAttendant (SkypeForBusiness) | Microsoft Learn
Set-CsAutoAttendant (SkypeForBusiness) | Microsoft Learn
Now go ask ChatGPT to write you a script that does the same.